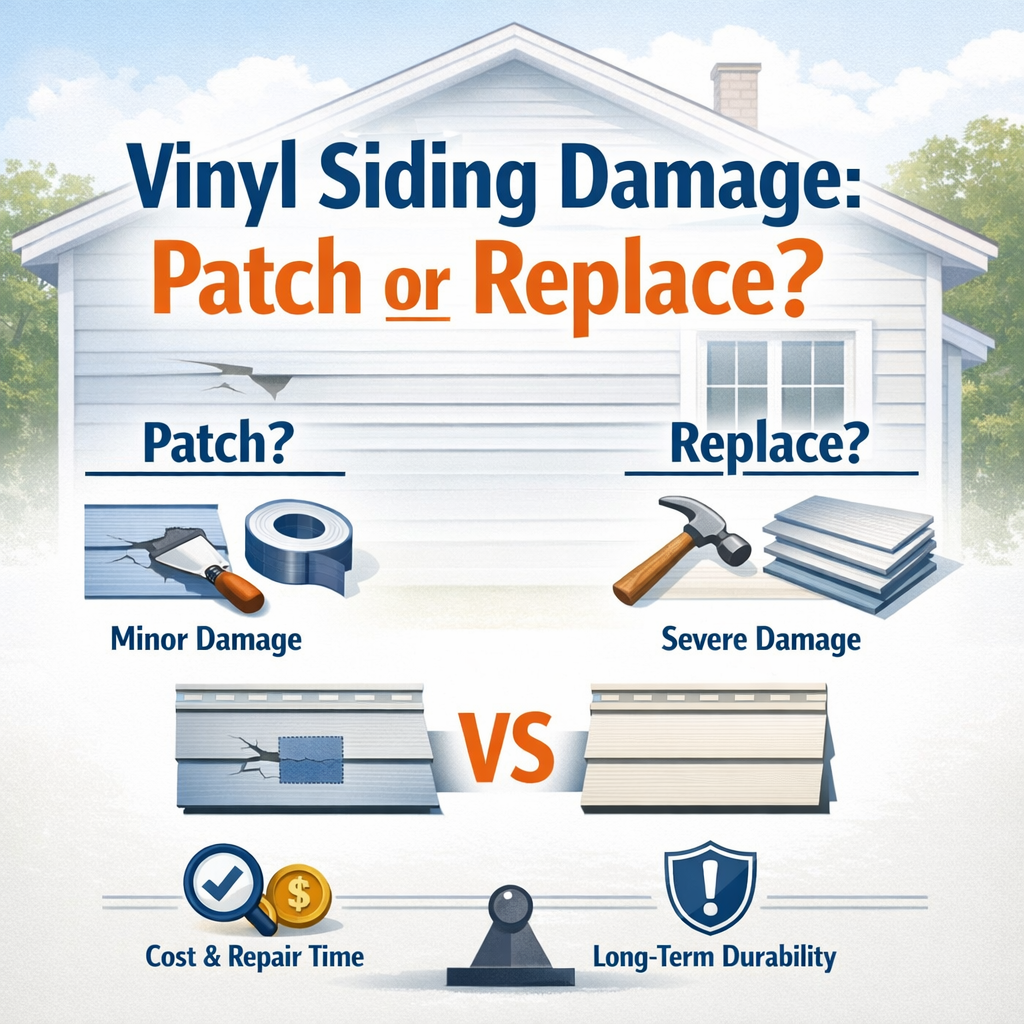
A weed eater kicks up a rock. A stray baseball finds the one panel you’re standing in front of. A woodpecker decides your siding is interesting. However it happened, you’re now looking at a hole or crack in your vinyl siding and wondering whether this is a Saturday afternoon fix or a call-the-contractor situation.
The honest answer is: it depends — and the difference matters more than most homeowners realize.
Most of what you’ll find online about vinyl siding patch repair covers the same narrow ground: buy an adhesive patch kit, clean the surface, cut it to size, peel and stick. That advice isn’t wrong, exactly. But it skips the diagnostic work that separates a repair that lasts from one that quietly conceals a worsening problem behind your wall. It also ignores the physics of vinyl itself — a material that moves considerably with temperature changes and will test every patch you put on it.
We’re going to cover all of that here. The goal isn’t to talk you out of a DIY repair or scare you with worst-case scenarios. It’s to give you the same decision-making framework a seasoned exterior contractor would use standing in your driveway — so you can make an honest call about what your siding actually needs.
The single biggest mistake homeowners make is treating all siding damage as equivalent. A pinhole from a rock chip, a stress crack running along a panel, and a fist-sized hole from impact each tell a different story — and they don’t all have the same solution.
Small punctures (under 1 inch diameter): These are typically the best candidates for adhesive patch repair. The surrounding panel is structurally intact, the damage zone is contained, and a properly applied patch can perform well for years with correct preparation.
Stress cracks and hairline fractures: This is where it gets important to slow down. Cracks that run along the length of a panel — rather than clean punctures — often indicate that the panel itself has become brittle from UV degradation. When vinyl ages and loses its plasticizer content, it becomes rigid and prone to fracturing under what used to be minor stress. A patch over a brittle panel is temporary work on borrowed time, because the underlying material will continue to crack and the patch perimeter will eventually fail with it.
Holes larger than 1 inch, or damage near window and door j-channels: Before any repair material touches these areas, you need to check what’s happening behind the panel. This is non-negotiable.
Here’s the diagnostic step you won’t see in any product listing or tutorial video: before applying a patch, press firmly with your palm on the siding surface 6 to 12 inches in every direction around the damage.
What you’re feeling for:
– Solid resistance — the sheathing behind is dry and intact, and you’re likely clear to patch
– Any softness or “give” — this indicates the OSB or wood sheathing behind the panel has absorbed moisture and begun to degrade
– A spongy or springy feel — a more advanced warning sign that moisture has been present for some time
Also look carefully at the siding surface around the damage, not just at it. Dark staining, discoloration, or paint bubbling in the vicinity of a hole are signs that water has already been working its way in — possibly for longer than the visible damage suggests.
A patch applied over a moisture-compromised wall cavity isn’t a repair. It seals moisture in, keeps it hidden, and gives a worsening problem the cover it needs to turn into a sheathing replacement or mold remediation. If your press test reveals any softness, or if you see staining patterns that don’t match the fresh damage, that panel needs to come off for a proper inspection before anything else happens.
Assuming your damage assessment comes back clean and a patch is genuinely the right call, the next thing most homeowners skip is understanding why patches fail — and how to prevent it.
Vinyl siding has one of the highest thermal expansion rates of any common building exterior material. As a general rule, a 10-foot section of vinyl siding can expand or contract by approximately half an inch across a 20-degree Fahrenheit temperature swing. Over the full temperature range of a North Carolina Triad summer to winter, a single panel may move more than an inch.
This matters for patch adhesion in a specific way. When you press an adhesive patch onto fully expanded siding on a hot August afternoon, the panel is near its maximum length. When winter arrives and that panel contracts, it pulls inward from every edge — including every edge of your patch. The adhesive bond experiences what engineers call shear stress: a lateral pulling force that works to separate the patch from the panel surface, starting at the perimeter and working inward.
This is exactly why patches applied in summer often start peeling at the edges by the following spring — and why some homeowners get three years out of a patch while others get three months. It’s not random. It’s physics.
What this means practically:
– Apply patches during mild temperatures, ideally in the 50–75°F range — late spring and early fall are your best windows in the Triad
– Slightly oversize the patch beyond the damage perimeter to give the adhesive bond more surface area to resist that lateral pull
– Patches applied over cracks (rather than clean holes) have a structurally higher failure rate, because the panel beneath is still flexing and the crack edges continue to move against each other
Cleaning the repair surface before patching isn’t just about removing visible dirt. It’s about understanding what happens to vinyl over time.
Older vinyl siding — particularly panels installed before roughly 2000 — tends to exhibit a condition called chalking. As UV exposure breaks down the titanium dioxide and stabilizers in the PVC compound, a fine white powder migrates to the surface. You can detect it by rubbing your finger across the siding: if it comes away chalky, the surface oxidation is significant. Standard adhesive patches bond very poorly to chalked surfaces because the adhesive is gripping the loose chalk layer, not the vinyl itself.
For siding in this condition:
– Wash the area with a diluted TSP (trisodium phosphate) solution or a dedicated vinyl siding cleaner and rinse thoroughly
– Allow the surface to dry completely — not just surface-dry, but fully dry at depth, which can take longer on humid Triad days
– Consider scuff-sanding the immediate patch zone very lightly with 220-grit sandpaper to break through the chalk layer and give the adhesive a mechanical grip on fresh material
– Wipe down with isopropyl alcohol as a final prep step to remove any residue
This level of preparation on aged siding is the difference between a patch that holds and one that peels in the first weather cycle.
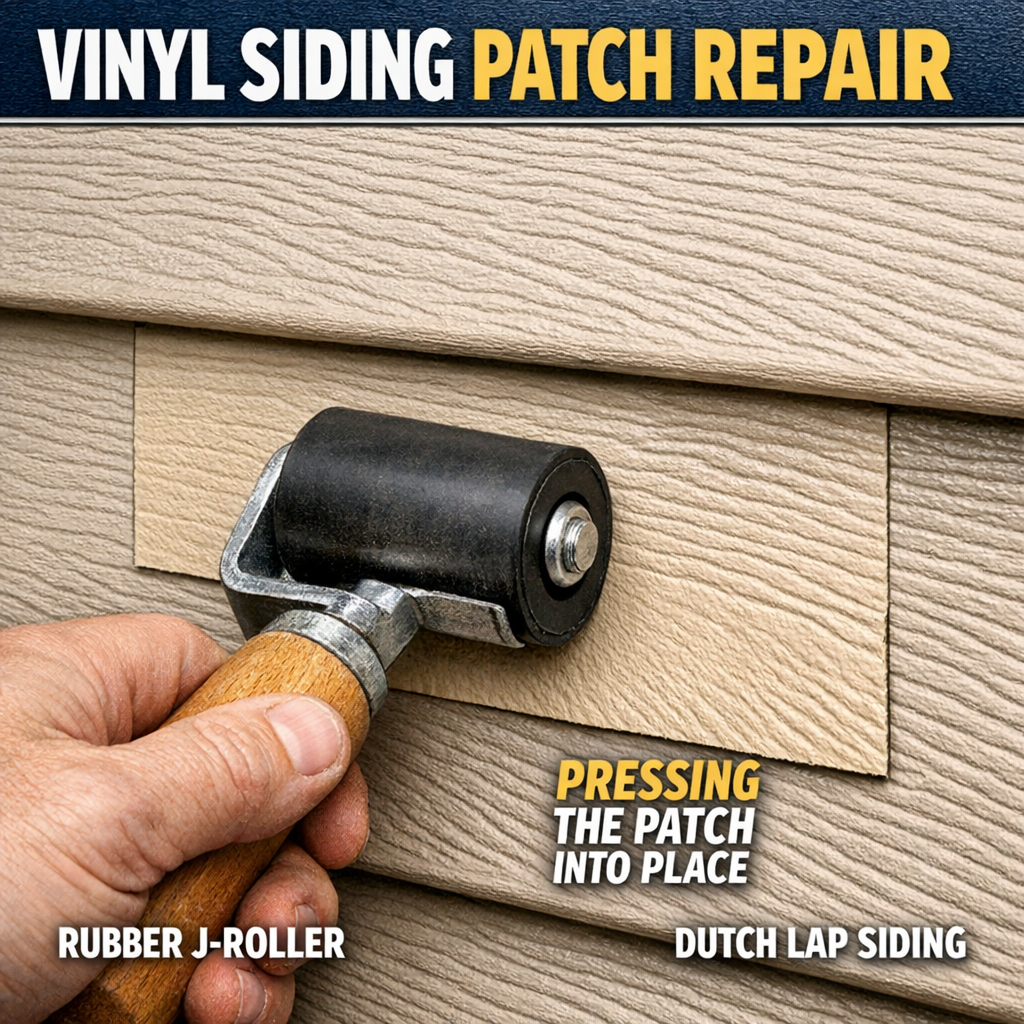
Here’s something that separates a professional-looking repair from an obvious patch job: most residential vinyl siding isn’t flat. If your home has Dutch lap siding, beaded panels, or any embossed wood-grain texture — and the majority of homes in the Triad do — a standard flat patch creates two compounding problems that basic tutorials never address.
When you press a flat adhesive patch onto a textured siding surface, it doesn’t make full contact. The patch touches the high points of the texture pattern and bridges over the low points, leaving micro-gaps across the repair area. Those gaps do two things: they allow water to wick under the patch edges through capillary action, and they create air pockets where UV-driven heat buildup accelerates adhesive degradation. Both mechanisms lead to premature edge lifting.
Even if the patch stays adhered, a flat surface interrupting an embossed or textured pattern is visually obvious — paint can match the color, but it can’t match the texture profile. The repair remains readable to anyone looking at your siding at an angle.
To address both issues on textured siding:
It’s worth being direct about something: adhesive patch kits are a legitimate tool for the right situation, but they aren’t how an experienced siding contractor approaches most damage. When panels are accessible and the damage warrants it, the method that produces a permanent, structurally appropriate result is panel section replacement using a zip tool. For a deeper look at how professional installers approach this process from start to finish, the siding installation complete guide covers the full scope of techniques used on residential exteriors.
Here’s what that process involves:
| Method | Best For | Longevity | Appearance | Skill Required |
|---|---|---|---|---|
| Adhesive patch kit | Small punctures under 1″, low-visibility areas, temporary repair | 1–5 years depending on conditions | Noticeable on textured profiles; paintable | Low |
| Panel section replacement (zip tool) | Any damage on accessible panels, cracks, larger holes | Permanent when done correctly | Seamless if color-matched | Moderate |
| Full panel replacement | UV-embrittled panels, moisture-damaged sections, damage near j-channels | Permanent | Perfect match with new panel | Moderate to high |
| Professional assessment + repair | Any damage with moisture concern, panels over 20 years old, damage near openings | Permanent with proper diagnosis | Professional finish | N/A — contractor handles |
A zip tool — sometimes called a siding removal tool — unlocks the interlocking seam between courses of vinyl siding without damaging adjacent panels. Once the damaged panel is unhooked, a replacement section cut to length can be slid in and re-locked. The repair is structurally identical to the original installation, and with a matching panel color, it’s effectively invisible.
This method costs very little in materials and is within reach of a handy homeowner willing to learn the technique. The challenge is color matching on older siding, where sun-fading means a new panel will stand out until it weathers in — which is why some homeowners opt to swap a panel from a less-visible area of the house to the repair zone and use the new panel in the hidden location. If you’re weighing your longer-term exterior options, our overview of vinyl siding options can help you compare profiles, finishes, and performance characteristics before committing to a material match.
There’s no shame in recognizing when a repair has moved beyond a weekend project. Here are the clear signals that it’s time to bring in an experienced siding contractor:
Any of these conditions means the right move is a proper inspection before any repair material goes on the wall. At Smithrock Roofing, we approach siding repairs the same way we approach everything else: honest assessment first, with no interest in selling you work you don’t need — and no interest in letting you skip work you do. With 60+ combined years of exterior experience serving the NC Triad, we’ve seen what deferred siding repairs become, and the early call is always the less expensive one.
Before closing out your vinyl siding repair project — or deciding whether to start one — three specific steps will put you in the best position heading into the year ahead.
1. Schedule a Whole-House Exterior Audit
Spring and fall are the ideal windows for a proactive exterior inspection. Rather than waiting for visible damage to prompt action, a scheduled audit by a qualified contractor covers all siding panels, trim, soffit, fascia, and penetration points in a single visit. Catching minor panel separation or early caulk failure before a wet season means the difference between a small repair and a significant remediation project.
2. Invest in a Quality Zip Tool Before Your Next DIY Attempt
If you plan to handle small repairs yourself, a dedicated siding zip tool is the single most important item to add to your kit in 2026. Generic substitutes or improvised tools are the leading cause of additional panel damage during amateur repairs. A proper zip tool allows clean, controlled unlocking of interlocked panels without cracking or distorting the profile — protecting not just the panel you’re repairing, but the two surrounding it.
3. Document Your Siding Profile and Manufacturer Information Now
Supply chain disruptions and manufacturer product line changes have made matching discontinued siding profiles increasingly difficult. Take time this year to photograph your siding profile up close, record any visible manufacturer markings stamped into the panels, and store that information somewhere accessible. If damage occurs months or years from now, this documentation dramatically speeds up the material sourcing process and improves the odds of a clean color match.
Small punctures and isolated panel damage are genuinely manageable DIY repairs for a homeowner who is comfortable with basic tools and willing to follow the correct process. The critical first step is always the press test — pressing firmly on the wall behind the damaged area to check for softness or give. If the wall feels solid and there are no signs of water infiltration, a patch or panel swap is a reasonable weekend project. However, if you notice any sponginess, staining, or cracking that extends beyond the damaged panel itself, a professional inspection is the appropriate next move before any repair material is applied.
Start by looking for manufacturer stamps or markings along the cut edge or back face of an existing panel near the damaged area. That information can be used to identify the product line and profile. From there, contact local siding suppliers or the manufacturer directly. If the product has been discontinued or the color no longer matches due to weathering, the most effective approach is to swap a panel from a low-visibility area of the house — such as behind a fence or in a recessed side wall — into the repair zone, and place the new unmatched panel in the hidden location.
Cracking rather than puncturing is typically a sign of panel embrittlement, which occurs when vinyl has been exposed to UV radiation and temperature cycling over many years. Older panels lose their flexibility and become brittle, meaning impact that would simply dent or puncture younger vinyl instead causes the material to fracture. Cold weather accelerates this — vinyl is significantly more brittle below freezing, which is why a surprising number of siding cracks are discovered after winter. Embrittlement across multiple panels is a strong indicator that the siding system as a whole is approaching the end of its serviceable life.
A correctly executed repair — where the underlying wall is sound, the patch or replacement panel is properly seated and locked, and all seams are sealed against moisture intrusion — should last as long as the surrounding siding. The weak point in most repairs that fail prematurely is not the patch material itself but an unaddressed moisture issue behind the wall, or inadequate sealing at the repair edges. This is why the inspection step before repair is not optional. A patch placed over an existing moisture problem will fail, and the damage it conceals will continue to worsen in the meantime.
Vinyl siding repair done right is one of the more satisfying maintenance tasks a homeowner can tackle — the results are immediate, the protection it restores is real, and the window between a small repair and a large one is often shorter than people expect. Whether you’re confident handling the work yourself or you’ve read through this guide and decided the situation calls for professional eyes first, the most important thing is not to leave damaged siding unaddressed through another wet season.
The team at Smithrock Roofing has spent decades working on the exteriors of homes across the NC Triad, and we’re always happy to give you a straight answer about what your siding actually needs. Contact Us to schedule an inspection or talk through what you’re seeing — no pressure, just honest exterior expertise from people who have seen it all.
Smithrock Roofing © Copyright 2026 • All Rights Reserved • Privacy Policy • Maintained by Mongoose Digital Marketing