Your home’s exterior works as a system. The roof sheds water downward, the siding carries it away from the wall assembly, and the flashing, trim, and drainage layers in between keep everything sealed and dry. When one part of that system starts to fail, the rest doesn’t take long to follow.
For homeowners across Winston-Salem, Greensboro, High Point, and the surrounding NC Triad communities, roof and siding repair is not just a maintenance chore — it is one of the most consequential decisions you will make for your home’s long-term health. Done right, a targeted repair extends the life of your entire exterior by years. Done wrong — or done only halfway — it leaves hidden damage behind that quietly gets worse behind drywall and inside wall cavities where you cannot see it.
This guide is written to give you the honest, technical picture that most contractors skip over. We will walk through how to actually diagnose where damage is coming from, why repairs fail when the underlying substrate is ignored, and how something as overlooked as attic ventilation can quietly cut your roof’s lifespan in half. Whether you are dealing with a fresh storm hit or gradual wear that has been building for years, understanding these fundamentals puts you in a far better position to ask the right questions and make a confident decision.
One of the most common frustrations homeowners bring to us is this: “We had this fixed once already. Why is it leaking again?”
The answer, almost every time, is that the previous repair addressed the symptom — the visible damage — without finding the actual source.
Water is a traveler. When it finds a breach in your roof system, it does not fall straight down to your ceiling. It follows the path of least resistance along sheathing, rafters, and insulation, sometimes traveling ten to fifteen feet laterally before it drips. The water stain on your ceiling tells you where the leak ends up — not where it started.
This is why a proper roof inspection begins at the stain and traces upward and outward from there, not just to the nearest visible shingle damage.
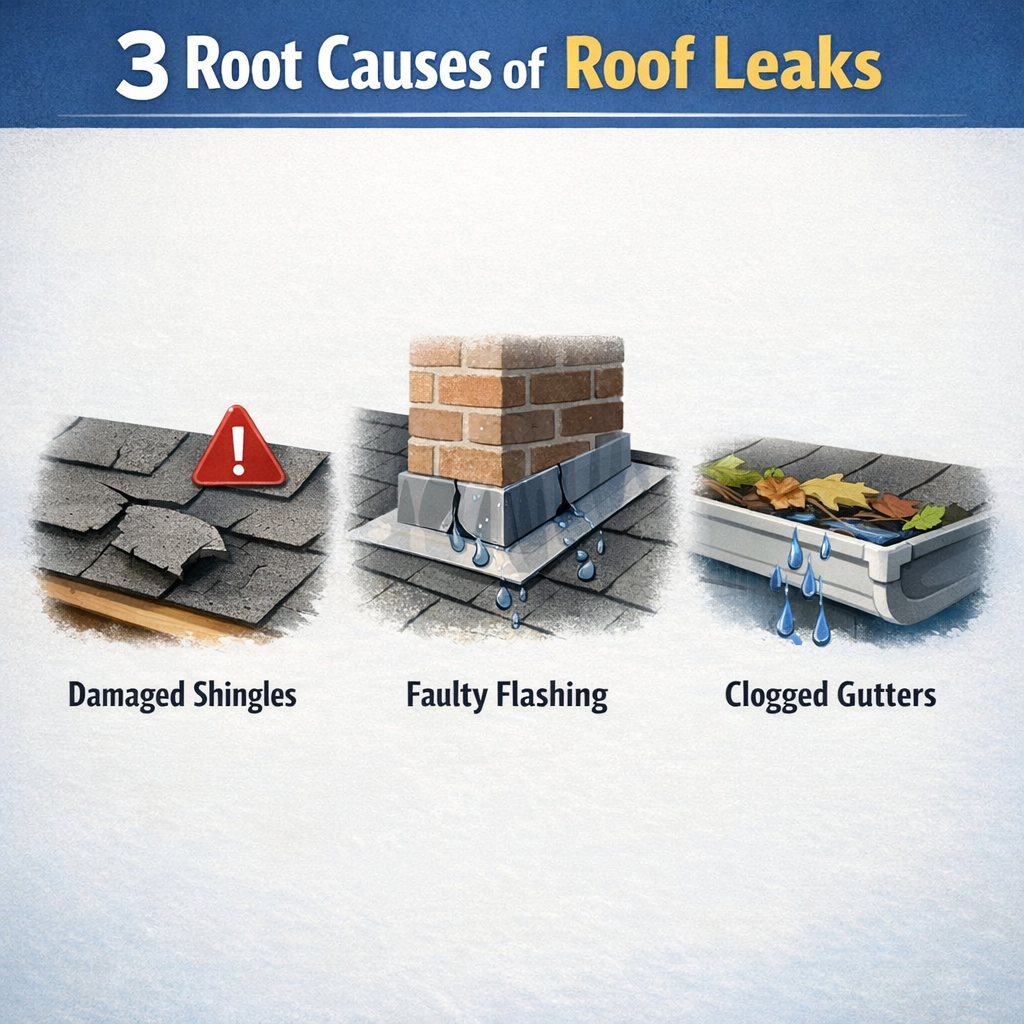
Understanding where leaks actually begin changes everything about how they should be repaired. There are three primary source categories, and each one requires a completely different fix.
1. Penetration Failures
These are the areas where something passes through or abuts your roof surface — chimneys, pipe boots, skylights, vent stacks, and HVAC equipment. These junctions are sealed with flashing and, in some cases, rubberized boots or caulk. Over time, thermal expansion and contraction causes metal flashing to pull away from masonry, rubber boots to crack, and sealants to separate. When a homeowner reports a leak near a chimney or vent, the shingles around it are almost never the problem. It is nearly always a flashing or sealant failure at the penetration itself. Replacing the surrounding shingles without addressing the flashing accomplishes nothing.
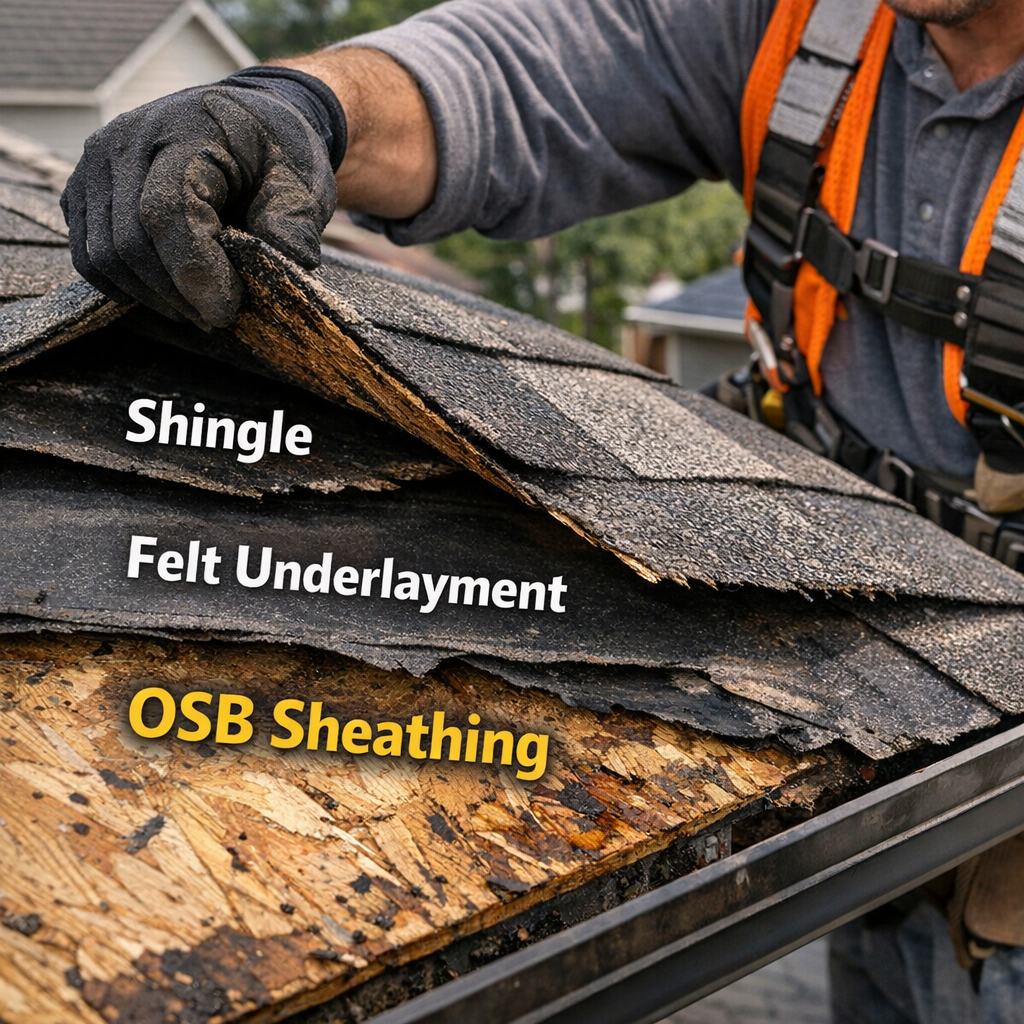
2. Field Failures
The “field” is the broad, mid-slope expanse of your roof between penetrations and edges. Leaks originating here are often traced not to the surface shingle itself, but to what is underneath it. Fasteners can back out over time due to thermal movement, lifting shingles slightly and allowing wind-driven rain to enter. Underlayment — the moisture barrier installed beneath shingles — degrades with age and can fail before the shingles above it show obvious wear. In some cases, granule loss on aging shingles exposes the fiberglass mat below, which deteriorates quickly under UV exposure and eventually cracks. Each of these scenarios looks similar from the outside but requires a different repair approach.
3. Edge and Valley Failures
Roof edges and valleys are high-traffic zones for water. Valleys channel water from two adjacent roof planes into a single concentrated stream, and if the valley flashing or underlayment was installed incorrectly, even a new roof can develop leaks in short order. Similarly, drip edge flashing at eaves and rakes exists to direct water off the roof deck and into the gutter — when it is improperly lapped, missing, or corroded, water wicks back under the shingles and rots the fascia and decking below. Edge and valley failures are frequently a workmanship issue from the original installation rather than simple wear, which is why they often recur if only the surface material is replaced.
Ask most contractors what causes siding to fail and they will point to the panel itself — a cracked board, a blown-off section, surface rot on wood siding. That is the visible answer, and sometimes it is the right one. But in our experience, the most persistent and costly siding failures have almost nothing to do with the panel you can see.
Every siding installation is built in layers. The outermost layer — the vinyl panel, the fiber cement board, the wood plank — is your first line of defense against weather. Behind it sits a drainage plane: a weather-resistant barrier (typically house wrap or building paper) that is designed to shed any moisture that gets past the siding. Behind that is the structural sheathing — usually OSB or plywood — and then the framing itself.
When a siding repair addresses only the outer panel without checking what lies beneath, there is a real risk of sealing problems in rather than sealing them out.
Here is what to look for at each layer:
Weather-Resistant Barrier (House Wrap / Building Paper)
This membrane must be lapped correctly — upper layers over lower layers, like shingles — so that water drains downward and out rather than into the wall. Tears, improper laps, or degraded material that has become brittle create moisture pathways that run directly into the sheathing. A new siding panel over a compromised barrier simply delays the next repair call.
Structural Sheathing
OSB and plywood sheathing are strong when dry. Introduce chronic moisture — whether from a failed barrier, a leaking window flashing, or inadequate drainage — and they begin to soften and delaminate. Soft sheathing cannot hold fasteners reliably. New siding panels nailed into degraded sheathing will flex under wind load, gaps will open, and water infiltration accelerates. Within one to two seasons, the repair fails.
Transition Flashings
Where siding meets another building element — a window frame, a roofline, a foundation — there must be continuous, properly lapped flashing to bridge the transition and direct water outward. This is the single most common entry point for water infiltration in residential siding systems. A strip of caulk is not a substitute for properly installed flashing, and caulk alone will not hold up through the temperature swings the NC Triad sees from January to July.
The Piedmont region of North Carolina presents a specific set of conditions that accelerate exterior wear. Summers bring sustained heat and humidity, with dew points that keep moisture levels high even on days without rain. Winters deliver regular freeze-thaw cycles, particularly in the higher elevations around King and Rural Hall. Spring storms in this region can produce wind-driven rain at angles that challenge even well-installed siding.
Moisture that penetrates a siding system in July does not have to travel far to begin causing damage. In a humid climate, trapped moisture behind panels stays present long enough to promote mold growth inside wall cavities and accelerate wood rot in framing members — damage that is invisible from the outside and only discovered during a thorough inspection or, unfortunately, during a much larger repair down the road.
The expert standard for siding repair in this climate: probe adjacent panels and the substrate beneath any repair area before installing new material, inspect all transition flashings for continuity, and verify the weather-resistant barrier is intact and correctly lapped. Anything less is a cosmetic fix.
This is the topic that gets the least attention during most repair consultations, and it may be the one with the greatest impact on how long your roof actually lasts.
A properly ventilated attic works on a simple principle: cool outside air enters through soffit vents at the eaves, rises across the underside of the roof deck, and exits through ridge or gable vents at the top. This continuous airflow performs two critical jobs — it keeps attic temperatures reasonable in summer, and it prevents moisture from accumulating in winter.
When that airflow is blocked, inadequate, or unbalanced, the consequences are significant.
Summer Heat Damage
Without adequate ventilation, attic temperatures in a North Carolina summer can exceed 150°F. Heat transfers through the roof deck and into the underside of shingles, accelerating the loss of the oils that keep shingles flexible and resistant to cracking. This thermal stress can reduce shingle lifespan by 30 to 40 percent, regardless of the quality of the material installed. You can put premium shingles on an unventilated roof and watch them fail years ahead of schedule.
Winter Moisture Damage
Warm, humid air from the living spaces below rises into an unventilated attic and has nowhere to go. It condenses on the cold underside of the roof deck, saturating the OSB sheathing over time. This moisture promotes mold growth, causes sheathing to delaminate, and degrades the structural integrity of the deck itself. A soft, spongy roof deck cannot hold fasteners properly — which means any shingles installed over compromised decking are on borrowed time.
Ice Dam Formation
While severe ice dams are more common in the mountains, the NC Triad does see freeze-thaw cycles significant enough to cause problems. Inadequate ventilation allows heat to escape unevenly through the deck, warming the mid-slope area and melting snow there while the eave area stays frozen. Meltwater runs down and refreezes at the cold eaves, building up a dam that backs water under the shingles. The interior leak that results is often misread as a shingle failure when the real cause is a ventilation problem. For a deeper look at this issue, the article How to Get Rid of Ice Dams walks through the mechanics and solutions in detail.
Warranty Implications
This is one that catches homeowners off guard. Most major shingle manufacturers — including CertainTeed, GAF, and Owens Corning — include ventilation compliance requirements in their warranty terms. A roof that does not meet minimum ventilation standards may have its material warranty voided, regardless of who installed the shingles or what tier of product was used. According to guidance from the Federal Housing Administration, the minimum standard is 1 square foot of net free ventilation area per 150 square feet of attic floor space, balanced between intake and exhaust. The Asphalt Roofing Manufacturers Association provides further technical guidance on how to calculate and achieve balanced ventilation in residential systems.
Before any roof repair or replacement, ventilation should be evaluated as part of the diagnosis — not added as an afterthought after materials are already ordered. That means checking:
Correcting a ventilation deficiency before new shingles are installed is not an upsell. It is the difference between a repair that lasts and one that creates the next problem.
One of the most common questions we hear from homeowners is whether to repair or replace. There is no single right answer — but there is a clear way to think through it.
| Condition Factor | Points Toward Repair | Points Toward Replacement |
|---|---|---|
| Roof Age | Under 15 years, materials in generally good condition | Over 20 years, approaching end of shingle lifespan |
| Damage Scope | Isolated to one area or section | Widespread across multiple slopes or field areas |
| Sheathing Condition | Deck is solid, fasteners hold | Soft spots, delamination, or rot present |
| Ventilation | Existing system meets minimum standards | Chronic ventilation deficiency requiring correction |
| Leak History | First occurrence, clear single source | Repeated leaks, multiple repair attempts |
| Underlying Cause | Penetration or flashing failure (isolated) | Systemic underlayment failure or shingle aging |
| Siding Damage | One or two panels, substrate intact | Multiple panels, substrate or barrier compromised |
| Energy Performance | No notable change in heating/cooling | Increasing energy use suggesting insulation or air sealing issues |
The framework above is a starting point, not a final answer. A thorough on-site inspection is the only reliable way to assess substrate condition, ventilation performance, and the true scope of any damage. What looks like a straightforward repair from the ground can involve soft sheathing or compromised flashing that changes the recommendation entirely once a qualified contractor gets on the roof. For a detailed breakdown of how these factors apply specifically to Winston-Salem homes, the article Roof Repair vs. Replacement in Winston-Salem: Key Criteria covers the decision in depth.
“Quality craftsmanship” is a phrase that appears on nearly every contractor’s website. It does not tell you anything. Here is what it actually means in practice for roof and siding repair.
For homeowners who have never been through a professional roof or siding repair, knowing what the process looks like removes a lot of uncertainty.
A thorough repair engagement typically follows this sequence:
At Smithrock Roofing, we have spent 60-plus combined years working on exteriors across Winston-Salem, Greensboro, High Point, Kernersville, Clemmons, Rural Hall, King, and the broader NC Triad region. We are CertainTeed PREMIER ShingleMaster certified and carry full licensing and insurance. But credentials aside, the most important thing we bring to a repair job is a diagnostic approach that looks for the actual source of the problem — not just the easiest place to point at and fix.
If your roof or siding has been showing signs of trouble, the right first step is an honest, thorough inspection. That is where every good repair starts.
As you plan ahead for your home’s exterior, three specific steps can help you stay ahead of problems rather than react to them:
Schedule a post-winter inspection in early spring. The freeze-thaw cycles that run through the NC Triad each winter are among the most damaging forces a roof and siding system faces. Ice works its way under flashing, seams, and shingle edges, then expands. By the time temperatures stabilize in March or April, damage is already done — it just has not shown up inside the house yet. A targeted spring inspection catches that damage early, before a summer storm turns a manageable repair into an emergency replacement.
Request an attic ventilation assessment alongside any roofing work. In 2026, more homeowners are discovering that what looks like a shingle problem is actually a heat and moisture problem driven from the inside out. Poor attic ventilation causes premature shingle deterioration, ice dam formation in winter, and moisture accumulation that rots decking from below. If ventilation has never been formally evaluated on your home, add it to the agenda the next time a roofer is on your property.
Document your exterior before storm season begins. Before the active storm season arrives, walk the perimeter of your home and photograph every elevation of your roof and siding. Note any existing soft spots, gaps, discoloration, or areas where caulk is pulling away. This baseline record becomes valuable the moment storm damage occurs — it demonstrates pre-storm condition to your insurance carrier and helps a repair contractor identify what is new damage versus pre-existing wear.
The answer depends on the extent and location of the damage, the age of the existing system, and the condition of the underlying sheathing and ventilation. A localized problem — a failed section of flashing, storm damage to a specific slope, or a small area of missing shingles — is often a strong candidate for repair when the surrounding materials are sound. When damage is widespread, when the system is approaching the end of its serviceable life, or when substrate damage is found beneath the surface materials, replacement is typically the more practical and cost-effective path over time. A thorough inspection by a qualified contractor is the only reliable way to make that call.
Your roof and siding are part of a continuous moisture management system that wraps your home. When siding is cracked, buckled, or pulling away from trim and corners, it creates an entry point for water that can migrate behind the wall assembly and work its way toward the roof line. Conversely, deteriorated soffit, fascia, or roof flashing allows water to travel down into wall cavities. Because these systems connect at every eave, rake, and corner, damage in one area accelerates wear in the other. This is why a full exterior assessment — not just a look at the obvious problem spot — is worth requesting.
After a significant wind or hail event, start from the ground and look for visible shingle displacement, missing sections, granule accumulation in gutters and downspout splash areas, and any siding panels that are cracked, dented, or pulled away from the wall. Check your attic interior for daylight or fresh water staining on rafters and decking. Look at your soffit and fascia for impact marks. If the storm was severe enough to cause visible landscape damage — broken branches, displaced outdoor furniture — assume your roof absorbed impact as well and treat a professional inspection as a priority rather than a precaution.
Most targeted repairs — flashing replacement, a damaged section of shingles, a failed run of siding panels — are completed in a single day when materials are on hand and the scope is well defined. Larger repairs involving multiple areas, substrate damage, or material procurement may extend across two or more visits. The variable that most often affects timeline is what the technician finds once the surface layer is removed. This is why a thorough inspection and honest scope conversation before work begins matters — it reduces surprises on both sides and allows for realistic scheduling.
When your home’s roof or siding shows signs of trouble, working with a contractor who understands the specific exposure conditions of the NC Triad — the summer humidity, the winter freeze-thaw cycles, the wind patterns that move through Greensboro and Winston-Salem differently than they do in other parts of the state — makes a measurable difference in the quality and durability of the repair. At Smithrock Roofing, our diagnostic approach, our CertainTeed PREMIER ShingleMaster certification, and our decades of combined regional experience mean we are focused on solving the actual problem, not just the visible one. If you are ready to get an honest look at what your roof or siding needs, we would be glad to help — Get a Free Estimate and let’s start with a thorough inspection.
Smithrock Roofing © Copyright 2026 • All Rights Reserved • Privacy Policy • Maintained by Mongoose Digital Marketing