Smithrock Roofing LLC logo featuring stylized rooftops with chimneys and arched windows

The Ultimate Guide to Installing Your Chimney Chase Cover

Why Proper Chimney Chase Cover Installation Protects Your Home

Chimney chase cover installation is a critical home maintenance task that prevents thousands of dollars in water damage. If your prefabricated chimney’s protective cover is missing, rusted, or failing, you could face repair costs ranging from $1,500 to $10,000.

Quick Installation Overview:

  1. Remove the old rain cap and deteriorated chase cover.
  2. Clean and prepare the chimney chase surface.
  3. Apply weatherproof silicone sealant around the chase edges.
  4. Position the new stainless steel cover and secure it with screws.
  5. Reinstall the storm collar and rain cap with proper sealing.

Prefabricated chimneys, common in newer homes, rely on a metal pan called a chase cover to keep rain, snow, and debris out of the wooden chase structure. When this cover fails, water can infiltrate your attic, walls, and ceilings, leading to costly structural damage and mold growth. A damaged cover also allows animals like squirrels or birds to enter your chimney.

I’m Jordan Smith of Smithrock Roofing. With over 15 years in exterior construction, I’ve seen how a proper chimney chase cover installation prevents costly water damage. My team has helped countless homeowners protect their investment with quality materials and expert installation techniques.
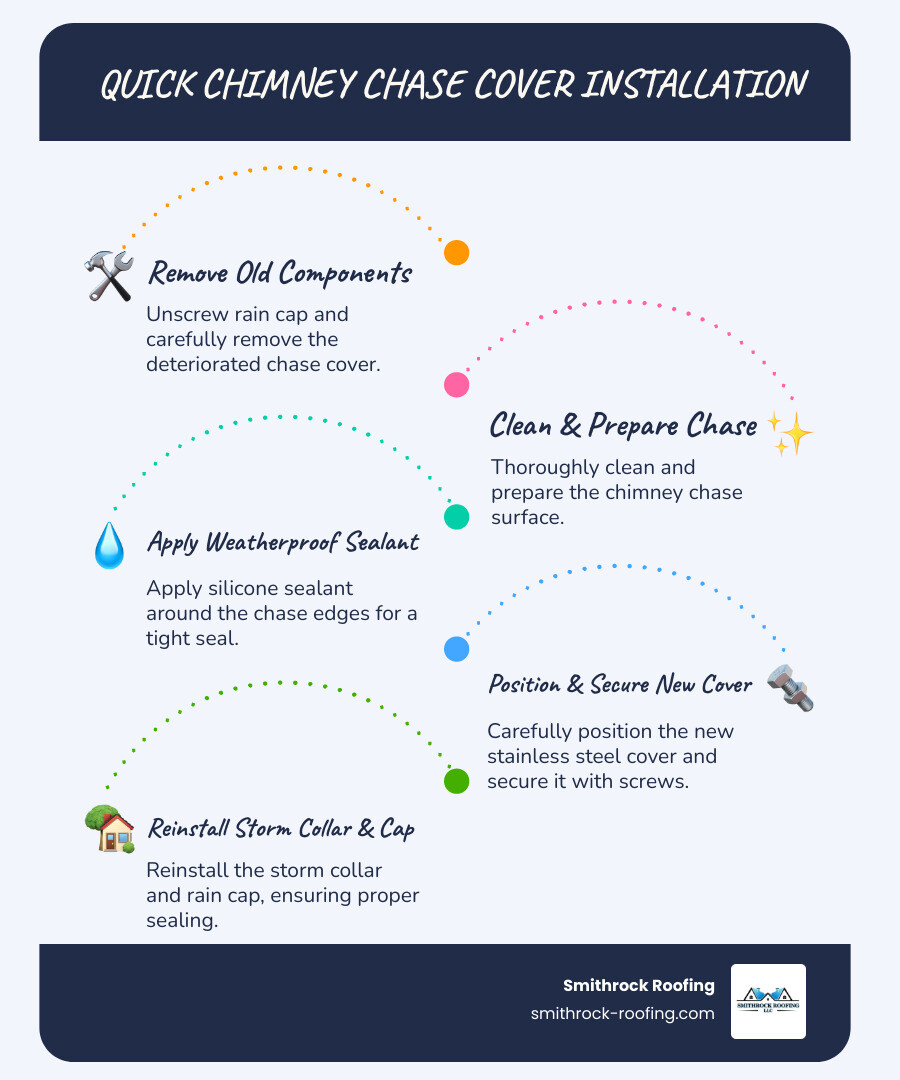
Detailed infographic showing chimney chase cover installation process with labeled components including the wooden chase structure, flue pipe, old rusted cover removal, new stainless steel cover placement, storm collar positioning, and rain cap reinstallation with step-by-step visual instructions - chimney chase cover installation infographic infographic-line-5-steps-blues-accent_colors

Understanding Your Chimney’s First Line of Defense

This section will cover the fundamentals of chimney chase covers, why they are essential, and how to identify when yours is failing.

What is a Chimney Chase Cover and Why is it Crucial?

A prefabricated chimney—the factory-built metal type found on most newer houses—is built with a chase structure. This is a wooden box that encloses the metal flue pipes, and on top of it sits a metal pan called a chase cover. This cover is a crucial protective barrier against the elements.

The primary job of a chase cover is water prevention. Rain, snow, and ice can cause thousands of dollars in damage if they get into the chimney chase, seeping into your attic and walls. Beyond water, the cover serves other key functions:

  • Debris Blockage: It keeps leaves, twigs, and other debris from piling up inside the chase, which can create a fire hazard and block airflow.
  • Animal Intrusion: A secure cover prevents birds, squirrels, and raccoons from entering your chimney and home.
  • Protecting the Chase Structure: The cover directly protects the wooden chase framing from moisture, preventing rot, mold, and expensive structural repairs.

For more detailed information about how we protect homes with professional chimney services, check out more info about our chimney services.

Chimney Chase Cover vs. Chimney Cap: Clearing the Confusion

It’s common to confuse a chase cover with a chimney cap, but they serve different functions. Understanding the difference is key to proper maintenance.

A chase cover is a metal pan that covers the entire top opening of the chimney chase. Its purpose is to protect the chase opening and the wooden structure below from weather.

A chimney cap is a smaller cover that sits directly on top of an individual flue pipe. Its job is to protect the flue opening by keeping rain and animals from going directly down the flue.

Masonry (brick) chimneys don’t have a chase cover; they use a concrete masonry crown to serve a similar purpose.

Chase covers and chimney caps work together for synergistic protection. The chase cover protects the overall structure, while the cap protects the flue pipe. You need both for a fully sealed chimney system.
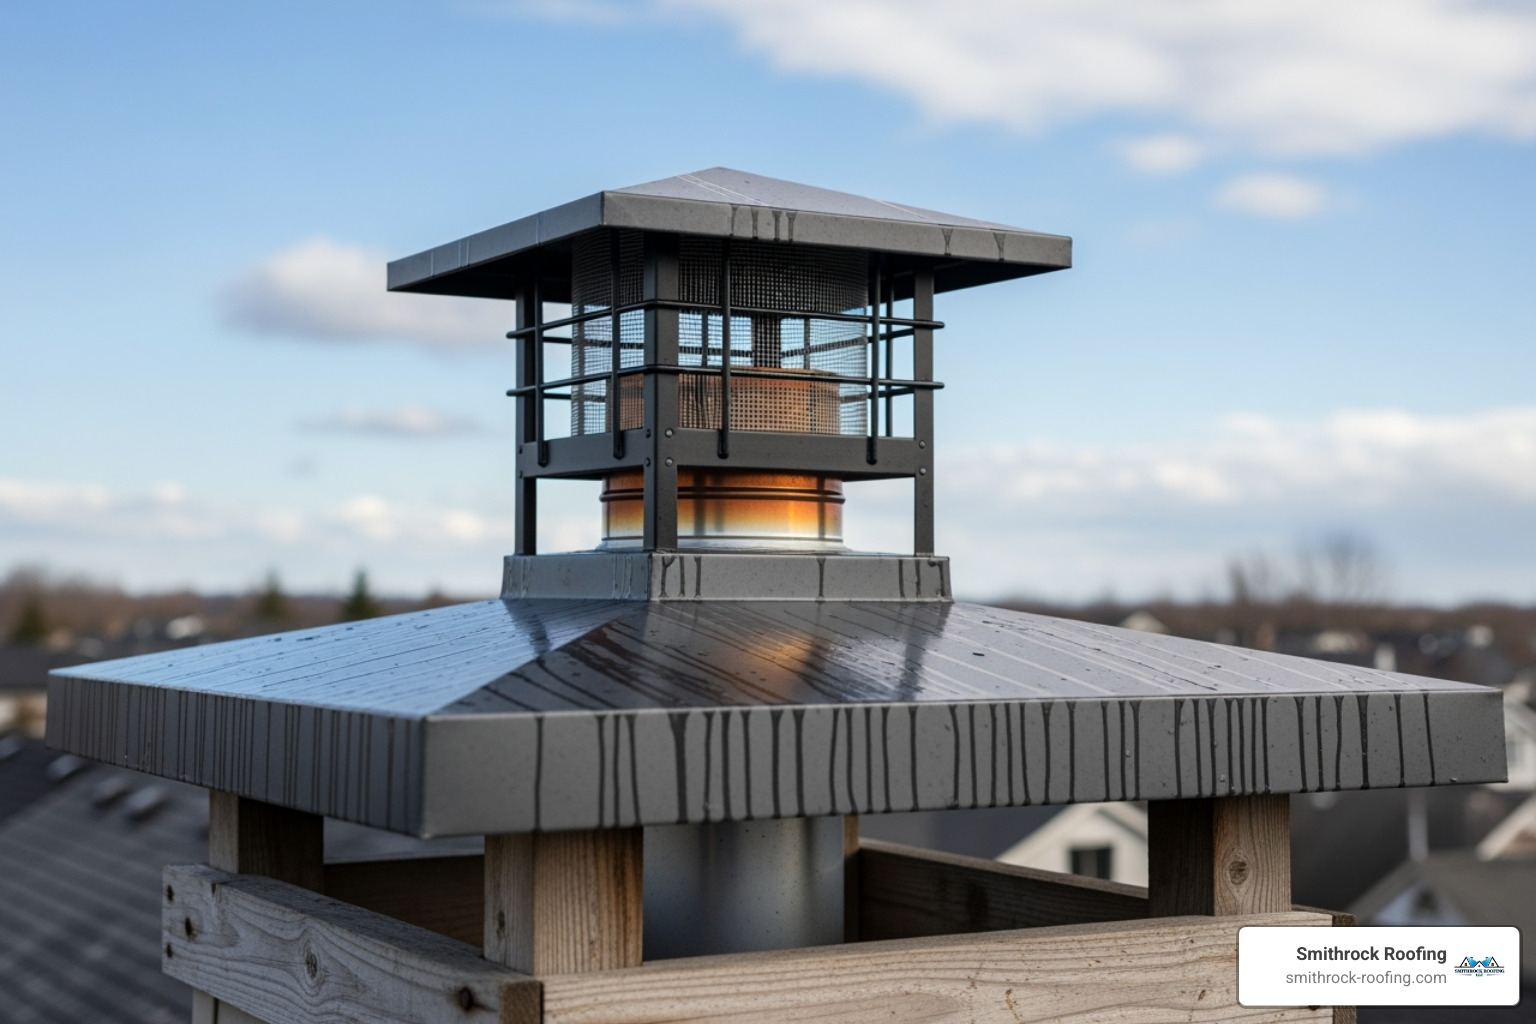
A chimney top clearly labeling the chase cover and the chimney cap, showing the distinct functions of each component - chimney chase cover installation

Telltale Signs You Need a New Chase Cover

Since your chase cover is constantly exposed to the elements, it will eventually wear out. Catching the signs of failure early can save you from costly repairs.

  • Rust Stains: Orange and brown streaks running down your chimney’s sides are a clear sign the cover, likely galvanized steel, is rusting and deteriorating.
  • Discoloration on Siding: Look for streaking, mildew, or odd color changes on the siding near the chimney, which indicates improper water runoff from a damaged cover.
  • Visible Holes, Cracks, or Dents: Any visible damage, no matter how small, is a serious issue that allows water to penetrate.
  • Water Pooling: Water collecting on top of the cover indicates it is sagging, warped, or improperly installed and not shedding water correctly.
  • Leaks in Your Attic: Leaks or ceiling stains near your chimney are urgent signs that the cover has already failed and water is entering your home.
  • Damaged Chimney Interior: Water stains, rotting wood, or mold growth inside the chase structure confirm a long-term leak from a failing cover.
  • Loose Fit: A cover that is loose, rattles in the wind, or has shifted is no longer providing a secure seal.

If you see any of these signs, a new chimney chase cover installation is necessary to prevent expensive water damage.
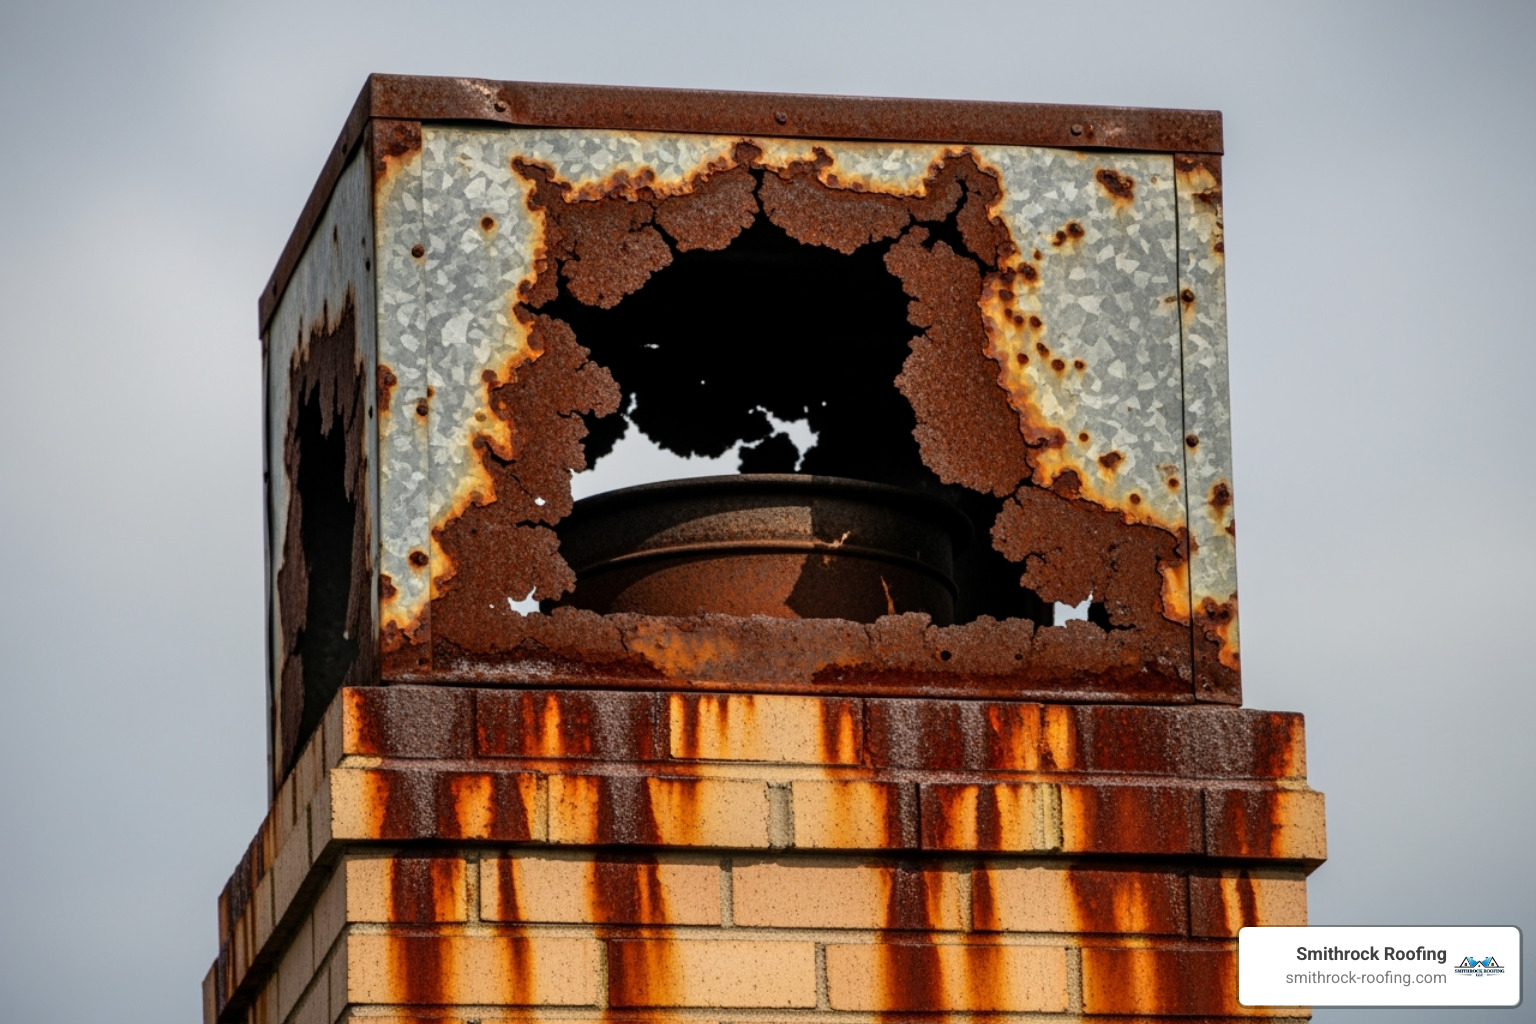
A badly rusted and deteriorating chase cover causing ugly stains down the side of a chimney, illustrating the clear signs of needed replacement - chimney chase cover installation

Choosing the Right Materials and Tools for the Job

For a durable chimney chase cover installation, selecting quality materials is paramount. Choosing a cheaper material upfront often leads to costly replacements later. Likewise, gathering the right tools ensures the job is done safely and efficiently.

Selecting the Best Material for Your New Chase Cover

The material you choose for your chase cover will dramatically impact its longevity and performance. Not all metals are created equal.

MaterialLifespanRust ResistanceCostAesthetics
Galvanized Steel5-10 yearsLowLowDull gray, prone to rust stains
Stainless Steel20+ yearsHighMediumBright, modern, no rust stains
Copper50+ yearsVery HighHighDevelops a beautiful patina over time
Aluminum15-20 yearsHighLow-MediumDull, can dent easily, less rigid
  • Galvanized Steel is the cheapest option but has a short lifespan. Its protective coating wears off, leading to rust stains and leaks within a few years. It is often the material used in original construction and is the most common source of chase cover failure.

  • Stainless Steel is the best value for most homeowners. It’s highly durable, won’t rust, and maintains its clean appearance for decades, making it a long-term solution. Professional-grade covers are typically made from 22-gauge 304 stainless steel, which offers excellent durability against impacts and allows for precise fabrication.

  • Copper is a premium, long-lasting option that develops a beautiful green patina over time. Its high cost makes it less common, but it offers unparalleled longevity and aesthetic appeal.

  • Aluminum is rust-proof but less durable than stainless steel, as it dents more easily. For most applications, stainless steel provides the best balance of performance, longevity, and cost.

How to Accurately Measure for a Custom Fit

Accurate measurements are critical for a successful chimney chase cover installation, as a custom cover must fit perfectly to prevent leaks. A cover that is even slightly off can create gaps for water to enter.

Follow these steps to measure for your new cover:

  1. Measure Length and Width: Measure the outside edges of your chimney chase from one side to the other. Measure twice to ensure accuracy.
  2. Count Flue Holes: Determine how many flue pipes pass through the chase cover.
  3. Measure Flue Diameter: For each flue pipe, measure its outside diameter. Don’t assume they are all the same size.
  4. Measure Flue Hole Locations: This is the most critical step. For each pipe, measure from its center to all four outer edges of the chase. This pinpoints the exact location for the hole.
  5. Determine Skirt Height: The skirt is the vertical edge of the cover that hangs over the sides of the chase. A 3-inch skirt is standard and provides good coverage and attachment points.

For a helpful visual, Take a look at this measuring guide.

Essential Tools and Supplies for Your Chimney Chase Cover Installation

Assembling all necessary tools and supplies beforehand ensures a smooth and safe installation process. There’s nothing worse than having to stop a rooftop project to retrieve a forgotten tool.

Essential Tools:

  • Safety Harness, Non-skid Shoes, Gloves, and Safety Glasses
  • Tape Measure
  • Power Drill (cordless is ideal)
  • 1/8″ Steel-Cutting Drill Bit (with a pilot point)
  • Screwdriver (to match screw heads, often 5/16″ hex head)
  • Pry Bar or Hammer
  • Utility Knife
  • Caulk Gun

Essential Supplies:

  • Your Custom-Ordered Chase Cover
  • High-Temperature Weatherproof Silicone Sealant (one tube is usually sufficient)
  • Stainless Steel Screws (if not included with the cover)

A Step-by-Step Guide to Chimney Chase Cover Installation

This comprehensive guide will walk you through the entire chimney chase cover installation process, from safe preparation to the final seal.

Safety First: Preparing for a Rooftop Project

Working on a roof is inherently dangerous and requires careful safety planning. Never rush a rooftop project.

  • Check the Weather: Work only on a clear, dry day with low wind. A wet roof is extremely slippery, and high winds can be hazardous.
  • Set Up Your Ladder Safely: Use an extension ladder that reaches at least three feet above the roofline. Place it on firm, level ground and have a spotter hold it steady.
  • Use Safety Gear: A safety harness anchored to a secure point is non-negotiable. Always wear non-skid shoes, gloves, and safety glasses.
  • Work with a Partner: A helper on the ground can pass tools, watch for safety issues, and clear the area below of any falling debris.

For more tips on roof safety, see these Benefits of Regular Roof Inspections.

Step 1: Removing the Old Chimney Cap and Chase Cover

The first step is to remove the old, damaged components.

  1. Remove the Rain Cap: Locate the screws securing the cap to the flue pipe and unscrew them. Lift the cap off and set it and the screws aside for reinstallation.
  2. Remove the Storm Collar: This metal ring is sealed to the flue pipe with old silicone. Carefully cut through the hardened sealant with a utility knife to free the collar and slide it up the pipe. If it’s stuck, you may need to pry it or cut it off. It’s inexpensive to replace if damaged.
  3. Remove the Old Chase Cover: The cover will be attached with screws or nails. Remove all fasteners. You may need a pry bar to lift a nailed-down cover, but be careful not to damage the underlying wood. Wear gloves, as the old rusted metal can be sharp. Lift the cover up and over the flue pipe.

The process of prying off the old, rusted chase cover, revealing the underlying chimney chase structure and demonstrating the wear and tear - chimney chase cover installation

Step 2: Preparing the Chase and Dry-Fitting the New Cover

Proper preparation of the chase surface is key to a successful, watertight installation.

  1. Inspect the Wood Chase: Check the top of the wooden structure for rot, soft spots, or water damage. A new cover needs a solid, sound foundation.
  2. Make Necessary Repairs: Replace any rotted or damaged wood before proceeding. Skipping this step will compromise the new installation and can lead to major structural problems.
  3. Clean the Chase Surface: Remove all debris, dirt, old nails, and leftover sealant from the top of the chase. The surface must be completely clean for the new sealant to adhere properly.
  4. Dry-Fit the New Cover: Before applying any sealant, place the new cover on the chase to confirm a perfect fit. The flue hole should align correctly, and the skirt should hang evenly on all sides.

Step 3: The Official Chimney Chase Cover Installation

Now it’s time for the official installation. Precision here ensures a long-lasting, weatherproof seal.

  1. Apply Silicone Sealant: Apply a generous, continuous 1/4″ to 3/8″ bead of high-temperature weatherproof silicone to the top edge of the chase. This is the primary water barrier.
  2. Position the New Cover: With a partner, carefully lower the cover onto the silicone bead, guiding it over the flue pipe. Ensure it is centered and aligned.
  3. Press Down Firmly: Apply steady pressure around the entire perimeter to spread the silicone and create a complete seal. Some squeeze-out from under the edge is expected and indicates a good seal.
  4. Drill Pilot Holes: Use a steel-cutting bit to drill pilot holes through the cover’s skirt and into the chase. Place screws about 2.5 inches from each corner and one in the center of each side.
  5. Secure with Stainless Steel Screws: Drive stainless steel screws into the pilot holes until snug. Do not overtighten, as this can distort the metal or strip the wood.

For a helpful demonstration, Watch this installation video for a visual guide.

Step 4: Finalizing with the Storm Collar and Cap

The final steps involve sealing the flue pipe opening to complete the weatherproofing.

  1. Install the Storm Collar: Slide the storm collar down the flue pipe until it rests firmly on the raised collar of the new chase cover. Consider a new stainless steel collar if the old one is rusted or damaged.
  2. Seal the Storm Collar: Apply a generous bead of high-temperature silicone where the top of the storm collar meets the flue pipe. This critical seal prevents water from running down the pipe.
  3. Smooth the Silicone Bead: Use a gloved finger or a smoothing tool to create a uniform, continuous seal. Clean up any excess silicone immediately.
  4. Reinstall the Rain Cap: Place the rain cap back on the flue pipe and secure it with its screws. Upgrade to a new stainless steel cap if the old one is rusted or damaged.

The Costs of Neglect vs. The Benefits of a New Chase Cover

Understanding the financial implications of a failing chase cover can truly highlight the value of this essential home maintenance project. Ignoring the problem can lead to a nightmare repair bill.

The High Price of a Failing Chase Cover

Ignoring a rusty, failing chase cover leads to significant and costly damage. Water infiltration is a silent destroyer that spreads through your home’s structure.

  • Water Damage: Water from a leaky cover can seep into the wooden framing, insulation, and drywall, causing widespread damage that is expensive to repair.
  • Structural Rot: Persistent moisture will rot the wooden chase, compromising the chimney’s structural integrity and creating a serious safety hazard.
  • Interior Repairs: Leaks eventually find their way inside, leading to costly attic and ceiling repairs, including replacing drywall, fixing insulation, and repainting.
  • Mold Remediation: Damp conditions encourage mold growth, which poses health risks to your family and requires expensive professional remediation services.
  • Potential Fire Hazard: Water damage can affect the firebox or flue system, creating conditions that could lead to fire or carbon monoxide leaks into your living space.

Repair costs from a failing chase cover typically range from $1,500 to $10,000. In cases of severe structural damage or mold, costs can be even higher. For more insights on preventing water damage, see our guide on roof leaks in Winston Salem and prevention tips for homeowners.

Long-Term Savings and ROI of a Quality Installation

A proper chimney chase cover installation is a smart investment that provides significant long-term savings and benefits.

  • Prevents Expensive Repairs: A new cover is a proactive measure that saves you thousands in potential water damage repairs down the line.
  • Protects Home Value: A well-maintained chimney with a clean, rust-free cover improves curb appeal and signals to potential buyers that the home is well cared for.
  • Provides Peace of Mind: Knowing your chimney is properly sealed provides invaluable peace of mind during heavy rain and storms.
  • Improves Energy Efficiency: A sealed chase prevents drafts and heat loss through the chimney structure, which can help lower your heating and cooling bills.
  • Offers Long-Term Protection: A quality stainless steel cover lasts for decades, eliminating the recurring cost and hassle of replacing cheaper, rust-prone galvanized covers.

The return on investment is clear. Installing a lifetime warrantied chimney chase cover can save you $100 to $300 annually through prevented heat loss and avoided minor repairs. Over its lifespan, the cover more than pays for itself.

Frequently Asked Questions about Chimney Chase Covers

Here are answers to some of the most common questions we receive about chimney chase covers, based on years of helping homeowners protect their properties.

How often should I inspect my chimney chase cover?

Annual inspection is recommended, ideally during your routine roof maintenance or chimney cleaning. Make it part of your fall home maintenance checklist. During the inspection, look for rust, physical damage, or failing sealant around the edges and collars. Catching these issues early can prevent thousands of dollars in water damage.

If you’re not comfortable getting on a roof, a professional inspection is a worthwhile investment. A trained eye can spot problems that are not visible from the ground and address them before they become major issues.

Can I paint my new chimney chase cover?

Yes, you can paint a chase cover, but it’s often unnecessary for higher-quality materials. Stainless steel has a clean, modern finish that doesn’t require paint, and copper is typically left unpainted to allow its signature green patina to develop over time. Painting an old, galvanized steel cover can extend its life temporarily while you budget for a proper replacement.

If you do decide to paint, use a high-temperature paint designed for exterior metal. Proper surface preparation and application according to the manufacturer’s instructions are crucial for a durable, lasting finish.

Is this a DIY project or should I hire a professional?

DIY installation is possible for individuals with significant roofing experience, but it is not a project for beginners. The work involves being on a roof at heights, which carries inherent risks. Safety is the primary concern, and without the proper experience and safety equipment, the project can be dangerous.

Hiring a professional ensures a perfect, watertight seal. An experienced installer can identify underlying issues like wood rot that a DIYer might miss and will typically offer a warranty for their work. Considering the high cost of water damage from a failed installation, the price of professional installation is a worthwhile investment for guaranteed results and peace of mind.

Conclusion: Protect Your Home with a Secure Chimney

A proper chimney chase cover installation is a crucial final step in protecting your home. This guide has shown how this single component is vital for preventing significant damage. Investing a few hundred dollars in a quality stainless steel cover can save you thousands in water damage repairs. It’s a one-time fix compared to the recurring replacement needed for cheaper galvanized steel.

Proper installation is just as important as the material. A perfect seal is necessary to ensure complete protection, which requires careful measurement, preparation, and application. A secure chimney contributes to a healthy home and provides peace of mind during storms. Knowing your home is protected is invaluable.

At Smithrock Roofing, we emphasize proactive maintenance. We offer high-quality products and recommend seasonal replacements to prevent emergencies and costly damage before they happen.

We serve homeowners in Winston-Salem NC, King NC, Clemmons NC, Lewisville NC, Pilot Mountain NC, East Bend NC, Mt. Airy NC, Kernersville NC, Siloam NC, Danbury NC, High Point NC, Trinity NC, Pfafftown NC, Tobaccoville NC, Greensboro NC, Walnut Cove NC, Belews Creek NC, Rural Hall NC, Pinnacle NC, Bethania NC, Advance NC, Wallburg NC, Horneytown NC, Union Cross NC, and Midway NC.

For expert assessment and professional installation, our team at Smithrock Roofing ensures your home is protected from the top down. We get the job done right the first time with materials that will protect your home for decades. Contact us today to learn more about our chimney services.
Share:

Categories

Follow us

You can find us on Facebook, Instagram, and Google.
Smithrock Roofing LLC logo featuring stylized rooftops with chimneys and arched windows
Smithrock Roofing proudly services the cities of Winston-Salem, King, Clemmons, Lewisville, Pilot Mountain, East Bend, Mt. Airy, Kernersville, Siloam, Danbury, High Point, Trinity, Pfafftown, Tobaccoville, Greensboro, Walnut Cove, Belews Creek, Rural Hall, Pinnacle, Bethania, Advance, Wallburg, Horneytown, Union Cross, and Midway, NC.

Get In Touch

Location

483 Forum Parkway
Rural Hall, NC 27045

Email

info@smithrock-roofing.com

Phone

(336) 971-0464

Newsletter

Sign up to receive important tips, special offers, and discounts.

Smithrock Roofing © Copyright 2025 • All Rights Reserved • Maintained by Mongoose Digital Marketing