
A note on the numbers: the figures in this guide are national industry averages compiled for research — they are not Smithrock Roofing quotes. Every home and project is different, which is why our in-home assessments and written quotes are always free.
Chimney liner installation cost is one of the first things homeowners want to understand when a chimney inspection turns up damage — or when they’re upgrading to a new wood stove, gas insert, or high-efficiency appliance that demands a properly sized flue. It’s a fair question, and it deserves a straight answer rather than a runaround.
Here’s the honest truth: the final number is not a single figure you can look up on a chart. It’s the sum of several variables — liner material, chimney height and condition, installation complexity, necessary repairs, and local permitting. A typical professional installation of a stainless steel liner for a single-story home runs $2,500 to $7,000, but complex projects can push well past $10,000. This guide walks through every factor so you can understand what drives that range, budget realistically, and ask the right questions when you sit down with a contractor.
More importantly, this guide will help you understand why a chimney liner matters in the first place — because it’s not a cosmetic upgrade or an upsell. It is a critical safety component, and treating it like one is the only approach worth taking.
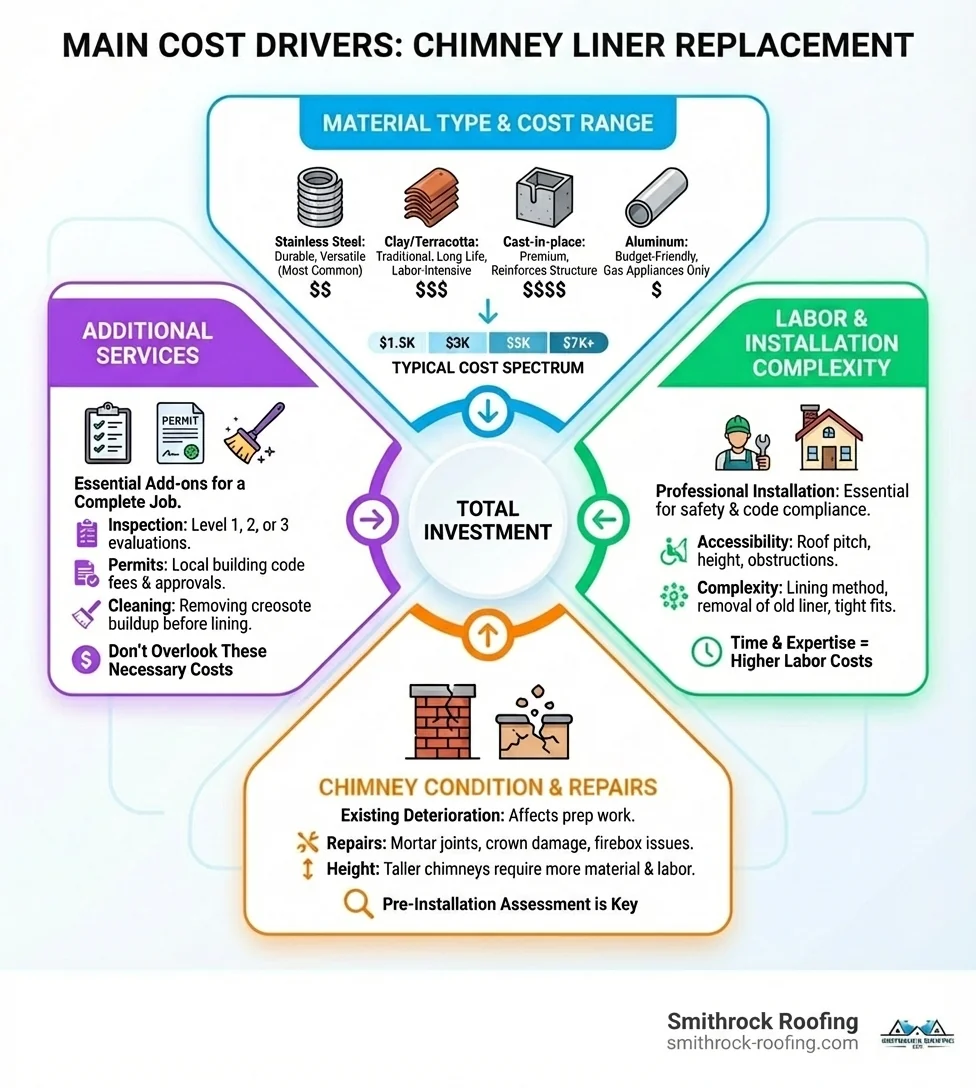
Before diving into the details, here is a quick-reference summary of what homeowners typically pay for chimney liner work. These figures reflect the full range of real-world projects — from a straightforward single-story reline to a complex multi-story restoration with masonry repairs included.
| Project Type | Typical Cost Range |
|---|---|
| Stainless steel liner — single story, standard install | $2,500 – $5,000 |
| Stainless steel liner — two story or complex layout | $4,000 – $7,000+ |
| Cast-in-place liner — full restoration | $5,000 – $10,000+ |
| Aluminum liner — qualifying gas appliances only | $500 – $2,000 |
| Clay tile sealant repair (HeatShield® type) | $1,500 – $5,000 |
| Pre-install inspection + cleaning | $350 – $950 |
| Associated masonry repairs (crown, tuckpointing) | $200 – $3,000+ |
These ranges represent the cost to reline a chimney from start to finish — meaning materials, labor, and the preparatory steps that make the installation safe and code-compliant. Sections below break down every component in detail so you understand exactly what moves a project toward the low end or the high end of that range.
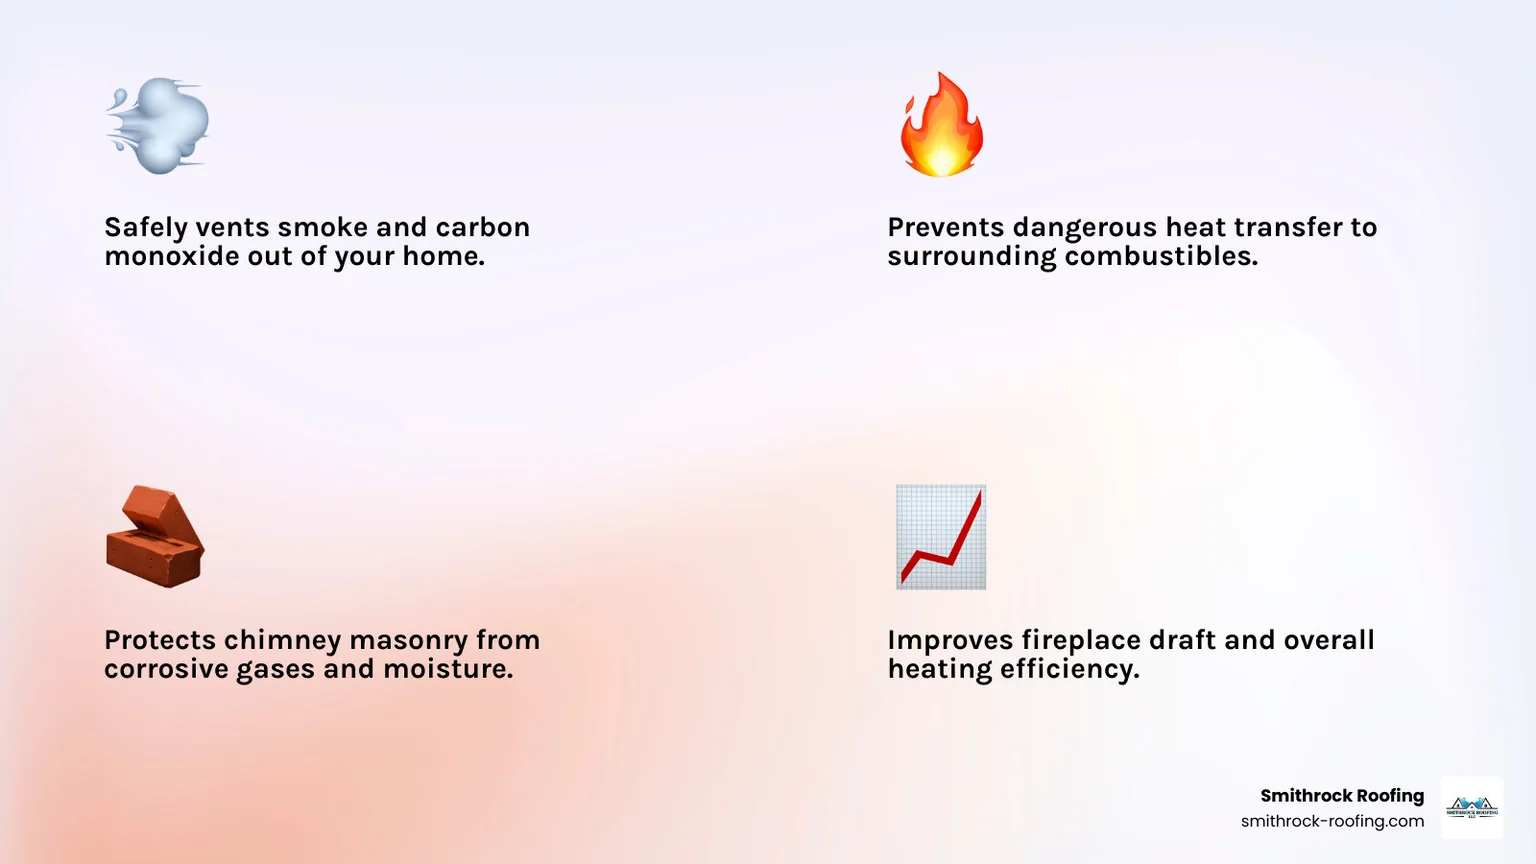
A chimney liner, sometimes called a flue liner, is a conduit installed inside your masonry chimney that contains the byproducts of combustion — heat, smoke, and gases — and channels them safely out of your home. That description sounds simple enough, but the job it performs is anything but minor.
When your fireplace or appliance is running, flue temperatures can exceed 1,100°F. Without a properly functioning liner, that heat transfers directly to the combustible materials surrounding your chimney — wood framing, drywall, insulation — raising the risk of a slow-building fire inside your walls. A liner contains that heat and keeps it moving upward and out.
Carbon monoxide is the second major threat. CO is odorless, colorless, and deadly. Old masonry chimneys — even ones that look solid on the outside — develop cracks and porous mortar joints over time. Without a continuous, sealed liner, CO can seep through those gaps and accumulate in your living spaces long before any alarm sounds. A sound liner creates the sealed passage that keeps those gases moving in one direction: out.
There’s a third function that often goes underappreciated: masonry protection. The gases produced by burning wood, oil, or gas are highly acidic and corrosive. Without a liner, they attack your chimney’s bricks and mortar from the inside, causing accelerating deterioration — crumbling mortar, spalling brick, and eventually structural instability. A liner shields the masonry and dramatically extends the life of the entire chimney structure.
Finally, a correctly sized, smooth-walled liner improves draft. Better draft means your appliance burns fuel more completely, smoke exits cleanly, and flammable creosote has less opportunity to accumulate on cooler chimney walls.
Because these safety benefits are so well established, the National Fire Protection Association’s NFPA 211 standard — adopted as code by most local jurisdictions — mandates liners for all new construction and most new appliance installations. The Chimney Safety Institute of America (CSIA) considers a properly installed and maintained liner a fundamental requirement, not an optional upgrade. Local codes in the Winston-Salem, Greensboro, and High Point areas follow suit.
Some liner problems announce themselves clearly. Others hide until a professional camera goes into the flue. Common signs that something is wrong include:
The most definitive diagnosis comes from a Level 2 inspection — a professional video camera scan of the full interior length of the flue. Without that internal view, critical damage can go undetected and unaddressed.
Understanding what happens during a chimney liner replacement helps homeowners know what they’re paying for and what questions to ask. The process is more involved than simply dropping a new liner into an old chimney — and the steps that come before and after the liner itself go in are just as important as the liner material you choose.
No reputable contractor skips this step. A Level 2 inspection uses a video camera to scan the full interior length of the flue, revealing cracks, displaced mortar joints, corrosion, blockages, and structural damage that are completely invisible from the firebox or the chimney crown. The findings determine whether you need a full liner replacement, a targeted repair, or something more extensive like a cast-in-place restoration. They also identify any masonry or structural issues that must be resolved before a new liner can be safely installed.
A thorough professional sweep removes creosote, soot, and debris from the flue before any liner work begins. A clean interior gives the inspector an accurate camera view, ensures a proper liner fit, and eliminates fire hazards during installation. For wood-burning chimneys, this step is never optional.
If the inspection reveals crown damage, deteriorated mortar, or failed flashing, those issues are addressed before the liner goes in. Installing a new liner inside a structurally compromised chimney is counterproductive — water intrusion and masonry movement will shorten the new liner’s life and can create safety hazards down the road.
If the existing liner is a failed stainless steel system, removal is relatively straightforward. Clay tile removal is a different story — tiles must be extracted piece by piece from inside the flue, a labor-intensive process that adds meaningful time and cost to the project. This is why clay tile removal is always listed as a separate line item in a transparent estimate.
Liner diameter is not a guess. It is calculated based on NFPA 211 standards, the specific appliance being vented, the appliance’s BTU output, and the chimney’s height and configuration. Getting this right is critical — an oversized liner causes rapid creosote buildup, and an undersized one restricts draft and risks CO spillage into the living space. A qualified professional handles this calculation as a matter of course.
The new liner is lowered into the flue from the chimney top, connected to the appliance at the base, and secured at the top with a top plate and storm collar. For wood-burning systems, insulation is added around the liner before it goes in — either as a ceramic fiber blanket wrap or a poured fill in the annular space. Every connection point is sealed with approved high-temperature sealant. The chimney cap is installed last, covering the liner termination and protecting the entire system from rain, animals, and debris.
Most municipalities require a building permit for chimney liner work and a follow-up inspection by a local official to confirm code compliance. A contractor who pulls permits on your behalf and schedules the inspection is doing the job correctly. One who suggests skipping the permit to save money is a contractor worth walking away from.
The liner material you choose is the single largest driver of your total project cost. Each option has a different price point, lifespan, and range of appropriate applications. Choosing the wrong material for your fuel type isn’t just an efficiency issue — it’s a safety one. Here’s what you need to know about each option.
Stainless steel is the most popular and versatile choice for relining existing chimneys. It’s suitable for wood, gas, and oil-burning appliances, available in configurations that fit virtually any chimney geometry, and — when properly installed and maintained — among the most durable options available.
There are two main forms:
Alloy selection matters significantly for both performance and longevity. 304 stainless steel is a quality alloy appropriate for gas appliances or occasional wood-burning use. 316Ti stainless steel — which contains titanium and molybdenum — offers superior resistance to the corrosive acids produced by burning wood and coal, and is the required grade for those fuels. It’s also the recommended choice for any wood-burning application where maximum longevity is the goal. Many high-quality 316Ti liners come with a lifetime warranty from the manufacturer when installed by a certified professional.
Liner thickness, typically ranging from .005 to .006 inches, also affects durability and cost — thicker walls hold up better over time and resist puncture during installation.
For more on keeping your chimney system in peak condition, visit our Chimney Services page.
Because stainless steel is by far the most common choice for chimney relining, it’s worth understanding how the per-foot cost builds up across a real project. The liner material itself — whether flexible 304 or 316Ti — runs approximately $20 to $70 per linear foot depending on alloy, diameter, and wall thickness. Add ceramic fiber insulation blanket wrap at $15 to $30 per foot, and you are looking at a combined material cost of roughly $35 to $100 per foot before labor, accessories, or prep work are factored in.
A 20-foot chimney, which is typical for a two-story home, could therefore carry $700 to $2,000 in liner and insulation materials alone. Labor, the top plate and storm collar, the chimney cap, and any required repairs are added on top of that figure. This is why the complete installed cost — not the raw material price — is the number that matters when comparing contractor quotes.

Clay tile liners have been standard in masonry chimneys for over a century. When a chimney is built from scratch with clay tile liners stacked in place — each section carefully mortared — the material cost is modest. The tiles themselves run approximately $10 – $20 per tile section, and the potential lifespan, assuming sound installation and no chimney fires, is up to 50 years.
The problem is that clay is brittle. Thermal shock — the rapid temperature change that occurs during a chimney fire — can crack or shatter tiles entirely. Even gradual house settling over decades can cause tiles to shift and crack. Once that happens, repair is difficult and expensive. Specialized cast-in-place sealant systems like HeatShield® can address minor, isolated cracks in an otherwise structurally sound flue, but they can’t fix missing or shattered tiles. And because clay tiles cannot be inserted into an existing chimney from the top, relining a damaged clay flue almost always means either applying a sealant system, switching to stainless steel, or opting for a cast-in-place liner.
Cast-in-place liners are created by pumping a specialized, lightweight cement-like slurry into the chimney around a temporary inflatable form. When the form is removed after curing, what remains is a seamless, smooth, round flue that conforms perfectly to the chimney’s interior — gaps, irregularities, and all. That seamless adhesion is also what makes this method exceptional for structurally compromised chimneys: the poured liner bonds to the inside of the masonry, reinforcing the entire chimney structure rather than simply lining it.
The result is highly durable, resistant to both corrosion and extreme heat, and suitable for all fuel types. It’s also considered a permanent solution — cast-in-place liners can last 50 years or more. For historic chimneys or those with severe structural deterioration, no other method provides the same combination of structural reinforcement and long-term performance.
The trade-off is cost. Specialized materials, inflatable forms, trained crews, and a mandatory curing period make this the most expensive liner option by a significant margin.
Aluminum liners are the most budget-friendly metal option, but their application is narrow and their limitations are real. Aluminum cannot tolerate the high temperatures produced by wood, coal, or oil-burning appliances — using one for those fuels is a serious fire hazard and a code violation. They are suitable only for certain mid-efficiency (Category I) gas furnaces and water heaters that produce low-temperature, low-moisture flue gases.
Even within that limited window, aluminum corrodes relatively quickly. Modern high-efficiency condensing gas appliances, for example, produce acidic condensation that will destroy an aluminum liner in short order. If your appliance qualifies, aluminum is a legitimate option — but it should never be the default choice simply because it’s inexpensive.
Flue liner replacement becomes necessary when the liner has deteriorated beyond the point where a repair can restore safe, code-compliant function. This is not always a judgment call homeowners can make from the firebox opening — it requires a professional inspection with a camera in the flue. That said, there are circumstances where full replacement is almost always the appropriate path rather than an attempt to extend the liner’s life with a sealant or patch.
The distinction between repair and replacement matters for your budget. A targeted sealant repair on an otherwise sound clay flue can be a cost-effective solution — but it can also approach the cost of a full stainless steel reline when the damage is extensive. Getting an honest assessment from a qualified professional is the only reliable way to know which path makes sense for your specific chimney.
Beyond material, several variables shape the final number. Understanding them helps you evaluate any contractor’s estimate with confidence.
The physics are straightforward: more chimney means more material and more labor. A 35-foot, two-story chimney can cost nearly double that of a 15-foot single-story chimney. Diameter matters too — wider flues require more liner material and more insulation to fill the gap between a round liner and a square or rectangular tile flue.
Flue shape is a factor that many homeowners don’t anticipate. Most liners are round, because a circular cross-section produces the best draft. Traditional masonry chimneys, however, were built with square or rectangular flues. Installing a round liner inside a square tile flue creates a void that must be filled with insulation — either a blanket wrap or a poured mix — both for safety and code compliance. That insulation is an added material and labor cost, but it’s not optional.
Offsets and bends in the flue path add further complexity. A flexible stainless liner can navigate bends that a rigid liner cannot, but threading a flexible liner through a chimney with multiple offsets takes more time and skill — and that shows up in the labor cost.
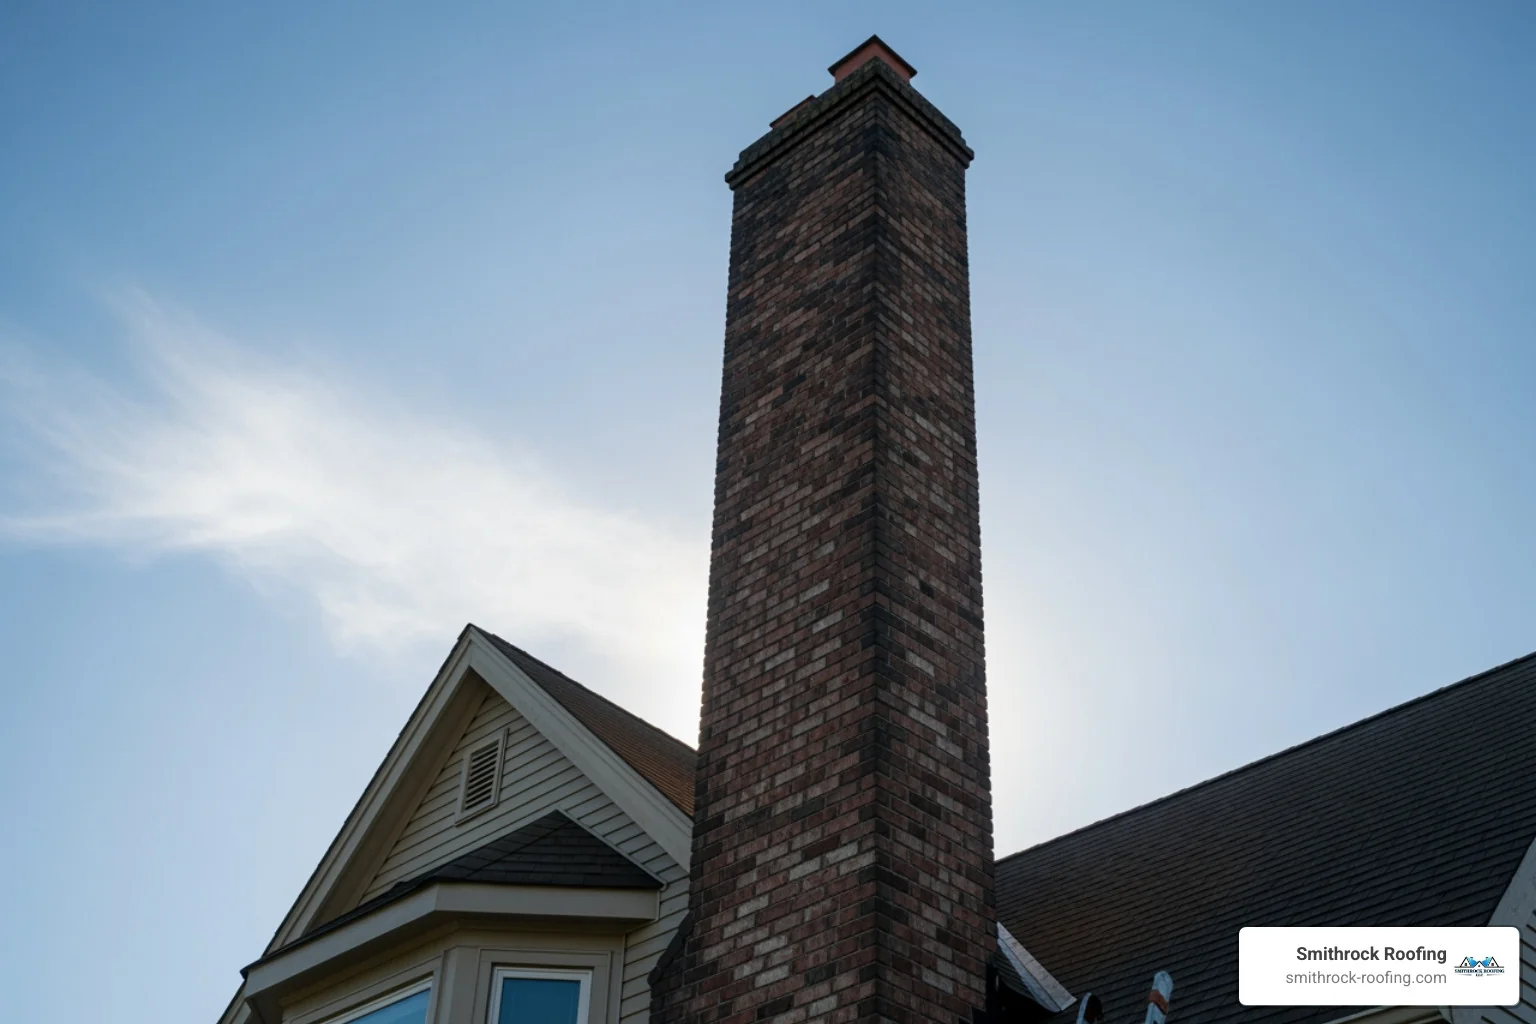
A chimney in good structural shape is ready for a new liner with minimal prep. A chimney that has been neglected, subjected to a chimney fire, or left to weather without proper maintenance is a different story — and a more expensive one.
Pre-existing damage has to be addressed before a new liner goes in. That can include tuckpointing deteriorated mortar joints, rebuilding sections of the stack, repairing or replacing a damaged chimney crown, or dealing with third-degree glazed creosote that requires specialized chemical treatments to remove. Each of these is a separate line item from the liner installation itself, but none of them can be skipped if the goal is a safe, lasting result. Our Roof Repair Services page covers related structural work we handle across the exterior of your home.
Old liner removal also adds cost. Removing a failed stainless steel liner is relatively straightforward. Breaking out old clay tiles, however, is labor-intensive and messy — tiles must be extracted piece by piece from inside the flue, often from both the top and bottom. Depending on chimney height and damage extent, clay tile removal alone can add $500 to $2,500 or more to the labor total.
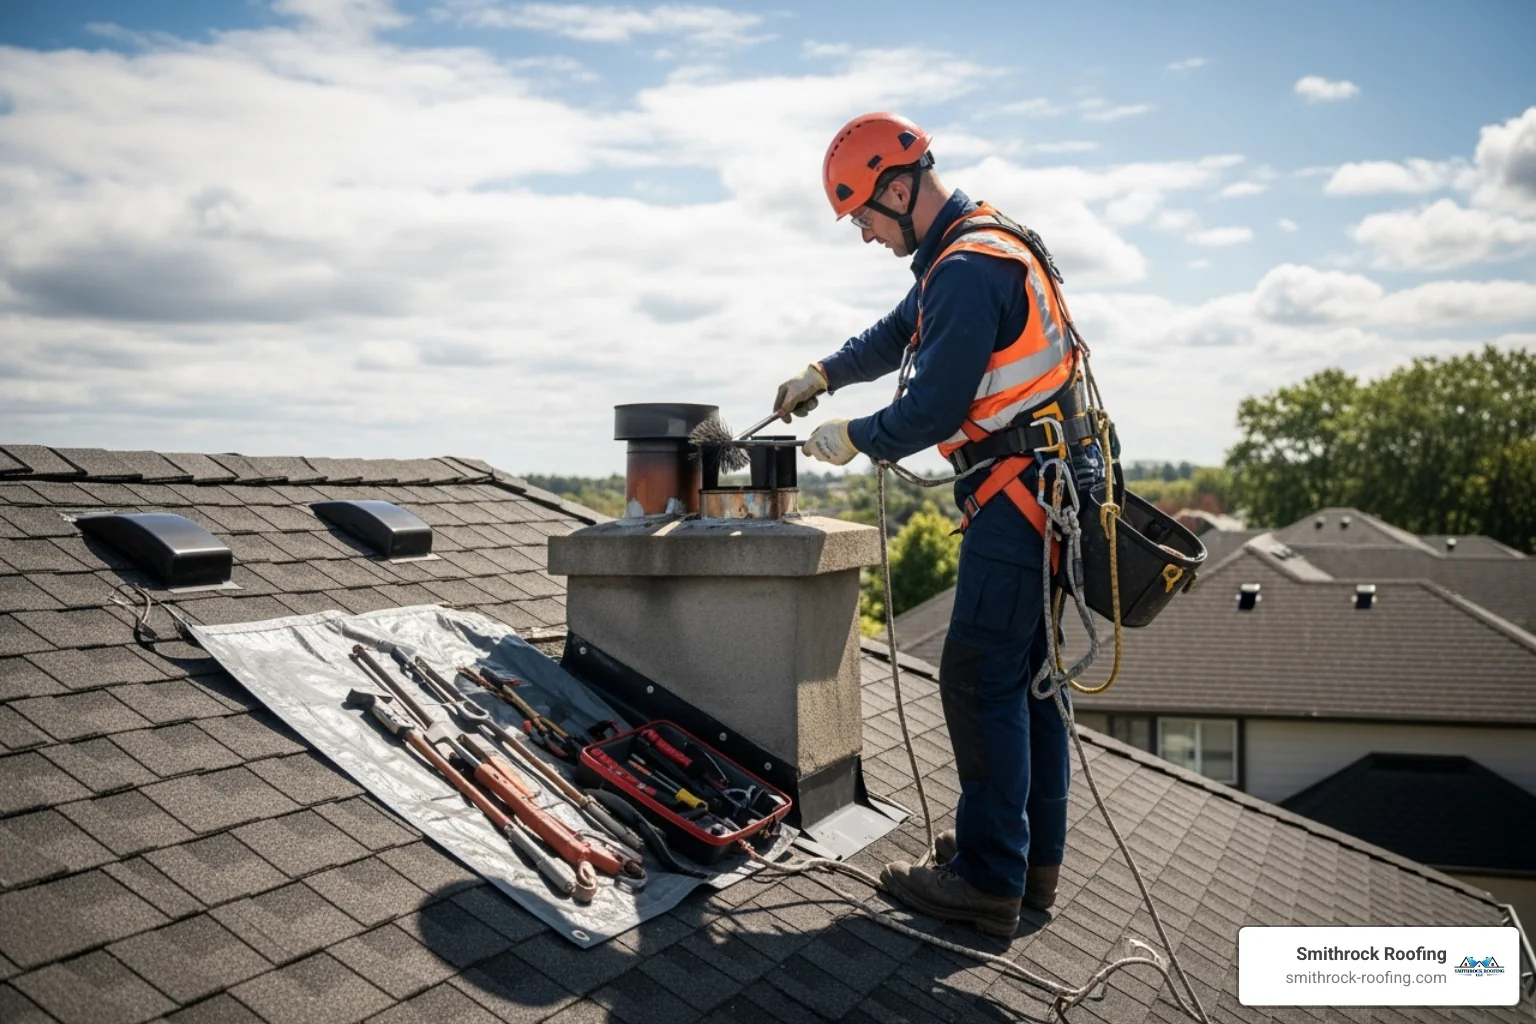
Labor typically accounts for $1,000 to $3,000+ of the total project cost and is influenced by everything from crew size and installation time to the physical characteristics of the roof itself.
Roof pitch is a real factor. A low-slope, single-story roof is relatively manageable. A steep 12/12 pitch — or a tall chimney on a multi-story home — requires safety harnesses, roof jacks, and potentially scaffolding or a man lift. That equipment costs money, and the extra care required for safe operation takes additional time. Both are legitimate costs that a reputable contractor will include transparently in the estimate.
Multiple appliances sharing one chimney also increase complexity. Venting a furnace and a water heater into a single flue, for example, requires additional connections, fittings, and careful sealing to ensure each appliance drafts properly without interference. This adds both material and labor costs — and in some cases, a professional may recommend separate venting for safety and code compliance.
A liner installation doesn’t happen in isolation. Several related services are either required before the liner goes in or are essential companions to it. Budgeting for these upfront prevents surprises on the final invoice.
Before any liner work begins, three preparatory steps are standard — and each has a cost:
Insulating a new stainless steel liner is highly recommended for wood-burning systems and is often required by code. The benefits are substantial enough that skipping it to save money is a false economy:
Insulation comes in two common forms. Ceramic fiber blankets are wrapped around flexible liners before installation, adding approximately $15 – $30 per foot. A poured vermiculite or perlite mix fills the annular space around a rigid liner, adding approximately $20 – $40 per foot. Either way, the added cost is modest relative to the safety and performance return.
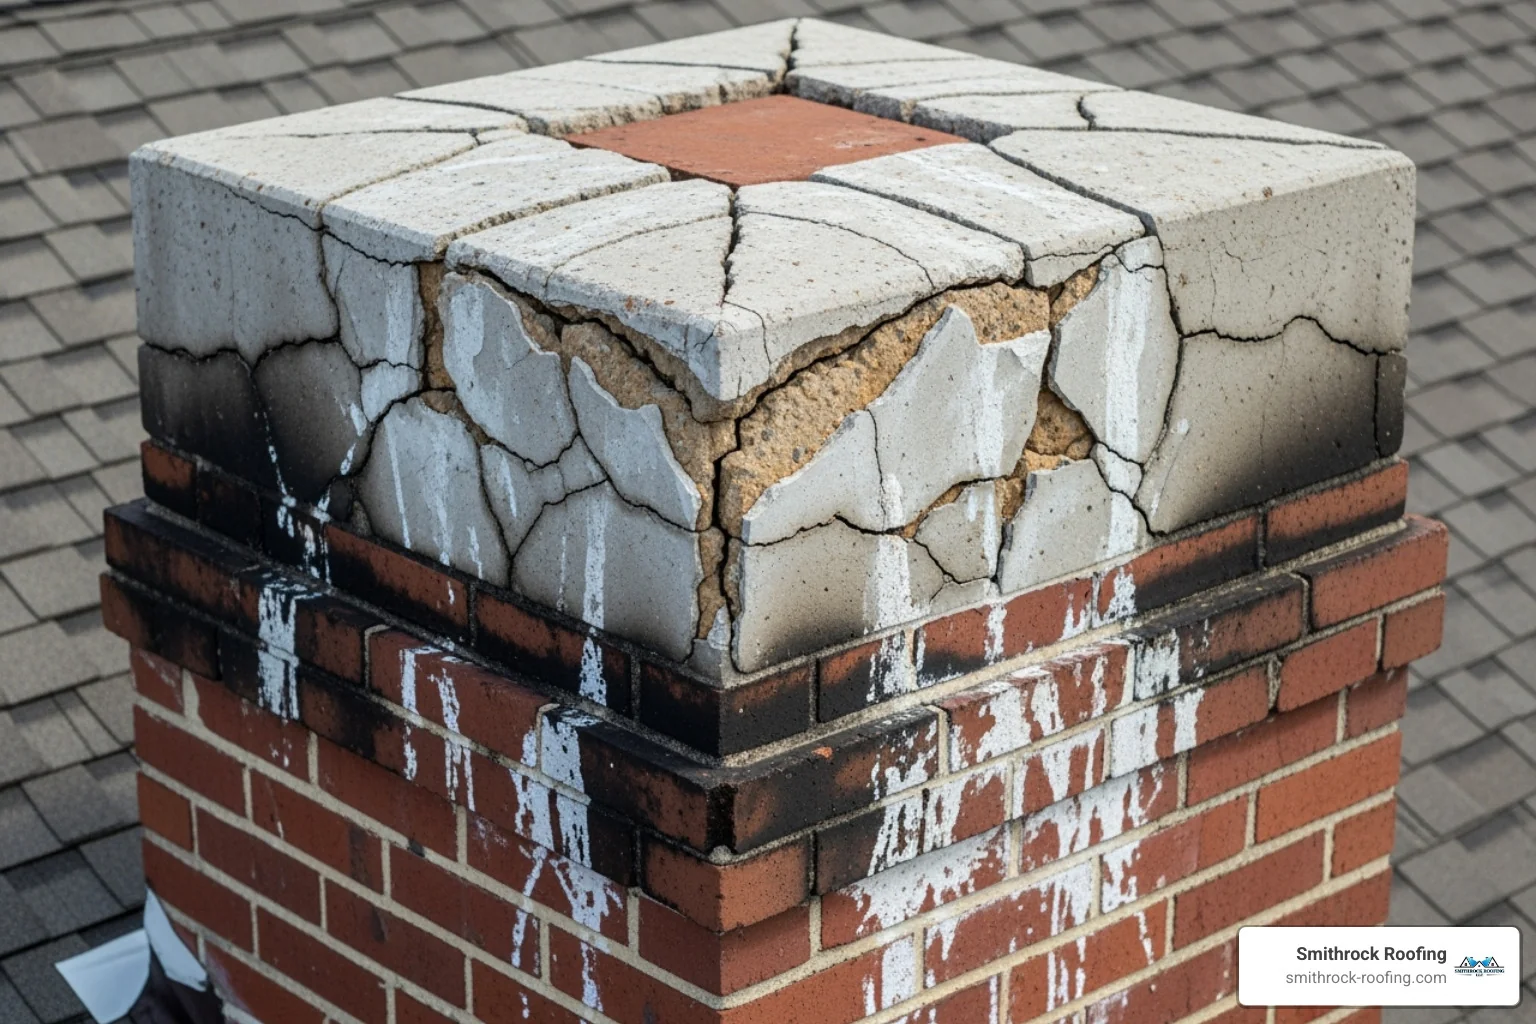
The pre-lining inspection often reveals other issues that need to be addressed to ensure the system is complete, watertight, and safe. Common associated repairs include:
The most common question homeowners ask after a failed inspection is a simple one: how much does it cost to reline a chimney? The honest answer is that chimney relining cost varies based on the same factors covered throughout this guide — but here is how those pieces add up in a realistic project scenario.
Consider a straightforward chimney relining project on a single-story home in the NC Triad: a 20-foot flexible 316Ti stainless steel liner with ceramic fiber insulation, a new stainless steel chimney cap, a pre-installation Level 2 inspection and sweep, and a local building permit. At the material and labor ranges described in this guide, that project could reasonably fall between $3,000 and $5,500 in total.
Now add the variables that push the average cost to reline a chimney higher:
When those variables stack up, the total cost to reline a chimney on a complex project can reach $7,000 or more without anything unusual going wrong. That range reflects real-world relining costs — not padding or upselling. It reflects the scope of work required to do the job safely and correctly the first time.
The average cost to reline a chimney most homeowners encounter — when the project is a standard stainless steel reline on a typical residential chimney in sound structural condition — sits somewhere between $2,500 and $5,500. Projects with complicating factors push toward the higher end of the full range. A professional assessment is the only reliable way to know where your specific project will land.
When the project estimate lands in the $3,000–$7,000 range, the appeal of a DIY liner kit is understandable. Those kits are available online for $500 to $1,500, and the upfront math seems to favor the DIY route. But chimney liner installation is one of those jobs where the gap between what looks manageable and what can go dangerously wrong is genuinely serious. Here’s an honest breakdown of both sides.
The kit price doesn’t capture the full picture. You’ll also need specialized tools — heavy-duty snips, pop rivet tools, grinders, high-temperature sealant, and proper safety equipment for roof work including harnesses and anchors. A one-time purchase or rental for all of these adds up quickly. Beyond tools and materials, the risks of an improper installation are significant:
Hiring a certified chimney professional costs more upfront, but here’s what that cost covers:
When evaluating contractors, look for technicians certified by the Chimney Safety Institute of America (CSIA) or the National Fireplace Institute (NFI). You can find a certified professional through the NFI to verify credentials before you commit.
Lifespan depends heavily on material, installation quality, fuel type, and maintenance. The table below summarizes typical expectations:
| Liner Material | Typical Lifespan |
|---|---|
| Aluminum | 5 – 15 years |
| Stainless Steel (304) | 15 – 25+ years |
| Stainless Steel (316Ti) | 25+ years; often lifetime warranty |
| Clay / Terracotta | Up to 50 years (if no thermal shock) |
| Cast-in-Place | 50+ years; considered permanent |
| Ceramic Sealant Systems | 10 – 50 years |
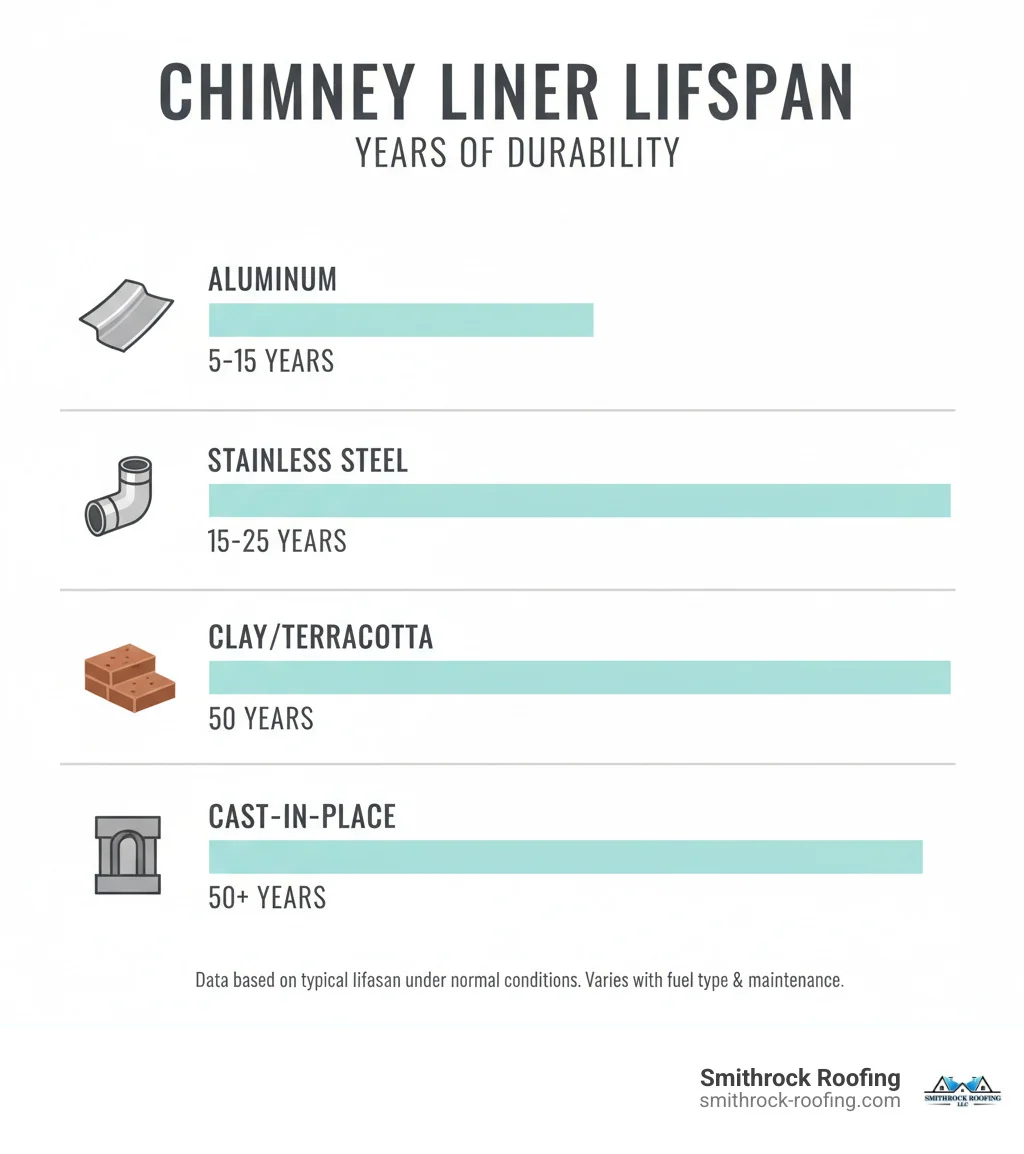
Regardless of the material in your chimney, annual professional inspections and cleanings are the single most important thing you can do to get the full life out of your liner. For wood-burning systems, this is non-negotiable — creosote buildup is both a fire hazard and an accelerant for liner deterioration. Annual maintenance typically costs $150 – $350 and is a small price relative to the investment it protects.
In most situations, yes. The NFPA 211 standard — the national benchmark for chimney and venting safety — is adopted as law by most local building codes across the country, including in the Winston-Salem and Piedmont Triad area. It mandates that chimneys venting solid-fuel and oil appliances have a properly installed liner. New chimney construction, new appliance installations (like a wood stove or gas insert), and relining after fire damage or inspection findings all typically require a compliant liner under local code.
Some older chimneys may be technically grandfathered if they haven’t been touched — but grandfathering doesn’t mean safe. Safety organizations universally recommend that all chimneys venting combustion byproducts be lined, and your homeowner’s insurance policy may independently require it. An insurance claim for a chimney fire traced to a faulty or absent liner can be denied, regardless of local code status.
Some signs are visible to the homeowner: clay tile fragments falling into the firebox, smoke rolling back into the room, unusual odors from the fireplace when it’s not in use, or accelerating creosote buildup between cleanings. Other warning signs are subtler — wallpaper discoloration or peeling on walls adjacent to the chimney, for instance, can indicate heat or moisture transferring through a compromised flue.
The definitive answer requires a Level 2 professional inspection with a video camera scan of the interior flue. Many serious liner problems — cracks, displaced joints, corrosion — are simply not visible from the firebox opening or the chimney top. A camera gives your technician a complete picture of the liner’s condition and determines whether repair or full replacement is the appropriate path.
Repair is sometimes viable, but it depends entirely on the liner material and the extent of the damage.
For clay tile liners, minor and isolated cracks in an otherwise structurally sound flue can sometimes be addressed using a cast-in-place ceramic sealant system — HeatShield® is a well-known option — which coats the flue interior and seals gaps. This can extend a liner’s functional life if the tiles themselves are intact and the underlying structure is stable. However, this approach cannot fix shattered or missing tiles, and it won’t hold if the chimney structure is actively shifting. In those cases, full replacement is the only safe path. Note that the cost of a sealant repair can sometimes approach the cost of a stainless steel reline, so it’s worth evaluating both options.
For stainless steel liners, significant corrosion, seam separation, or holes from mechanical damage or a chimney fire warrant full replacement. Patching metal liners is not an approved repair method — it doesn’t restore the liner’s structural integrity and creates uneven interior surfaces that accelerate creosote accumulation. A professional Level 2 inspection is the only reliable way to determine whether repair is a viable, safe long-term option or whether replacement is the right call.
Relining a chimney means installing a new liner system inside the existing masonry structure — the chimney itself stays in place. That is what most homeowners need, and it is far less expensive than tearing down and rebuilding a chimney from scratch. A standard stainless steel reline typically runs $2,500 to $7,000 for most residential chimneys. Full chimney reconstruction, by contrast, can run tens of thousands of dollars depending on the chimney’s height and complexity. Relining is nearly always the right approach unless the masonry structure itself is beyond repair.
The flue is the internal channel that the liner occupies — so relining the flue and relining the chimney are effectively the same project. The cost to reline a chimney flue is determined by the liner material chosen, the length and diameter of the flue, the accessibility of the chimney, and any prep work required before installation. For a stainless steel liner on a standard residential chimney, the all-in cost — liner, insulation, top plate, cap, inspection, cleaning, and permit — typically falls between $2,500 and $5,500. More complex chimneys with structural issues push that number higher.
A professional quote should be an itemized document — not a single number with no explanation behind it. Transparent, written estimates should clearly identify each of the following components where applicable:
If a quote is just a bottom-line number without line items, ask for a written breakdown before signing anything. A contractor confident in their pricing is always willing to show the work.
A straightforward stainless steel liner replacement on a single-story chimney in good condition is typically completed in one day. Projects that involve clay tile removal, extensive masonry repairs, cast-in-place liner installation (which requires a curing period), or difficult roof access may run two or more days. The pre-installation inspection and any required permitting add time before installation begins but do not affect the installation day itself.
Every chimney liner — regardless of material — needs annual professional attention to remain safe and functional. For wood-burning systems, that means a thorough sweep to remove creosote and soot, combined with at minimum a Level 1 inspection of all accessible components. Creosote is highly flammable, and even a moderate accumulation can ignite during normal use. This isn’t a step to skip to save money.
For gas or oil appliances, an annual inspection is still critical — it checks for blockages like animal nests or debris, confirms that connections and seals are intact, and catches corrosion early before it becomes a liner-ending problem. Routine annual maintenance typically costs $150 – $350 and is the most cost-effective investment you can make in the longevity of your liner and the safety of your chimney system.
For wood-burning systems specifically, burning only well-seasoned hardwood makes a meaningful difference. Green or wet wood burns at lower temperatures, produces more smoke, and generates far more creosote than properly seasoned wood. It’s one of the simplest things a homeowner can control — and one of the most impactful for liner longevity.
Not every contractor who offers chimney liner installation has the training to do it correctly — and on a job where the consequences of error include house fires and carbon monoxide exposure, credentials matter. Here is what to look for when selecting a professional for your chimney relining project.
At Smithrock Roofing, we have earned more than 350 five-star reviews from homeowners across the NC Triad by prioritizing exactly this kind of honest, transparent service. Our approach has always been consultative — we tell you what we find and recommend what your home actually needs, without upselling work that isn’t necessary.
A chimney liner isn’t a feature you upgrade when you feel like it — it’s a fundamental safety system that protects your family from fire and carbon monoxide every time you use your fireplace or appliance. When it fails, the consequences can be severe. When it’s properly installed and maintained, it works quietly in the background for decades, doing exactly what it’s supposed to do.
The right starting point is always an honest assessment of what you’re actually dealing with. A video inspection tells you the condition of your existing liner, identifies any structural issues that need to be addressed, and gives a professional the information they need to recommend the right solution for your home and budget — whether that’s a stainless steel reline, a sealant repair, or a more extensive restoration. You don’t need to guess, and you shouldn’t have to.
At Smithrock Roofing, our team serves homeowners throughout Winston-Salem, King, High Point, Clemmons, Lewisville, Pilot Mountain, and communities across the NC Triad. We bring 60+ combined years of experience to every project, and our approach is always consultative — we’ll tell you what we find and what we recommend, without pressure to spend more than the situation requires.
Schedule your free in-home assessment today and get a clear, written quote for exactly what your chimney needs. No surprises, no runaround — just honest answers from a team that stands behind its work.
See also: Gutter Installation Cost: What Quotes Don’t Tell You
See also: Average Roof Replacement Cost: What You’ll Really Pay

Smithrock Roofing © Copyright 2026 • All Rights Reserved • Privacy Policy • Maintained by Mongoose Digital Marketing
