
Chimney chase cover installation is a critical home maintenance task that prevents thousands of dollars in water damage. If your prefabricated chimney’s protective cover is missing, rusted, or failing, you could face repair costs ranging from $1,500 to $10,000.
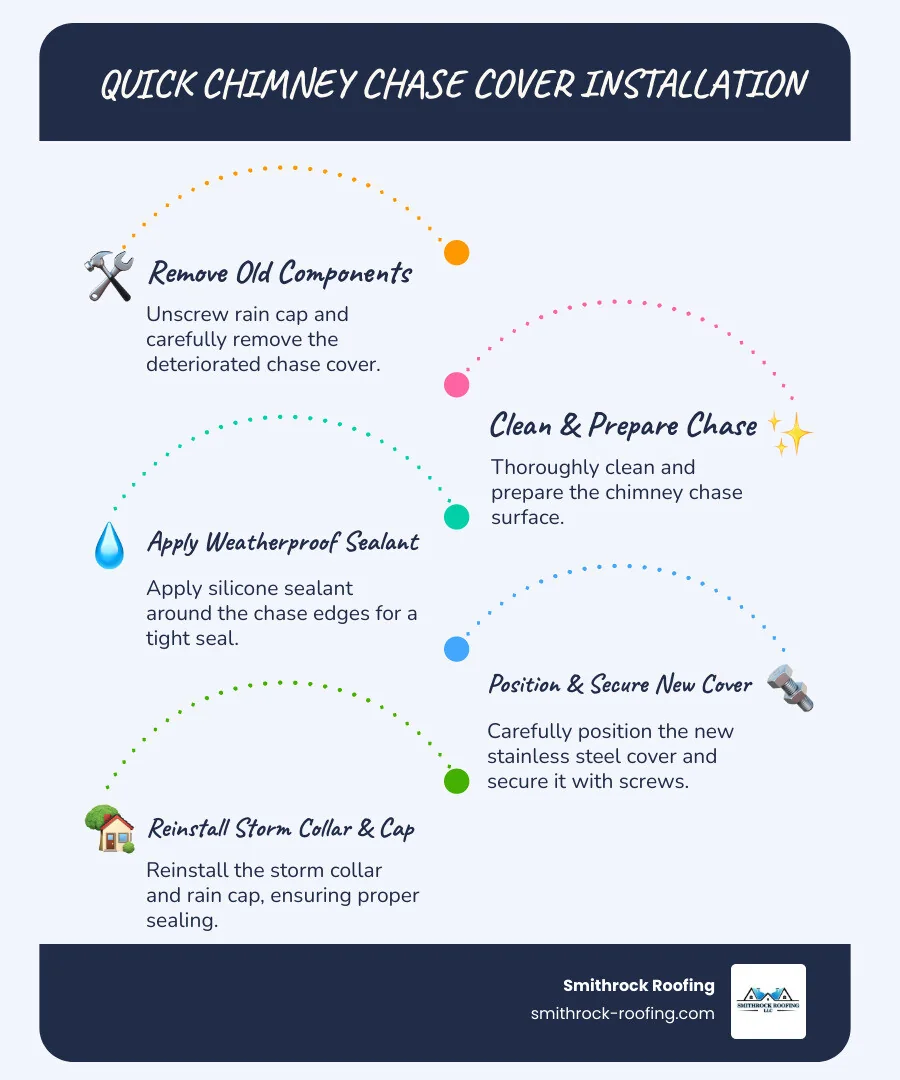
Quick Installation Overview:
Prefabricated chimneys, common in newer homes, rely on a metal pan called a chase cover to keep rain, snow, and debris out of the wooden chase structure. When this cover fails, water can infiltrate your attic, walls, and ceilings, leading to costly structural damage and mold growth. A damaged cover also allows animals like squirrels or birds to enter your chimney.
I’m Jordan Smith of Smithrock Roofing. With over 15 years in exterior construction, I’ve seen how a proper chimney chase cover installation prevents costly water damage. My team has helped countless homeowners protect their investment with quality materials and expert installation techniques.
This section will cover the fundamentals of chimney chase covers, why they are essential, and how to identify when yours is failing.
A prefabricated chimneythe factory-built metal type found on most newer houses, is built with a chase structure. This is a wooden box that encloses the metal flue pipes, and on top of it sits a metal pan called a chase cover. This cover is a crucial protective barrier against the elements.
The primary job of a chase cover is water prevention. Rain, snow, and ice can cause thousands of dollars in damage if they get into the chimney chase, seeping into your attic and walls. Beyond water, the cover serves other key functions:
For more detailed information about how we protect homes with professional chimney services, check out more info about our chimney services.
It’s common to confuse a chase cover with a chimney cap, but they serve different functions. Understanding the difference is key to proper maintenance.
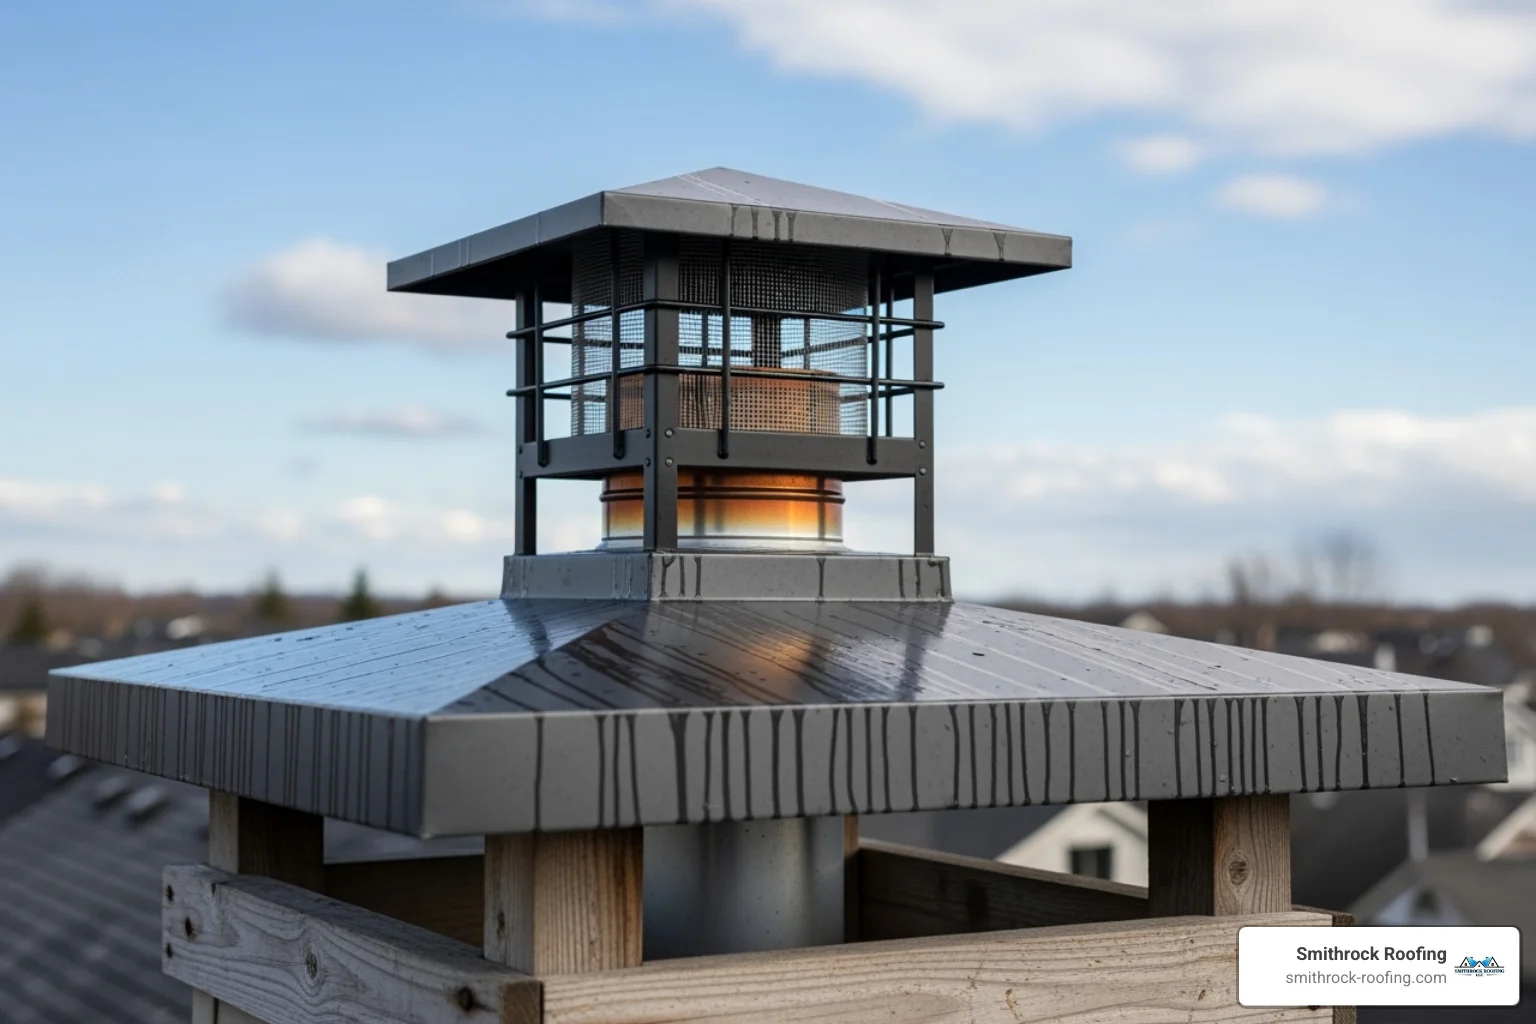
A chase cover is a metal pan that covers the entire top opening of the chimney chase. Its purpose is to protect the chase opening and the wooden structure below from weather.
A chimney cap is a smaller cover that sits directly on top of an individual flue pipe. Its job is to protect the flue opening by keeping rain and animals from going directly down the flue.
Masonry (brick) chimneys don’t have a chase cover; they use a concrete masonry crown to serve a similar purpose.
Chase covers and chimney caps work together for synergistic protection. The chase cover protects the overall structure, while the cap protects the flue pipe. You need both for a fully sealed chimney system.
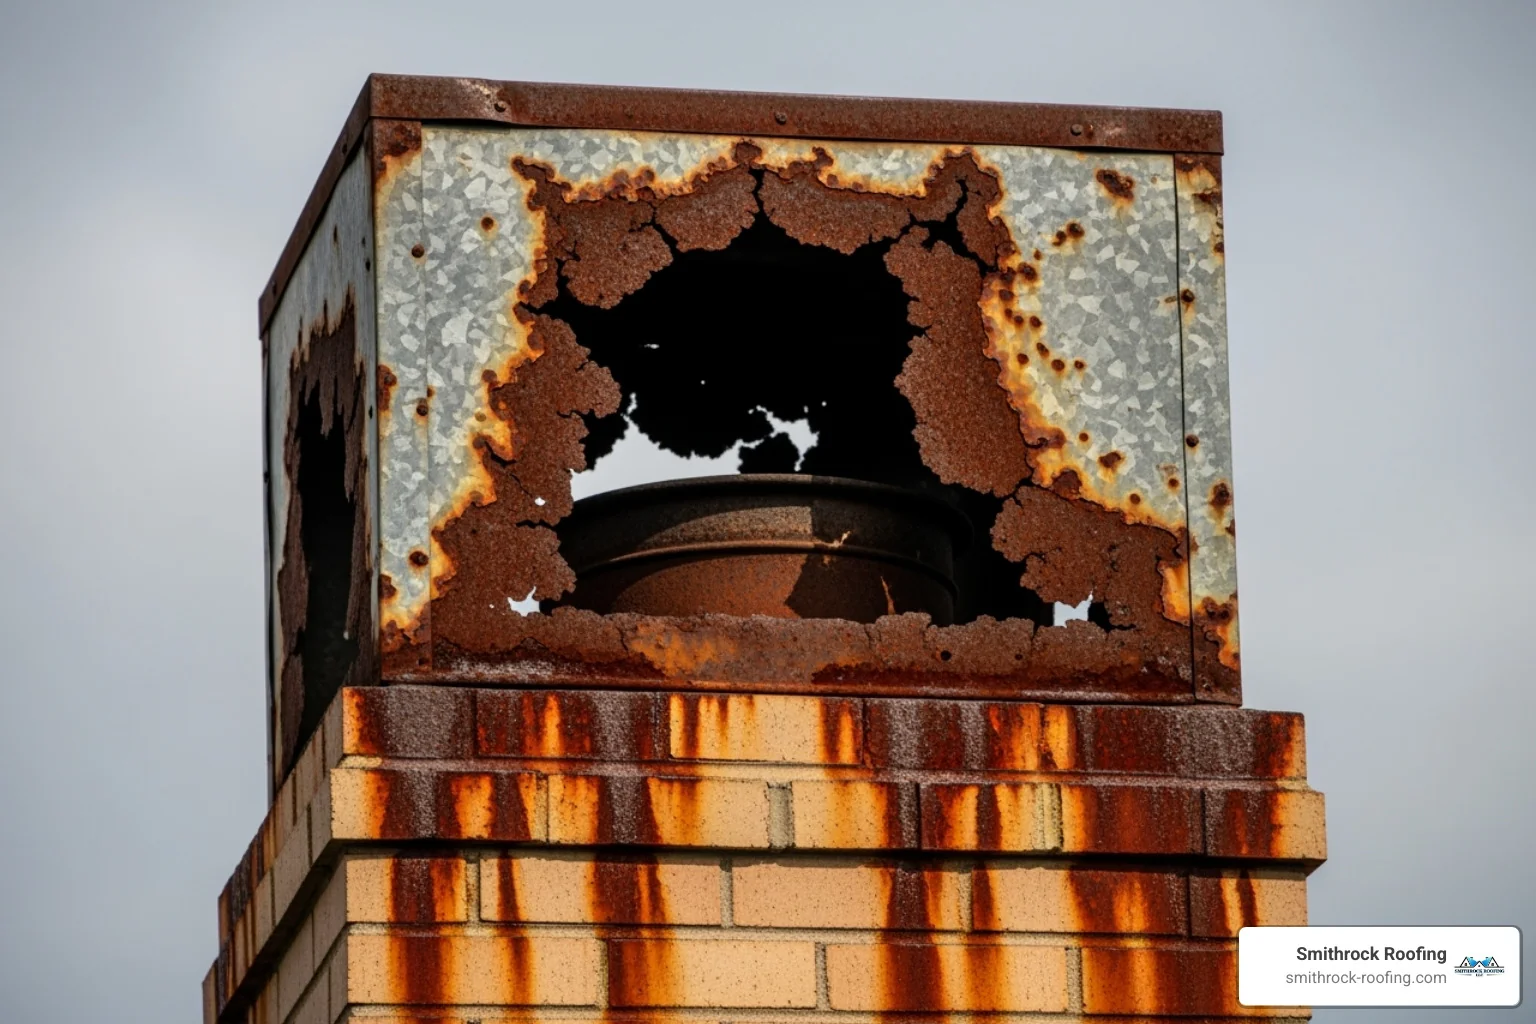
Since your chase cover is constantly exposed to the elements, it will eventually wear out. Catching the signs of failure early can save you from costly repairs.
If you see any of these signs, a new chimney chase cover installation is necessary to prevent expensive water damage.
Need a hand with this in Winston-Salem, Greensboro and the NC Triad? Call (336) 971-0464 or request a free estimate. Honest answers, no pressure.
For a durable chimney chase cover installationselecting quality materials is paramount. Choosing a cheaper material upfront often leads to costly replacements later. Likewise, gathering the right tools ensures the job is done safely and efficiently.
Need a local pro? Learn more about our chimney services in Winston-Salem.
The material you choose for your chase cover will dramatically impact its longevity and performance. Not all metals are created equal.
| Material | Lifespan | Rust Resistance | Cost | Aesthetics |
|---|---|---|---|---|
| Galvanized Steel | 5-10 years | Low | Low | Dull gray, prone to rust stains |
| Stainless Steel | 20+ years | High | Medium | Bright, modern, no rust stains |
| Copper | 50+ years | Very High | High | Develops a beautiful patina over time |
| Aluminum | 15-20 years | High | Low-Medium | Dull, can dent easily, less rigid |
Galvanized Steel is the cheapest option but has a short lifespan. Its protective coating wears off, leading to rust stains and leaks within a few years. It is often the material used in original construction and is the most common source of chase cover failure.
Stainless Steel is the best value for most homeowners. It’s highly durable, won’t rust, and maintains its clean appearance for decades, making it a long-term solution. Professional-grade covers are typically made from 22-gauge 304 stainless steel, which offers excellent durability against impacts and allows for precise fabrication.
Copper is a premium, long-lasting option that develops a beautiful green patina over time. Its high cost makes it less common, but it offers unparalleled longevity and aesthetic appeal.
Aluminum is rust-proof but less durable than stainless steel, as it dents more easily. For most applications, stainless steel provides the best balance of performance, longevity, and cost.
Accurate measurements are critical for a successful chimney chase cover installationas a custom cover must fit perfectly to prevent leaks. A cover that is even slightly off can create gaps for water to enter.
Follow these steps to measure for your new cover:
For a helpful visual, Take a look at this measuring guide.
Assembling all necessary tools and supplies beforehand ensures a smooth and safe installation process. There’s nothing worse than having to stop a rooftop project to retrieve a forgotten tool.
Essential Tools:
Essential Supplies:
This comprehensive guide will walk you through the entire chimney chase cover installation process, from safe preparation to the final seal.
Working on a roof is inherently dangerous and requires careful safety planning. Never rush a rooftop project.
For more tips on roof safety, see these Benefits of Regular Roof Inspections.
The first step is to remove the old, damaged components.
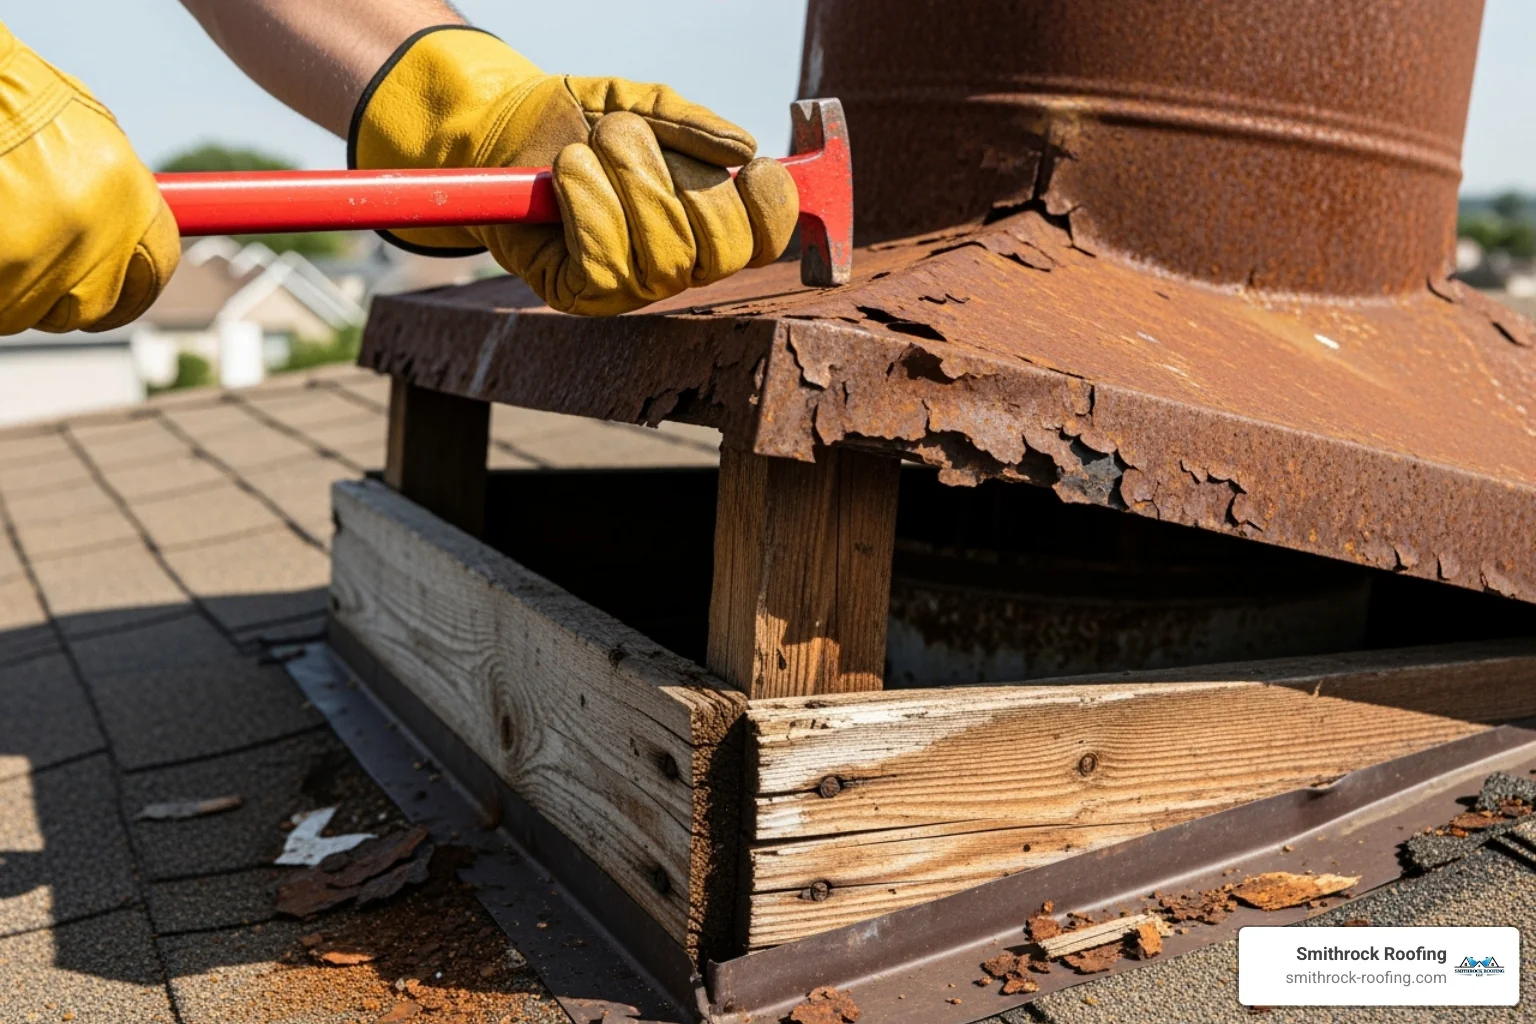
Proper preparation of the chase surface is key to a successful, watertight installation.
Now it’s time for the official installation. Precision here ensures a long-lasting, weatherproof seal.
For a helpful demonstration, Watch this installation video for a visual guide.
The final steps involve sealing the flue pipe opening to complete the weatherproofing.
Knowing when to replace your chimney chase cover is just as important as knowing how. Many homeowners put off a replacement until a leak becomes obvious inside the home, at which point the water damage has already set in. Replacing a chimney chase cover proactively, the moment you spot rust streaks, a loose fit, or visible deterioration, is almost always the smarter and less costly path.
Minor sealant failure around the edges of an otherwise intact cover can sometimes be addressed with fresh silicone. But in most cases where homeowners are asking whether they should repair or replace, the honest answer is replace. Here’s why:
If your cover was originally installed with galvanized steel, which is the case for most factory-built chimneys, replacing it with a 304 stainless steel unit is the upgrade that pays for itself over the long run.
When you hire a professional to replace your chimney chase cover, the process follows the same general steps outlined in this guide, but with added confidence that measurements are exact, the underlying chase structure is assessed for hidden damage, and the finished installation is properly sealed and secured.
At Smithrock Roofing, when we replace a chimney chase cover for homeowners across the NC Triad, we start by thoroughly inspecting the chase top for rot or deterioration before a single fastener goes in. We’re not just swapping a metal panel, we’re making sure the foundation it sits on is sound. A new cover installed over compromised wood will fail prematurely, and that’s a disservice to the homeowner.
The replacement process typically includes:
The result is a chimney that is fully protected and ready to weather whatever North Carolina throws at it, from summer thunderstorms to winter ice events.
Understanding the financial implications of a failing chase cover can truly highlight the value of this essential home maintenance project. Ignoring the problem can lead to a nightmare repair bill.
Ignoring a rusty, failing chase cover leads to significant and costly damage. Water infiltration is a silent destroyer that spreads through your home’s structure.
Repair costs from a failing chase cover typically range from $1,500 to $10,000. In cases of severe structural damage or mold, costs can be even higher. For more insights on preventing water damage, see our guide on roof leaks in Winston Salem and prevention tips for homeowners.
A proper chimney chase cover installation is a smart investment that provides significant long-term savings and benefits.
The return on investment is clear. Installing a lifetime warrantied chimney chase cover can save you $100 to $300 annually through prevented heat loss and avoided minor repairs. Over its lifespan, the cover more than pays for itself.
Here are answers to some of the most common questions we receive about chimney chase covers, based on years of helping homeowners protect their properties.
Annual inspection is recommendedideally during your routine roof maintenance or chimney cleaning. Make it part of your fall home maintenance checklist. During the inspection, look for rust, physical damage, or failing sealant around the edges and collars. Catching these issues early can prevent thousands of dollars in water damage.
If you’re not comfortable getting on a roof, a professional inspection is a worthwhile investment. A trained eye can spot problems that are not visible from the ground and address them before they become major issues.
Yes, you can paint a chase coverbut it’s often unnecessary for higher-quality materials. Stainless steel has a clean, modern finish that doesn’t require paint, and copper is typically left unpainted to allow its signature green patina to develop over time. Painting an old, galvanized steel cover can extend its life temporarily while you budget for a proper replacement.
If you do decide to paint, use a high-temperature paint designed for exterior metal. Proper surface preparation and application according to the manufacturer’s instructions are crucial for a durable, lasting finish.
DIY installation is possible for individuals with significant roofing experiencebut it is not a project for beginners. The work involves being on a roof at heights, which carries inherent risks. Safety is the primary concernand without the proper experience and safety equipment, the project can be dangerous.
Hiring a professional ensures a perfect, watertight seal. An experienced installer can identify underlying issues like wood rot that a DIYer might miss and will typically offer a warranty for their work. Considering the high cost of water damage from a failed installation, the price of professional installation is a worthwhile investment for guaranteed results and peace of mind.
For a professional crew, a straightforward chimney chase cover installation typically takes one to two hours once the correct cover is on hand. That includes removing the old cover, inspecting and preparing the chase surface, setting the new cover with sealant, and finishing with the storm collar and rain cap. If the underlying wood needs repair, the timeline extends accordingly. For a homeowner tackling it as a DIY project, plan for a half-day, especially if this is your first time on a roof or working with sheet metal.
Chase covers are almost always custom-ordered to the exact dimensions of your chimney chase. Standard off-the-shelf covers rarely fit properly, and an ill-fitting cover defeats the entire purpose of the installation. You’ll need to measure the outside length and width of the chase, the number of flue openings, and the center location and diameter of each flue pipe. The measuring steps outlined earlier in this guide walk through exactly how to capture those dimensions accurately.
The chimney chase pan, another common term for the chase cover, needs replacing when it can no longer reliably shed water away from the chase opening. The clearest warning signs are visible rust or rust stains streaking down your siding, physical holes or cracks in the metal, water pooling on top of the cover, or evidence of interior leaks near the chimney. If the cover is original to the home and made from galvanized steel, age alone is a strong indicator, most galvanized pans reach the end of their useful life within a decade. When in doubt, a professional inspection can give you a definitive answer.
A proper chimney chase cover installation is a crucial final step in protecting your home. This guide has shown how this single component is vital for preventing significant damage. Investing a few hundred dollars in a quality stainless steel cover can save you thousands in water damage repairs. It’s a one-time fix compared to the recurring replacement needed for cheaper galvanized steel.
Proper installation is just as important as the material. A perfect seal is necessary to ensure complete protection, which requires careful measurement, preparation, and application. A secure chimney contributes to a healthy home and provides peace of mind during storms. Knowing your home is protected is invaluable.
At Smithrock Roofing, we emphasize proactive maintenance. We offer high-quality products and recommend seasonal replacements to prevent emergencies and costly damage before they happen.
We serve homeowners in Winston-Salem NC, King NC, Clemmons NC, Lewisville NC, Pilot Mountain NC, East Bend NC, Mt. Airy NC, Kernersville NC, Siloam NC, Danbury NC, High Point NC, Trinity NC, Pfafftown NC, Tobaccoville NC, Greensboro NC, Walnut Cove NC, Belews Creek NC, Rural Hall NC, Pinnacle NC, Bethania NC, Advance NC, Wallburg NC, Horneytown NC, Union Cross NC, and Midway NC.
For expert assessment and professional installationour team at Smithrock Roofing ensures your home is protected from the top down. We get the job done right the first time with materials that will protect your home for decades. Contact us today to learn more about our chimney services.
Chimney chase cover installation is crucial to prevent water damage, debris accumulation, and animal intrusion into the chimney, which can lead to costly repairs ranging from $1,500 to $10,000.
The steps include removing the old rain cap and chase cover, cleaning the chimney chase, applying weatherproof silicone sealant, positioning the new stainless steel cover and securing it with screws, and reinstalling the storm collar and rain cap with proper sealing.
A failing chimney chase cover can lead to water infiltration causing structural damage and mold growth, blockage from debris, and animal intrusion into the chimney.
The primary function of a chimney chase cover is to prevent water from entering the chimney chase, which protects the structure from moisture-related damage, blocks debris, and prevents animals from entering.

Smithrock Roofing © Copyright 2026 • All Rights Reserved • Privacy Policy • Maintained by Mongoose Digital Marketing
