
A downspout that is visibly pulling away from the wall, leaking at a joint, or dumping water at the foundation tells you something is wrong. What it does not tell you automatically is whether you are looking at a quick repair, a section replacement, or a symptom of a larger system problem hiding upstream. Sorting that out comes down to two things: identifying the actual failure mode rather than just the symptom, and checking whether that failure is traveling in either direction along the run. Get those two things right and you will spend your time fixing the real problem instead of discovering a second one next season.
Most downspout problems fall into five categories: clogs, detached sections, leaking seams, crushed or deformed pipe, and poor discharge placement. The issue is that these categories are not always independent. A homeowner who sees water overflowing the gutter during a heavy rain might flush the downspout and find it drains fine under low pressure, then conclude the system is clear. What they may have missed is a crushed section mid-run that restricts flow only when water volume is high. Under a slow trickle from a hose, that restriction goes undetected.
Similarly, a leaking seam above a wall bracket can direct water behind the siding rather than down the outside of the pipe, and the only visible sign might be siding discoloration or interior wall moisture that appears weeks later. Treating downspout problems as a checklist of separate items, rather than as an interconnected system, is the reason many repairs have to be repeated.
Before you flush anything or reach for a sealant tube, inspect the entire run from the gutter outlet to the discharge point while conditions are dry. You are looking for:
This dry inspection gives you a baseline before water obscures what you are looking at. It also tells you whether you are dealing with one localized problem or a run that has seen general neglect.
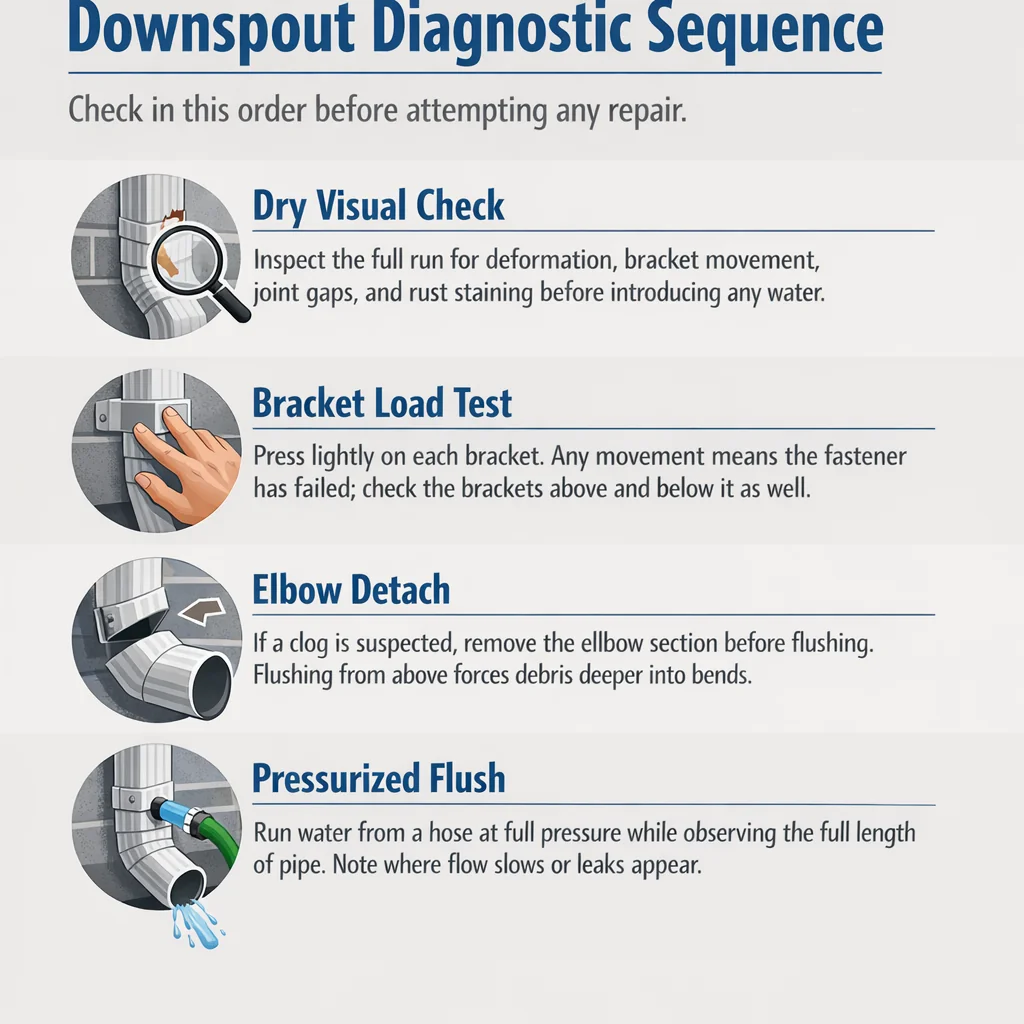
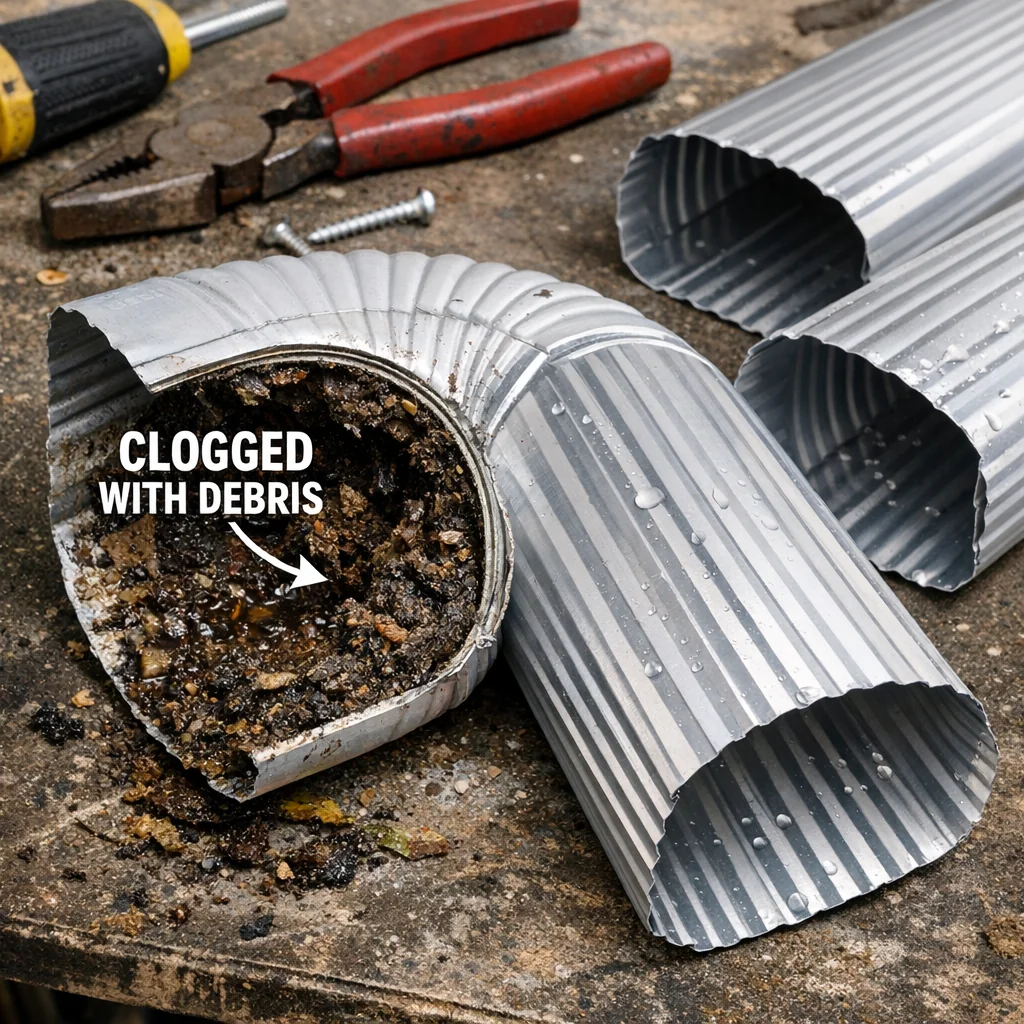
Clogs form most often near elbows and bends because that is where directional changes slow debris and give it a chance to accumulate. The practical consequence of this is often overlooked: if you run a garden hose into the top of the downspout and turn it on full, you are pressurizing whatever is sitting in that elbow from above, which can compact the debris further into the bend before it finally clears, if it clears at all.
The better approach is to disconnect the elbow at its lower fitting, clear the section by hand or with a narrow brush, then reattach it before flushing the straight runs above. This takes an extra few minutes and saves you from driving a clog more firmly into the one place it is hardest to dislodge. For a deeper look at what full downspout replacement involves when repairs are no longer sufficient, our ultimate guide to downspout replacement prices walks through the full cost picture.
Need a hand with this in Winston-Salem, Greensboro and the Triad? Call (336) 971-0464 or request a free estimate. Honest answers, no pressure.
A downspout bracket that has pulled away from the siding did not fail in isolation. When a bracket loses its grip, the weight of the downspout shifts to the brackets immediately above and below it. Those adjacent brackets are now carrying load they were not sized to handle on their own, and they are likely already under stress.
Replacing only the one failed bracket without inspecting its neighbors is an incomplete repair. On any single-bracket fix, press firmly on the bracket directly above and the one directly below. If either one shows movement, the fastener has already loosened. Replace those screws into solid substrate, or move the bracket to a fresh anchor point in the siding if the original hole has widened.
This is the repair decision that trips up most homeowners, and the line between them is clearer than most guides suggest.
A leaking seam on a sectional downspout has one of two causes: the sealant at the joint has dried out and separated, or the metal itself has corroded at the seam. These two causes require different responses, and treating them the same way is why many seam repairs fail within a season.
| Condition at the Seam | What It Means | Appropriate Response |
|---|---|---|
| Visible gap, clean metal on both sides | Sealant failure, metal structurally sound | Clean, dry, and reseal with gutter sealant; a durable long-term repair |
| Surface rust around the joint, no penetrating holes | Early corrosion, sealant bond to metal is weakening | Reseal as a temporary measure; plan section replacement within 1 to 2 seasons |
| Rust with visible pitting, soft spots, or holes | Material failure, metal substrate degraded | Section replacement; sealant will not bond adequately to corroded surface |
| Leaking from behind the pipe rather than the front seam | Water redirected by a hidden upstream seam gap | Inspect the full run; the visible drip point may not be the actual source |
When rust is present at or around the leak point, new sealant applied over corroded metal is bonding to a surface that is already breaking down. It will hold temporarily, but the metal beneath continues to degrade, and the seal fails again. If you are resealing a seam, the metal on both sides of the joint should be clean, dry, and free of active rust before the sealant goes on.
Sectional downspouts are assembled from multiple pieces with overlapping joints held together by sealant and friction. Every joint is a potential failure point. Seamless systems are formed from a continuous run of material with no mid-run joints, which eliminates most seam failures along the body of the pipe.
What seamless systems have instead are concentrated stress points at the elbow connections and at the outlet where the gutter transitions into the downspout. These connection points carry all the mechanical stress that sectional systems distribute across multiple joints. When a seamless downspout has a problem, it is almost always at one of these fittings rather than along the straight run.
This matters for repair because the diagnostic approach is different. On a sectional system, you are inspecting every joint along the run. On a seamless system, you can focus your attention on the top outlet, the elbows, and the bottom extension or splash block connection. Knowing which system you have before you start saves time and ensures you are looking in the right places. If you are evaluating whether your existing system is worth repairing or if a full upgrade makes more sense, our gutters service covers the options available to homeowners.
A downspout that terminates too close to the foundation is a common problem, and the typical recommendation is to add a surface extension or connect to underground drainage. That advice is correct as far as it goes, but it has a prerequisite that is rarely mentioned.
Adding an extension to a downspout that has a partial clog, a crushed section, or a failing seam upstream does not solve a drainage problem. It moves the overflow point. The downspout will still back up under volume and the water will still find its way toward the foundation, just from a slightly different location. Before any extension is installed, the full run above should be clear, unobstructed, and free of restriction. The extension is the last step, not the first.
DIY repair is reasonable for a single bracket replacement, a clean seam reseal, or clearing a detached elbow clog. The threshold shifts when:
At Smithrock Roofing, we serve homeowners across Winston-Salem, Greensboro, High Point, Kernersville, Clemmons, Rural Hall, King, and the surrounding NC Triad. When one of our technicians inspects a downspout system, they work through that diagnostic sequence from dry visual check to discharge point, looking for failure modes that interact rather than treating each symptom in isolation. That is what more than 350 five-star reviews and 60 combined years of exterior experience looks like in practice. If you are not confident the repair is complete or that the problem has been correctly identified, that is the moment to call.
Start with a dry visual check of the full run from the gutter outlet down to the discharge point. If the gutter itself is overflowing at the front lip during rain but the downspout looks dry, the clog is likely at or just above the inlet where the gutter meets the downspout. If water is backing up inside the downspout and spilling at the seams, the restriction is lower in the run. Running water through the top with a garden hose while watching where it slows or stops will usually isolate the location within a few minutes.
A single failing seam on an otherwise sound downspout is a reasonable DIY repair. The section needs to be dry and clean before any sealant is applied, and the seam should be inspected for rust or physical separation before assuming sealant alone will hold. Where the repair becomes more complicated is when rust is present at the seam, when the metal has thinned, or when more than one seam on the same run is showing failure. Those conditions usually mean the material itself is at the end of its service life, and reseal will only delay replacement rather than solve the problem.
A practical minimum is twice per year, once in late spring after tree pollination has peaked and once in late fall after the majority of leaves have dropped. Homes surrounded by mature trees, particularly those with overhanging branches near the roofline, may need attention more frequently. The inspection should cover not just the downspout interior but the brackets, seams, elbows, and the discharge point to catch mechanical failures before they become water intrusion problems.
An extension moves the discharge point away from the foundation, which does reduce the concentration of water at that location, but only if the downspout above it is functioning correctly. If there is a partial clog, a crushed section, or a failing seam upstream, adding an extension shifts the overflow point rather than solving the drainage problem. The full run should be clear and unobstructed before an extension is installed. The extension is the final step in a working system, not a fix for a system that is already failing.
Downspout problems rarely announce themselves until water has already been redirected somewhere it does not belong, which is why accurate diagnosis matters as much as the repair itself. Smithrock Roofing has served homeowners in Winston-Salem, Greensboro, and the surrounding NC Triad for years, and our technicians bring that hands-on regional experience to every exterior inspection. If your downspout system needs a second set of eyes, call us at (336) 971-0464 or Contact Smithrock Roofing to get started.

Smithrock Roofing © Copyright 2026 • All Rights Reserved • Privacy Policy • Maintained by Mongoose Digital Marketing
