Gutter Done: Your Step-by-Step Guide to Installing Gutters and Downspouts
Why Proper Gutter and Downspout Installation Protects Your Home
Gutter and downspout installation is a critical home improvement project that protects your property from water damage. A correctly installed system directs rainwater away from your home’s foundation, preventing soil erosion, basement flooding, and structural issues that can lead to thousands in repairs.
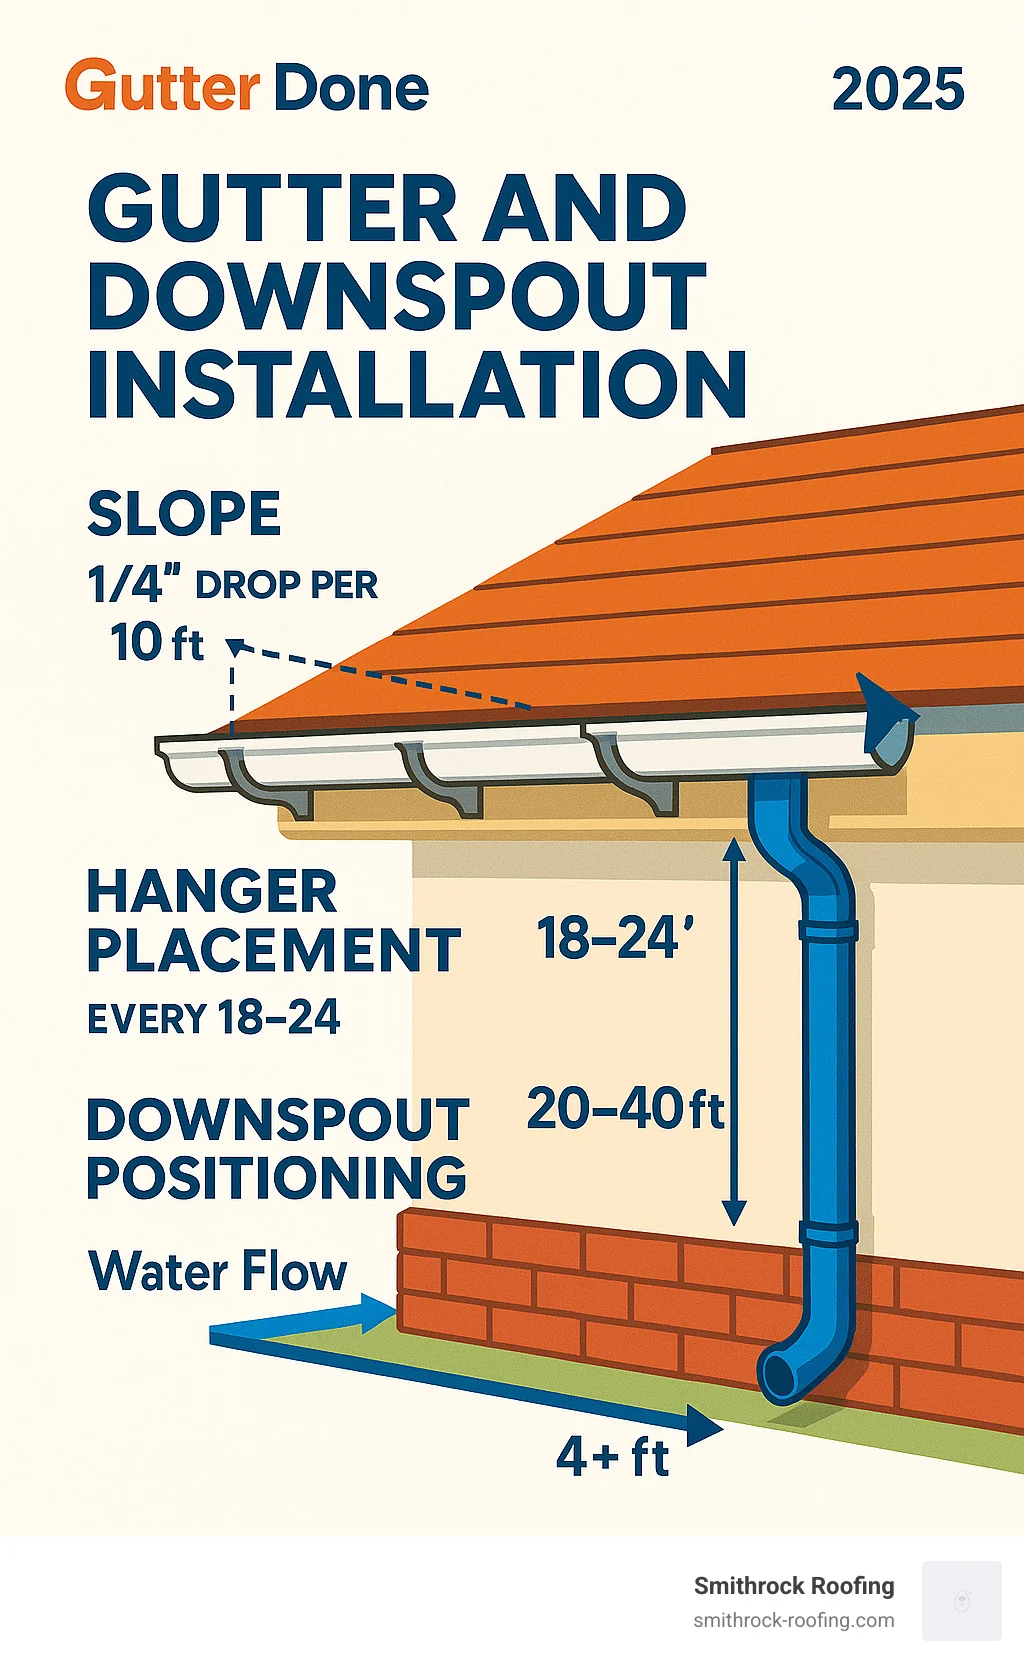
Proper installation involves several key steps: planning the system based on roof area, gathering the right tools, marking a precise slope (1/4-inch drop per 10 feet), installing hangers securely into fascia, hanging the gutters, and placing downspouts every 20–40 feet with extensions. Research shows that improper installation, especially incorrect pitch, leads to common problems like sagging gutters, leaky seams, and foundation damage.
As someone with over 15 years in exterior construction, I’ve seen how poor gutter and downspout installation can cause expensive foundation and siding damage. My experience at Smithrock Roofing confirms that whether you choose a DIY or professional approach, understanding the process is key to ensuring your home stays protected for decades.
Gutter and downspout installation terms simplified:
Gutters and Downspouts: What They Are and How They Work Together
Gutters and downspouts form a single, interconnected drainage system, and understanding what each component does helps you make better decisions about installation, maintenance, and replacement.
Gutters are the horizontal channels mounted along the lower edge of your roofline. Their job is simple: catch rainwater as it runs off the roof and funnel it toward a controlled exit point. Without gutters, that water hits the ground directly beside your foundation every time it rains.
Downspoutssometimes called downpipes or roof downspouts, are the vertical pipes attached to the exterior wall that carry water from the gutters down to ground level. A downspout is only useful if it deposits water far enough from the house to prevent it from seeping back toward the foundation. That’s why extensions and proper downspout placement matter just as much as the downspout itself.
Together, downspouts and gutters create a complete path for stormwater: off the roof, into the trough, down the pipe, and safely away from your home. When either component is undersized, improperly pitched, or poorly positioned, the whole system underperforms, and your home pays the price.
Before You Begin: Planning Your Gutter System
Proper planning is the foundation of a successful gutter and downspout installation. Before you pick up a single tool, understand your home’s specific needs to create a system that effectively manages water.
Why Gutters Are Your Home’s First Line of Defense
Without gutters, rainwater cascades off your roof directly to the ground around your foundation. This uncontrolled runoff can cause a host of expensive problems:
- Soil Erosion and Foundation Damage: Constant water bombardment washes away graded soil, leading to uneven settling and cracks in your foundation. Saturated soil can also freeze and expand, putting immense pressure on foundation walls.
- Basement Leaks: As water pools around your foundation, it seeps through cracks, leading to dampness, mold growth, and water damage.
- Damaged Landscaping: Uncontrolled water flow can destroy flowerbeds and shrubs.
- Siding Stains and Rot: Splashing dirt and constant moisture can stain siding, cause paint to fail, and lead to wood rot.
The importance of downspouts cannot be overstated. They are the critical component that carries collected water safely away from your home, making the entire gutter system functional.
Choosing Your Gutter System: Materials and Styles
Understanding the different gutter options will help you choose the right system for your home and budget.
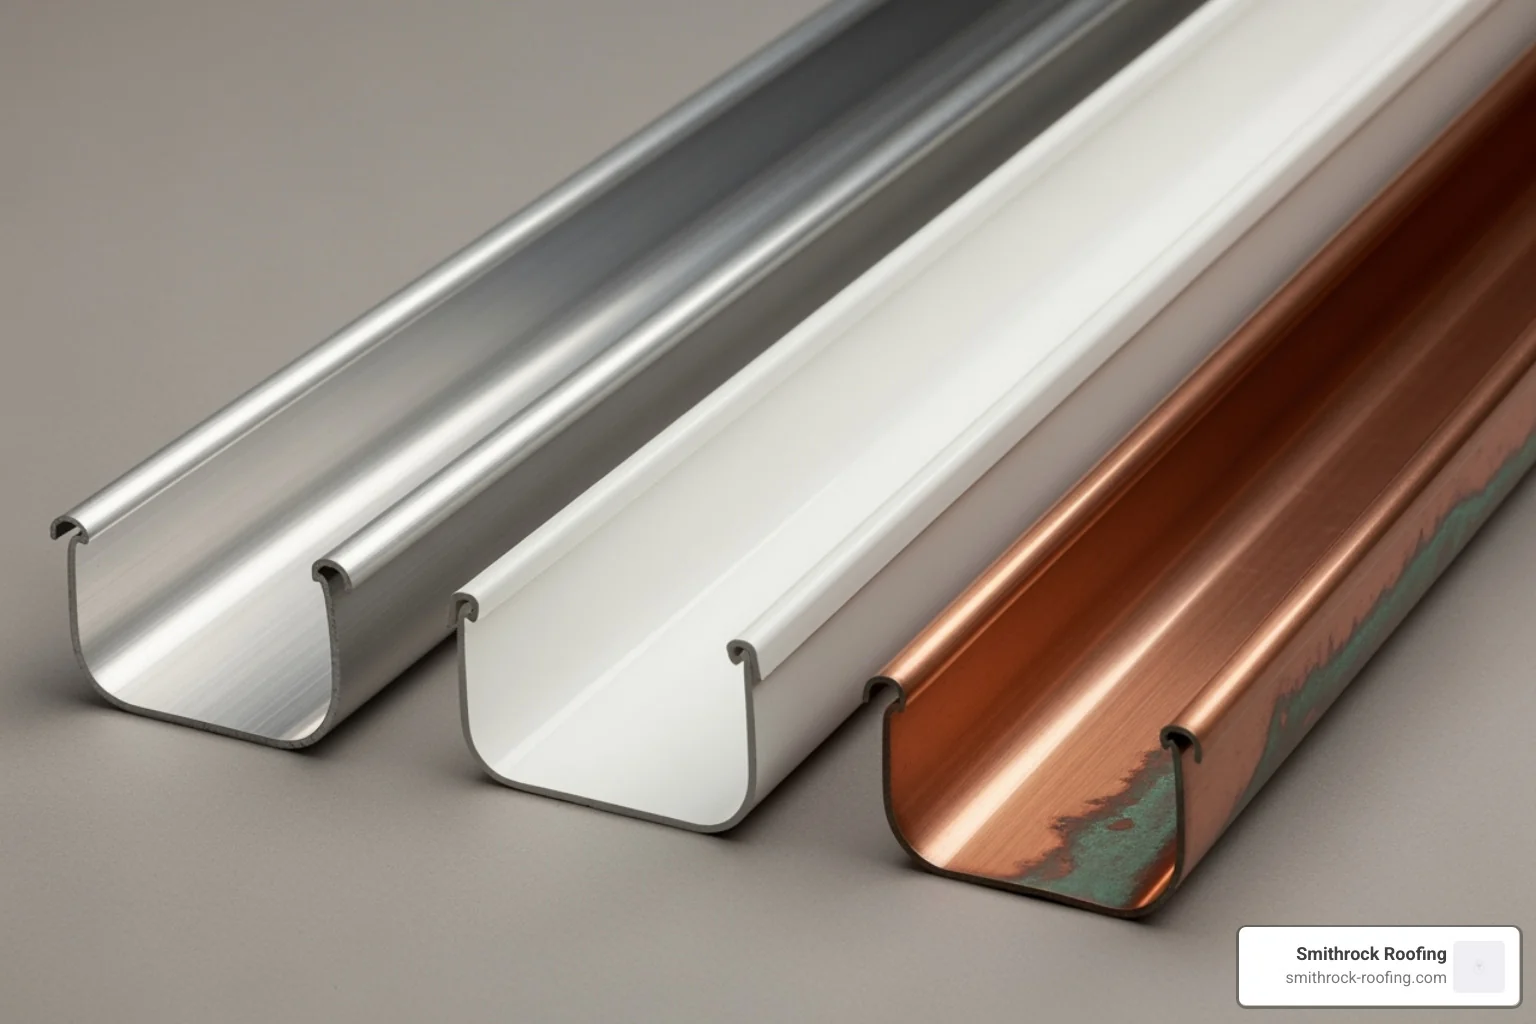
- Styles: K-Style gutters are the modern standard, mimicking crown molding and handling more water than their classic counterparts. Half-round gutters are a traditional choice for historic homes, offering efficient flow and easier cleaning.
- Seamless vs. Sectional: Sectional gutters come in 10-foot lengths and are DIY-friendly, but every seam is a potential leak point. Seamless gutterscustom-made on-site by professionals, eliminate seams for superior performance and reduced maintenance.
- Materials: Your choice of material impacts cost, durability, and lifespan.
- Aluminum: The most popular choice. Lightweight, rust-resistant, and lasts 20+ years. Can be dented.
- Vinyl: The most budget-friendly option and great for DIY. Lightweight and won’t rust, but can become brittle in extreme temperatures.
- Steel: Very durable and handles heavy snow loads well. Heavier and more challenging to install than aluminum.
- Copper: The premium choice. Lasts 50+ years and develops a beautiful patina. Expensive and requires professional installation.
| Material | Cost (per linear foot) | Lifespan | Durability | Maintenance |
|---|
| Aluminum | $2–$6 | 20+ years | Good | Low |
| Vinyl | $1–$3 | 10–15 years | Fair | Low |
| Galvanized Steel | $4–$8 | 20–30 years | Very Good | Moderate |
| Copper | $20+ | 50+ years | Excellent | Very Low |
Sizing Gutters and Downspouts Correctly
Incorrect sizing is a common DIY mistake. Your system must be able to handle the water volume from your roof.
- Calculate Roof Square Footage: The larger and steeper your roof, the more water it collects.
- Consider Rainfall Intensity: Areas with heavy downpours need a more robust system.
- Gutter Width: Standard 5-inch gutters are suitable for most homes. For large or steep roofs, or in heavy rain areas, upgrade to 6-inch gutters.
- Downspout Sizing: Use 2×3-inch downspouts for 5-inch gutters and 3×4-inch downspouts for 6-inch gutters.
- Downspout Placement: Install one downspout for every 20–40 feet of gutter. For runs longer than 40 feet, pitch the gutter from the center toward downspouts at each end.
More info about our gutter services
Roof drainage systems International Residential Code (IRC)
DIY vs. Hiring a Professional
Deciding whether to do it yourself or hire a pro depends on your skill, time, and the complexity of your roof.
- DIY Installation: The main benefit is cost savings on labor. However, it comes with safety risks from working on ladders, is time-consumingand potential mistakes (like improper pitch) can lead to costly water damage.
- Professional Installation: Professionals bring experienceensuring correct sizing and pitch. They can install superior seamless guttersunderstand local building codes, and offer warranties. If your home has a complex roofline, existing fascia rot, or you’re uncomfortable with heights, calling a pro is the smart choice.
Get a professional roof estimate
Gathering everything beforehand makes the project run smoothly.
- Essential Tools: Sturdy ladder, tape measure, chalk line, level, power drill, tin snips or hacksaw, gutter crimper, pop rivet gun, caulking gun, work gloves, and safety glasses.
- Essential Materials: Gutter sections (5 or 6-inch), downspouts (2×3 or 3×4-inch), inside/outside corners, end caps, gutter hangers, downspout elbows (A and B styles), downspout straps, 100% exterior silicone sealant, pop rivets or sheet metal screws, and gutter flashing.
The Gutter Installation Process: Step by Step
With your plan and materials ready, it’s time to walk through the complete gutter installation process. The steps below cover everything from prepping your fascia to routing the final downspout extension, in the right order, the way an experienced crew would approach it. Work methodically and prioritize safety at every stage.
Safety First: Essential Precautions
Working at height is dangerous. Never compromise on safety.
- Ladder Safety: Use a sturdy ladder rated for your weight plus materials. Place it on firm, level ground.
- Work with a Partner: A helper can stabilize the ladder, pass tools, and call for help if needed.
- Three Points of Contact: Always keep two hands and one foot, or two feet and one hand, on the ladder.
- Avoid Power Lines: Aluminum gutters conduct electricity. Maintain a safe distance from overhead wires.
- Wear Protective Gear: Gloves protect from sharp metal edges, and safety glasses are non-negotiable.
- Don’t Overreach: Climb down and move the ladder instead of stretching unsafely.
Step 1: Pre-Installation Inspection and Prep
Installing new gutters over damaged fascia is a recipe for failure. Inspect the fascia boards (the boards along your roofline) for any signs of wood rot.
Probe any suspicious spots with a screwdriver; healthy wood is solid, while rotted wood will feel soft or crumble. You must repair or replace any damaged fascia boards before proceeding. This ensures you have a solid mounting surface that can support the weight of water-filled gutters. Prime and paint any new wood for protection.
gutters
Step 2: Mapping and Marking for Perfect Pitch
Proper slope is essential for drainage. The goal is a 1/4-inch drop for every 10 feet of gutter length toward the downspout. That works out to roughly 1/16-inch of fall per foot, just enough for gravity to do its job without making the gutters look visibly crooked from the ground.
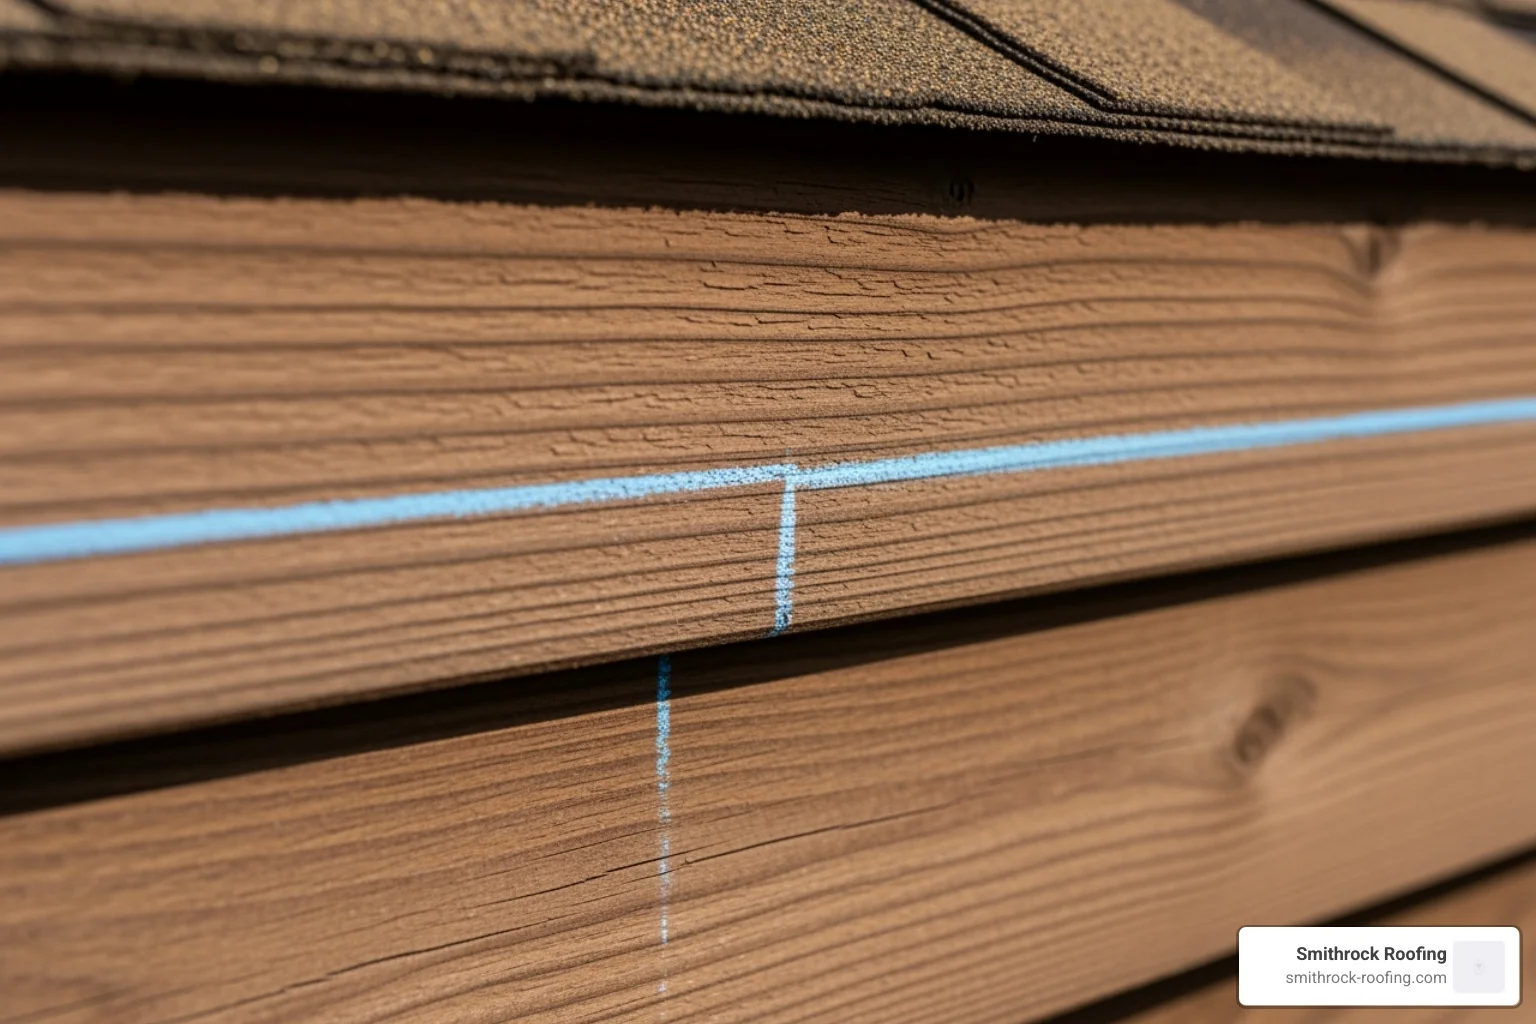
- Establish the High Point: At the end of the run farthest from the downspout, mark a spot on the fascia 1 to 1½ inches below the roofline.
- Mark the Low Point: At the planned downspout location, measure down from the roofline by the same amount plus your calculated drop.
- Snap a Chalk Line: Stretch a chalk line between the high and low points and snap it. This line marks the bottom of your new gutter.
- Mark Hanger Locations: Mark spots for hangers every 18–24 inches along the chalk line, aiming for rafter tails for stronger support.
Step 3: Assembling the Gutters on the Ground
It’s much safer to assemble gutter sections on the ground than on a ladder.
- Measure and Cut: Measure your runs and cut sections to length with a hacksaw or tin snips.
- Join Sections: Overlap sections by about 8 inches, with the upstream piece inside the downstream piece. Apply a generous bead of exterior silicone sealant to the joint and secure with pop rivets on the sides of the gutter.
- Attach End Caps: Seal and rivet end caps onto the ends of your gutter runs.
- Cut Downspout Outlets: At the lowest point of your run, use a hole saw or snips to cut an opening for the downspout outlet. Attach the outlet piece from inside the gutter, sealing it thoroughly before securing with rivets.
Step 4: Hanging the Gutters
With a helper, it’s time to lift the assembled sections into place.
- Attach Hangers: Install your fascia brackets or hidden hangers along the chalk line, screwing them into the solid wood of the rafter tails whenever possible.
- Lift and Secure: Carefully lift the assembled gutter section and rest it in the hangers. Secure the gutter to the hangers according to the manufacturer’s instructions.
- Install Gutter Flashing: This crucial step prevents water from running behind the gutter. Slide a metal flashing strip under your roof shingles and over the back edge of the gutter. This directs all water into the system and protects your fascia from rot.
Step 5: Downspout Installation, A Full Guide
The downspout installation phase is where your entire drainage system comes to life. A properly installed downspout moves water efficiently from the gutter outlet all the way to ground level, and critically, away from your home. Here’s how to do it right.
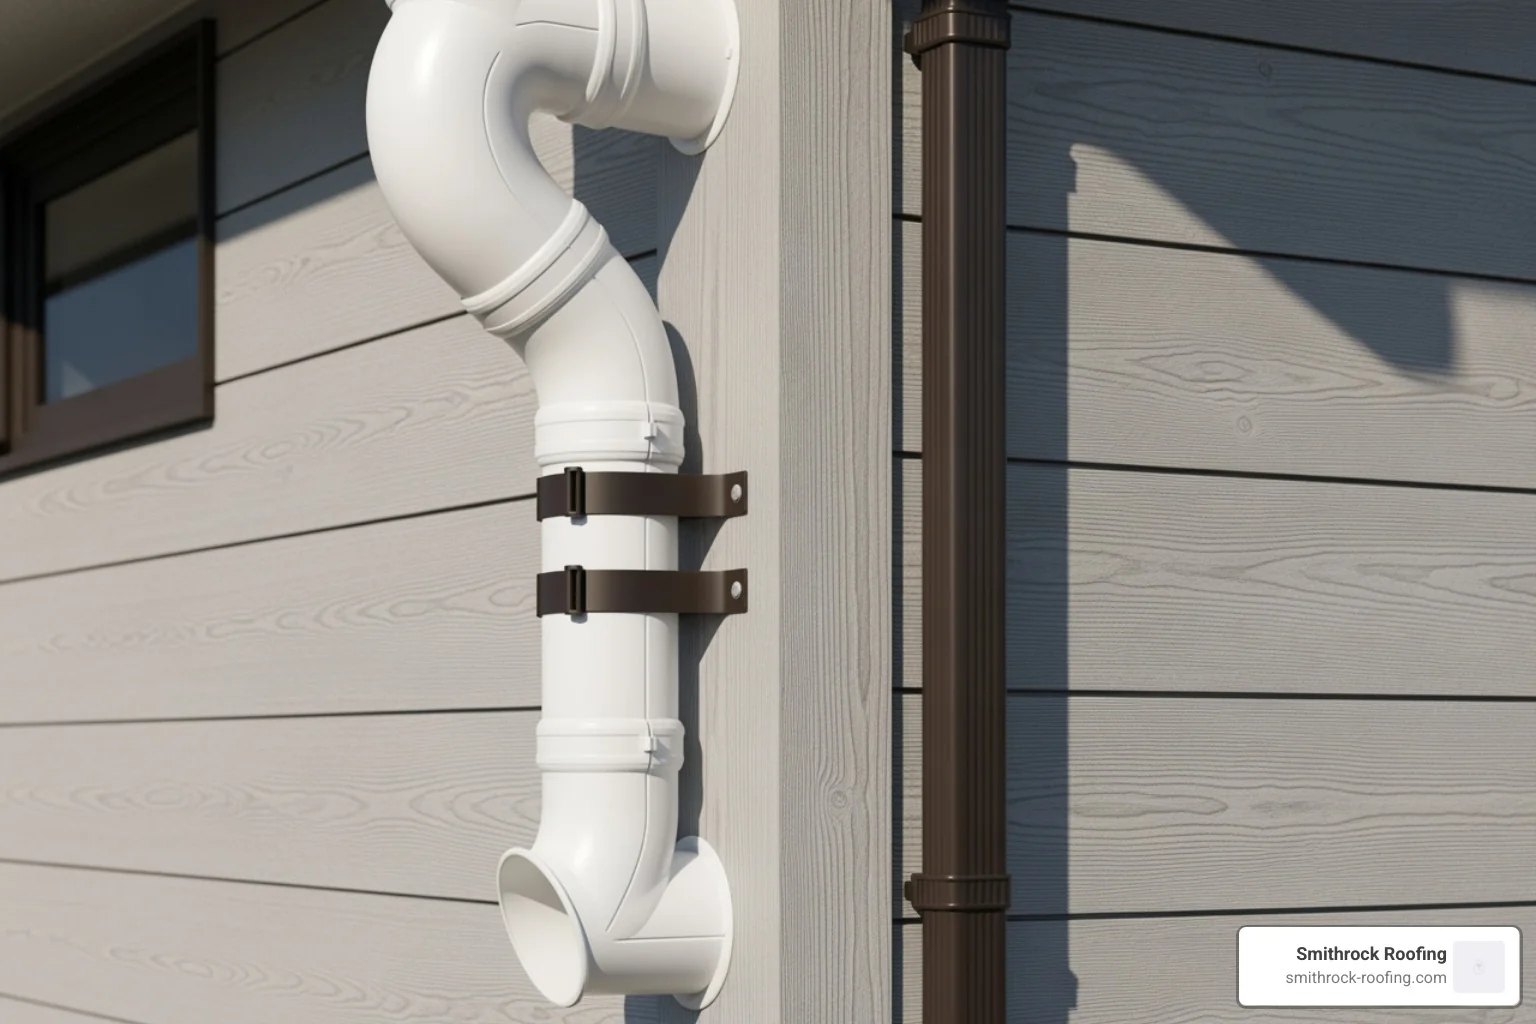
- Attach the Top Elbow: Connect a downspout elbow (typically a “B” elbow) directly to the gutter outlet. This angles the downspout toward the wall.
- Measure and Cut the Drop: Hold a second elbow against the wall at the bottom to determine how long your straight vertical section needs to be. Cut a downspout section to that length and crimp the top end so it slides securely into the upper elbow.
- Assemble the Full Run: Connect the top elbow, vertical section, and bottom elbow into a continuous assembly. Make sure each connection overlaps in the correct direction, water should always flow into, not against, a joint.
- Secure to the Wall: Attach the downspout to the siding or exterior wall using downspout straps placed every 3 feet. Use appropriate fasteners for your wall material. The downspout should sit flush against the wall without gaps.
- Add the Final Elbow or Extension: At the base, attach a final elbow or flexible extension to direct water at least 4 feet away from the foundation. This is a non-negotiable step, a downspout that dumps water at the base of the wall defeats the entire purpose of the system.
On walls where the gutter sits far from the house, such as over a wide overhang, you may need an additional offset elbow and a longer connecting section to bridge the gap before the downspout drops vertically. Plan this out before cutting any material.
Learn more about proper installation
Downspout Placement: Rules and Spacing That Actually Matter
Getting downspout placement right is one of the most consequential decisions in the entire installation. Too few downspouts, or poorly positioned ones, and your gutter system will back up and overflow during heavy rain, exactly the scenario you’re trying to prevent.
How Far Apart Should Downspouts Be?
The standard rule is one downspout for every 20 to 40 feet of gutter run. For most homes, that means one downspout at each end of a straight gutter section is sufficient. In areas with frequent heavy rainfall, like much of the NC Triad, erring toward 20–30 feet of spacing is the smarter choice. The more water your roof collects in a short period, the faster your system needs to drain it.
For gutter runs that exceed 40 feet, the best approach is to pitch the gutter from the center down toward a downspout at each end. This prevents water from having to travel an excessive distance to reach a single outlet, reducing the risk of overflow mid-run.
Where Should Gutter Downspouts Be Placed?
Position matters as much as quantity. Here are the key rules for gutter downspout placement:
- At the lowest point of each gutter run. Water flows downhill, so the outlet must be at the end where you’ve established your low point during the slope-marking phase.
- Away from doors, windows, and high-traffic areas. Downspouts that dump water near an entry point or walkway create slip hazards and can accelerate moisture damage to nearby trim.
- Directed toward a slope or drainage path. The final extension or elbow should point water toward a yard that grades away from the house, a garden bed that can absorb it, or an underground drain system.
- Never directly into a corner or against a wall. Water that pools in corners has nowhere to go and will eventually find its way into your foundation.
- At least 4 feet from the foundation. This is the minimum safe discharge distance. Six feet or more is better wherever the grading allows it.
Gutter Pitch and Slope: The Numbers You Need to Know
Slope is one of those details that separates a gutter system that performs for decades from one that starts sagging and pooling within a season. Here’s a clear breakdown of the numbers involved.
- Gutter pitch per foot: Approximately 1/16 inch of drop per linear foot of gutter.
- Gutter drop per 10 feet: 1/4 inch, this is the standard most contractors and the IRC reference.
- Gutter fall per foot: Same as pitch per foot, roughly 1/16 inch, or about 0.5% grade.
These numbers might seem trivially small, but they add up meaningfully over long runs. A 40-foot gutter run should drop 1 inch total from the high end to the downspout. That’s enough to move water reliably without making the gutter visibly tilted from the street.
If the pitch is too shallow, water sits in the gutter, breeds mosquitoes, and adds weight that accelerates sagging. If it’s too steep, fast-moving water can overshoot the downspout outlet during a downpour. The 1/4-inch drop per 10 feet rule hits the right balance.
The Gutter Replacement Process: What to Expect
Installing gutters on a new home is one thing. Replacing an existing system that has reached the end of its life involves a few additional steps that are worth understanding before you begin, or before you hire a contractor.
Signs You Need Gutter Replacement
Not every gutter problem requires a full replacement. A leaky seam, a loose hanger, or a small hole can often be repaired. But some situations call for starting fresh:
- Gutters that are visibly pulling away from the fascia along multiple sections
- Widespread rust, corrosion, or peeling that compromises the channel’s integrity
- Repeated sagging that returns even after re-hanging
- Fascia rot behind the gutters that requires full board replacement
- A system that consistently overflows even when clean, suggesting it was never sized correctly
The Gutter Replacement Steps
- Remove the old system carefully. Disconnect downspouts first, then remove gutter sections and hangers. Inspect the fascia for rot or damage as you go, this is your opportunity to address underlying issues before they’re hidden behind new gutters.
- Repair the fascia. Any rotted or damaged sections must be replaced before new gutters go up. Skipping this step means your new installation is already on borrowed time.
- Prime and seal exposed wood. New fascia boards should be primed and painted before gutters are attached to protect them from future moisture exposure.
- Follow the full installation process. Once the fascia is solid, the gutter replacement process mirrors a new installation: mark your pitch, assemble sections, hang the gutters, and install the downspouts per the steps outlined above.
- Evaluate for upgrades. A gutter replacement is the right time to reconsider sizing, materials, and downspout count. If your old system was undersized or had too few downspouts, fix that now rather than replicating the problem.
At Smithrock Roofing, we handle the full gutter replacement process, from removing the old system and repairing fascia to hanging new seamless gutters and routing downspouts correctly. If you’re seeing consistent water management problems, a full replacement is often more cost-effective in the long run than repeated patchwork repairs.
Avoiding Pitfalls and Ensuring Longevity
Even a well-planned gutter and downspout installation can fail if you’re not aware of common mistakes. Avoiding these pitfalls will ensure your system lasts for decades.
Top 5 Common Installation Mistakes to Avoid
- Improper Pitch: This is the most common failure. If the slope is too flat, water pools, adding weight and collecting debris. If it’s too steep, water can rush past the downspout outlet during heavy rain. Stick to the 1/4-inch drop per 10 feet rule.
- Incorrect Hanger Spacing: Spacing hangers more than 24 inches apart (or 16–18 inches in snowy climates) allows gutters to sag under the weight of water and ice, leading to pooling and potential collapse.
- Leaky Seams: In sectional systems, every joint is a potential leak. Failing to overlap sections correctly, using cheap sealant, or not securing joints with rivets will lead to drips that can rot your fascia board.
- Wrong Gutter Size: A system that’s too small for your roof’s size and pitch will be overwhelmed in a heavy storm, causing water to pour over the sides.
- Poor Downspout Placement: Too few downspouts or placing them where they dump water next to the foundation defeats the entire purpose of the system. Water must be directed at least 4 feet away.
Downspout Drainage Solutions and Alternatives
Effectively managing water at the end of the downspout is critical.
- Downspout Extensions: The simplest solution. Use plastic or metal extensions to carry water 4–8 feet away from the foundation.
- Splash Blocks: Concrete or plastic channels placed under the downspout outlet to disperse water and prevent ground erosion.
- Underground Drain Pipes: A more permanent solution where PVC pipes carry water from the downspout to a dry well or storm drain, keeping it completely away from the foundation.
- Rain Barrels: An eco-friendly option to collect and reuse rainwater for your garden. Ensure it has an overflow system to handle heavy rain.
- Rain Chains: A decorative alternative to downspouts that guides water down a chain. They are best suited for milder climates, as they can form large icicles in freezing weather.
The Impact of Climate on Your Gutter System
Your local weather should dictate your installation choices.
- Heavy Snow and Ice: In cold climates, use stronger hangers and space them closer together (every 16–18 inches) to support the immense weight of ice. Heat cables can be installed to prevent ice dams, which cause water to back up under shingles.
- Extreme Temperatures: Vinyl gutters can become brittle in extreme cold and warp in intense heat. Steel or copper are more durable choices for harsh climates.
- Heavy Rainfall: If your area experiences frequent, intense downpours, opt for larger 6-inch gutters and 3×4-inch downspouts to handle the higher volume of water without overflowing.
Post-Installation: Maintenance, Troubleshooting, and Costs
Your gutter and downspout installation is complete, but the work isn’t over. Regular maintenance is the key to ensuring your system protects your home for decades.
Your Gutter and Downspout Maintenance Checklist
Neglected gutters quickly become clogged, rendering them useless. A simple maintenance routine can prevent costly problems.
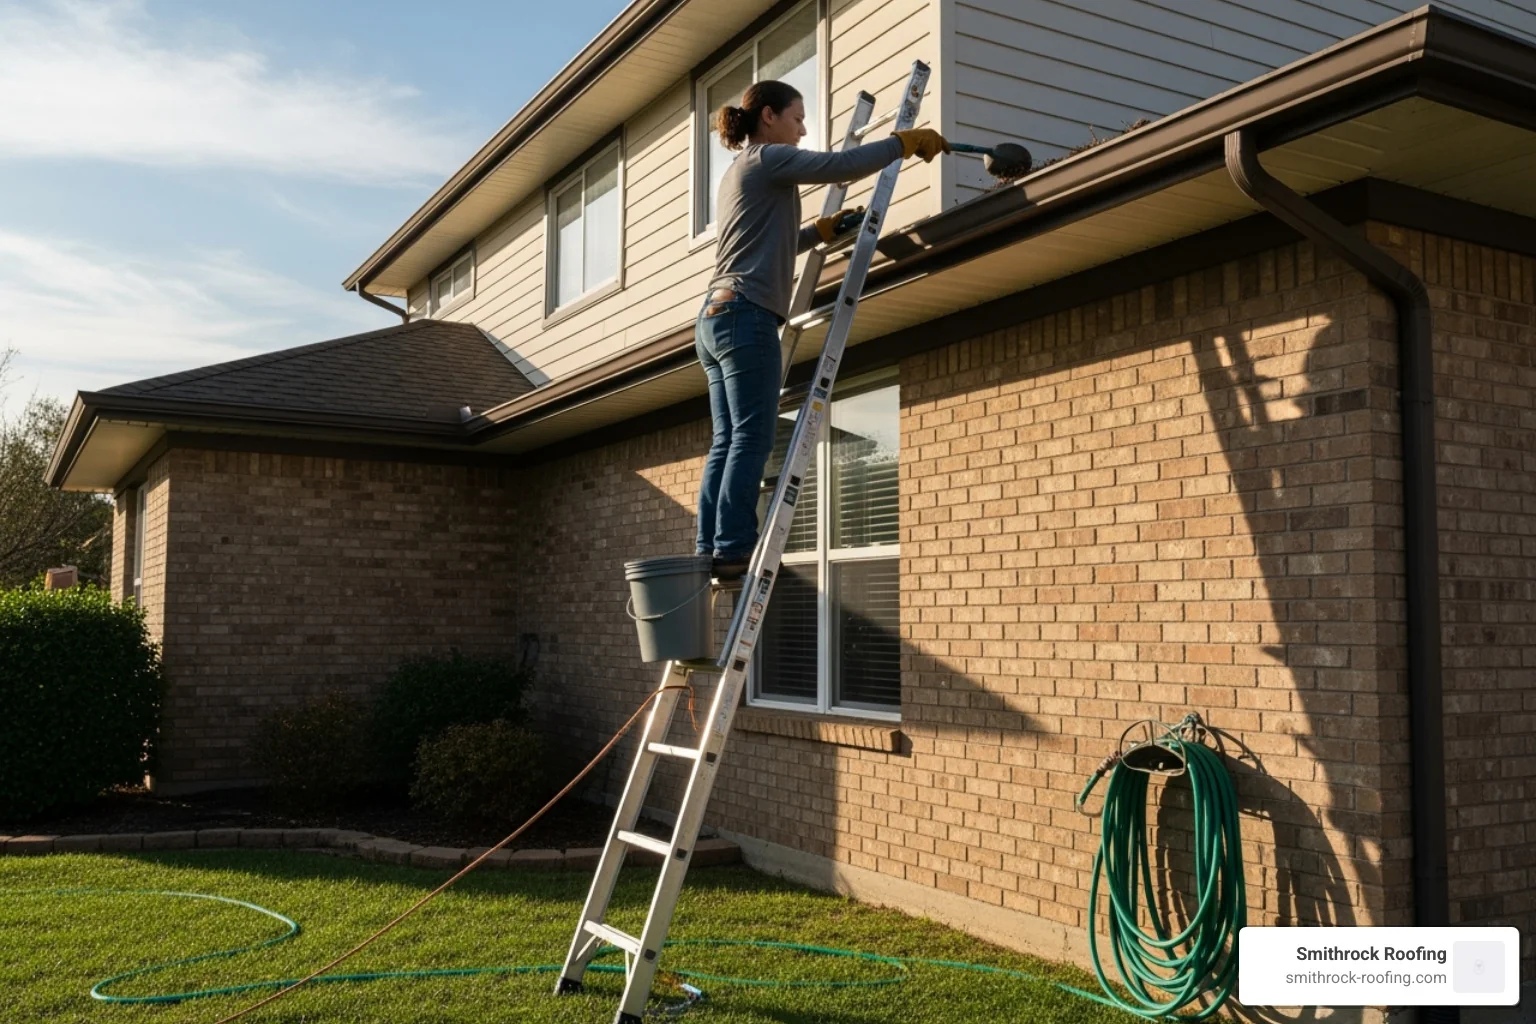
- Clean Twice a Year: Clean your gutters every spring and fall. If you have many trees, you may need to do it more often.
- Remove Debris: Use a gutter scoop and work gloves to remove leaves, twigs, and other debris.
- Flush the System: Use a garden hose to flush the gutters and downspouts. This clears out smaller debris and allows you to check for proper flow and leaks.
- Inspect While Cleaning: Look for loose hangers, sagging sections, or signs of leaks at the seams. Tighten fasteners and address small issues before they become big problems.
- Consider Gutter Guards: Guards (mesh, reverse curve, foam) can reduce the frequency of cleanings but do not eliminate maintenance entirely. They are a good option if you have many trees or find it difficult to work on a ladder.
Troubleshooting Common Gutter Problems
Even well-installed systems can develop issues. Here’s how to handle them:
- Leaky Seams or Holes: For small leaks, clean the area thoroughly, let it dry, and apply a generous bead of 100% exterior silicone sealant. For larger holes, use a gutter patch kit.
- Downspout Clogs: Try flushing the clog with a high-pressure hose nozzle from the top. If that fails, a plumber’s snake can often break it up. As a last resort, disassemble the downspout to remove the blockage.
- Sagging Gutters: This is often caused by loose or improperly spaced hangers. Add new hangers or tighten existing ones. If the fascia board behind the gutter is rotted, it must be replaced.
- Overflowing Gutters: The most common cause is a clog. If the gutters are clean, check the pitch with a level to ensure water is still flowing toward the downspout.
Understanding the Costs of Gutter and Downspout Installation
Costs vary based on materials, home size, and installation method.
- Material Costs (Per Linear Foot):
- Vinyl: $1–$3
- Aluminum: $2–$6
- Steel: $4–$8
- Copper: $20+
- Professional Installation Costs: Prices often include materials and labor. Expect to pay more for multi-story homes, complex rooflines, or difficult accessibility.
- Other Cost Factors: The need for fascia repair will add to the total cost. Don’t skimp on the number of downspouts to save money; inadequate drainage will lead to overflow and potential water damage.
While DIY saves on labor, professional installation offers significant value. Pros provide warranties, have specialized equipment for seamless gutters, and possess the experience to avoid costly mistakes. This expertise often makes professional installation a better long-term investment.
Frequently Asked Questions About Gutter and Downspout Installation
Here are answers to the most common questions we receive about gutter and downspout installation.
What is the difference between gutters and downspouts?
Gutters are the horizontal troughs mounted along the roofline that collect rainwater as it runs off the roof. Downspouts, also called downpipes or roof downspouts, are the vertical pipes that carry that collected water from the gutter down to ground level. The two components work as a system: gutters gather, downspouts discharge. Neither functions properly without the other.
How many downspouts do I need for my house?
The general rule is one downspout for every 20 to 40 feet of gutter. The exact number depends on two key factors:
- Roof Size: A larger roof collects more water and requires more downspouts to handle the volume.
- Local Rainfall: If you live in an area with frequent heavy downpours, you should place downspouts closer together (every 20–30 feet).
For any gutter run longer than 40 feet, it’s best to pitch the gutter from the center down toward a downspout at each end. This ensures water doesn’t have to travel too far, preventing overflow.
What is the correct slope for a rain gutter?
The correct slope is a 1/4-inch drop for every 10 feet of gutter run toward the downspout. That translates to a gutter fall of roughly 1/16 inch per footsubtle enough to appear level from the street, but sufficient for gravity to reliably move water toward the outlet.
This pitch is critical for proper function. It allows gravity to move water efficiently toward the downspout without letting it pool or rush so fast that it overshoots the outlet.
Can I install new gutters over a rotted fascia board?
No. Absolutely not. This is one of the most critical mistakes a homeowner can make.
Rotted fascia wood is soft and weak. It cannot support the weight of a gutterespecially when it’s full of water, leaves, or ice. Attaching a new gutter to rotted wood will inevitably lead to the gutter sagging and pulling away from the house, causing it to fail and potentially damage your home.
Always inspect your fascia boards before beginning your gutter installation. Any rotted sections must be cut out and replaced with new, solid wood. This is an essential step that ensures your new gutters have a secure foundation to last for decades.
What is a downspout and how does it work?
A downspout (sometimes called a down spout, downpipe, or roof downspout) is the vertical pipe that connects to the gutter outlet and channels water from the roofline to ground level. Most residential downspouts are rectangular, either 2×3 inches for use with standard 5-inch gutters or 3×4 inches for larger 6-inch systems. They are secured to the exterior wall with metal straps and terminate in a bottom elbow or extension that redirects water away from the foundation. Without a functioning downspout, even a perfectly installed gutter is just a trough that dumps water over its edge.
How do I know if my gutter downspout needs replacement?
Common signs that a downspout needs attention include: visible holes, cracks, or rust; sections that have pulled away from the wall; water staining on siding directly below or beside the downspout; persistent clogs that can’t be cleared; and water pooling near the foundation despite the system appearing clear. In many cases a single damaged downspout section can be replaced without replacing the entire system, but if the issue is recurring or widespread, a full evaluation is worth scheduling.
What does proper gutter installation actually involve?
Proper gutter installation means more than just hanging a trough along the roofline. It requires inspecting and repairing the fascia before mounting anything, establishing the correct pitch (1/4 inch of drop per 10 feet), using hidden hangers spaced no more than 18–24 inches apart, sealing all joints thoroughly, installing gutter flashing under the roof edge, and placing correctly sized downspouts at appropriate intervals. When any of these steps is skipped or done carelessly, the consequences show up quickly, as sagging, leaking, overflowing, or foundation damage.
Conclusion: Protecting Your Home’s Value
You now have a comprehensive understanding of gutter and downspout installationfrom selecting the right materials and sizing your system correctly, to nailing the pitch, completing a proper downspout installation, and knowing when a full gutter replacement makes more sense than repeated repairs.
A properly installed gutter system is a modest investment that delivers huge returns. It works 24/7 to channel water away from your foundation, preventing basement floods, preserving your landscaping, and protecting your home’s structural integrity and curb appeal.
DIY installation can be a rewarding and cost-effective project. However, professional installation is the wiser choice for multi-story homesbuildings with complex rooflinesor if you want the superior performance of seamless gutters. A professional brings expertise, offers warranties, and provides the peace of mind that the job was done right the first time.
At Smithrock Roofing, we’ve seen how quality installation protects a home’s value. We understand that gutters are a key part of your home’s entire exterior defense system. Delaying replacement only gives water more time to cause expensive damage.
Your home deserves protection that lasts. Whether you tackle this project yourself or trust our experienced team, investing in a proper gutter and downspout installation is one of the most important moves you can make as a homeowner.
Contact us today to learn more about our gutter services
Need a local pro? Learn more about our gutter installation and repair in Greensboro.
Frequently asked questions
Why is proper gutter and downspout installation important for a home?
Proper gutter and downspout installation protects a home from water damage by directing rainwater away from the foundation, preventing soil erosion, basement flooding, and structural issues.
What are the key steps in installing gutters and downspouts correctly?
Key steps include planning the system based on roof area, marking a precise slope (1/4-inch drop per 10 feet), installing hangers securely into fascia, hanging the gutters, and placing downspouts every 20-40 feet with extensions.
What common problems arise from improper gutter installation?
Improper installation can lead to sagging gutters, leaky seams, and foundation damage due to incorrect pitch.
How does rainwater affect a home without gutters?
Without gutters, rainwater can cause soil erosion, foundation damage, basement leaks, damaged landscaping, and siding stains or rot by cascading directly to the ground around the foundation.


