Choosing a vinyl siding contractor in the NC Triad feels straightforward until you start getting proposals. Suddenly you’re comparing vague line items, unfamiliar brand names, and warranty language that all sounds the same. Most contractors around Greensboro, Winston-Salem, High Point, and Kernersville hand you a brochure and a price — but they rarely sit down and explain what actually separates a siding job that performs for 30 years from one that starts buckling, warping, or trapping moisture within the first decade.
That gap between “we install siding” and genuinely knowing how siding should be installed for this specific region is exactly what this guide addresses. If you’re a homeowner in the Triad evaluating contractors, the information below will help you ask better questions, recognize quality work, and avoid the most common mistakes — before a single panel goes up.
Most siding manufacturers publish installation guidelines written for a generic national audience. What they don’t account for is that the Piedmont Triad sits squarely in IECC Climate Zone 4A — a mixed-humid classification that creates a specific and demanding set of conditions for exterior cladding.
Here’s what that means in practical terms: Winston-Salem and Greensboro regularly swing from temperatures in the low 20s in January to the upper 90s in July. That’s a thermal range of 70+ degrees across a single year. Vinyl expands and contracts with every one of those temperature changes. Add in the Triad’s high summer humidity, occasional winter ice events, and wind-driven rain patterns that push moisture against the west and southwest faces of most homes — and you have an installation environment that punishes shortcuts quickly.
Contractors who don’t account for these conditions during installation aren’t cutting corners intentionally; many simply apply the same technique they’d use anywhere. The problem is that the Piedmont’s climate doesn’t forgive generic approaches.
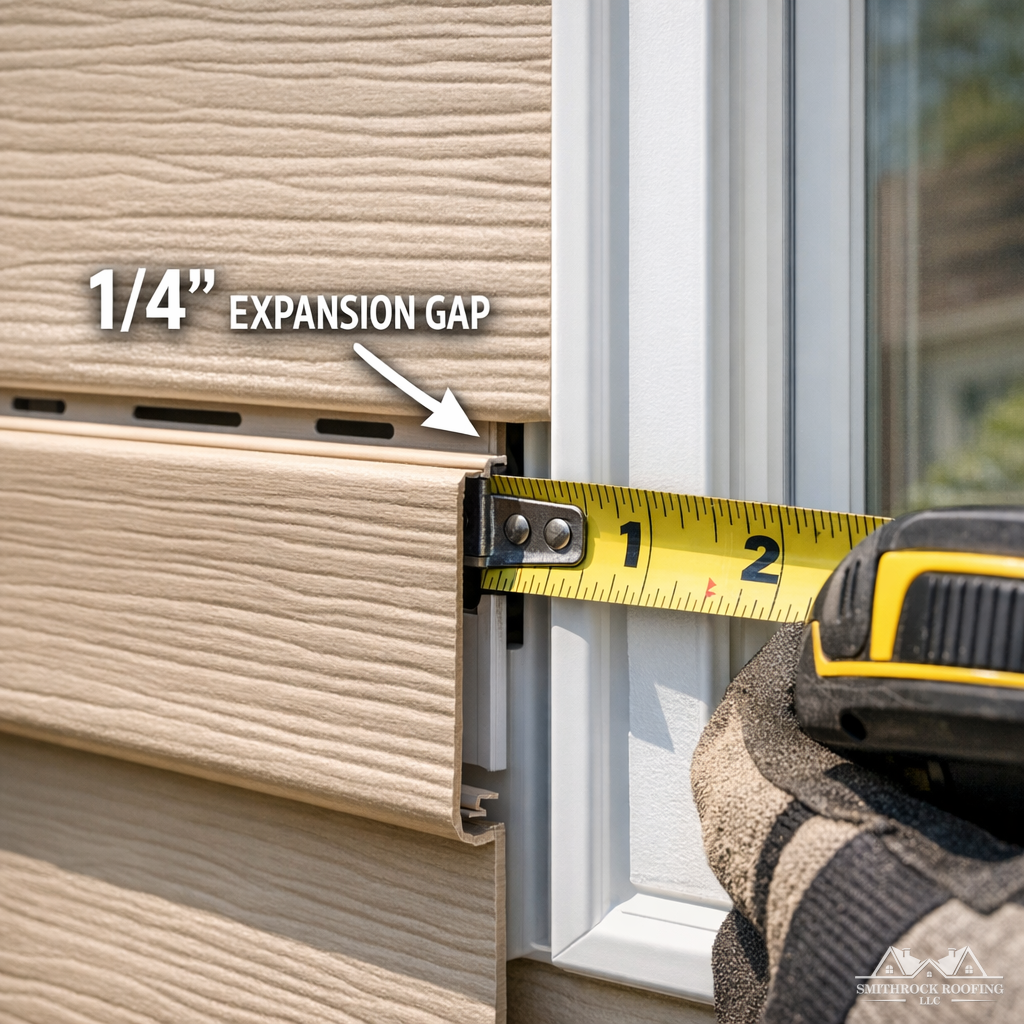
Every vinyl siding panel needs room to move. Where panels meet J-channel, corner posts, window trim, and door casings, there must be a deliberate gap — typically a minimum of 1/4 inch — left at every connection point. This isn’t optional; it’s a fundamental requirement of the material itself.
In the Triad’s summer heat, a panel that was installed snug against trim in February will have nowhere to expand by July. The result is buckling — panels that visibly bow outward and eventually pull away from their lock positions. We see this regularly on homes where a previous contractor nailed panels too tightly or skipped the expansion gap entirely at J-channel connections.
The fix isn’t a quick adjustment. Buckling caused by improper installation typically requires removing and reinstalling affected panels, which is both disruptive and avoidable.
House wrap — the moisture barrier installed beneath siding panels — has an overlap direction that matters. In the Piedmont Triad, prevailing storm systems predominantly approach from the west and southwest. Proper house wrap installation overlaps courses in a way that sheds wind-driven rain downward and away from the sheathing, similar to shingles on a roof.
When house wrap courses are installed in the wrong direction or when seams aren’t taped at penetrations, wind-driven rain can work its way behind the wrap and against the sheathing. This is particularly relevant in Triad homes with significant west-facing exposure — a common orientation in many suburban neighborhoods in Kernersville, Clemmons, and western Greensboro.
A full siding replacement project creates an opportunity to verify and improve soffit ventilation — the intake point for your attic’s airflow system. When installers replace fascia trim or soffit panels without confirming that ventilation baffles and vent strips are correctly positioned, they can inadvertently restrict airflow.
Reduced soffit ventilation raises attic moisture levels, which accelerates sheathing deterioration from above while your new siding is protecting the walls below. It’s a hidden conflict that doesn’t show up until years later, usually when someone investigates an attic humidity problem or premature shingle deterioration.
A significant portion of suburban homes in the Triad — particularly those built between the mid-1980s and early 2000s in neighborhoods across High Point, Kernersville, and south Greensboro — feature partial brick veneer on the lower portion of the facade with vinyl siding above. The transition point between brick and siding requires careful flashing and caulking detail work.
Water infiltration at that transition is one of the most common sources of hidden sheathing damage we find during pre-installation inspections. If the existing flashing at that brick-to-siding joint is deteriorated or was never properly installed, new siding installed on top of that condition will seal moisture against the wall rather than correcting the problem. For a deeper look at how these two cladding types interact, the article Beyond the Surface: A Deep Dive into Brick Veneer and Vinyl Siding covers the key compatibility and flashing details worth understanding before your project begins.
The single biggest difference between a contractor who does acceptable work and one who does excellent work often shows up in what happens before installation begins. Any contractor can hang panels. The question is whether they’ve examined what those panels will be covering.
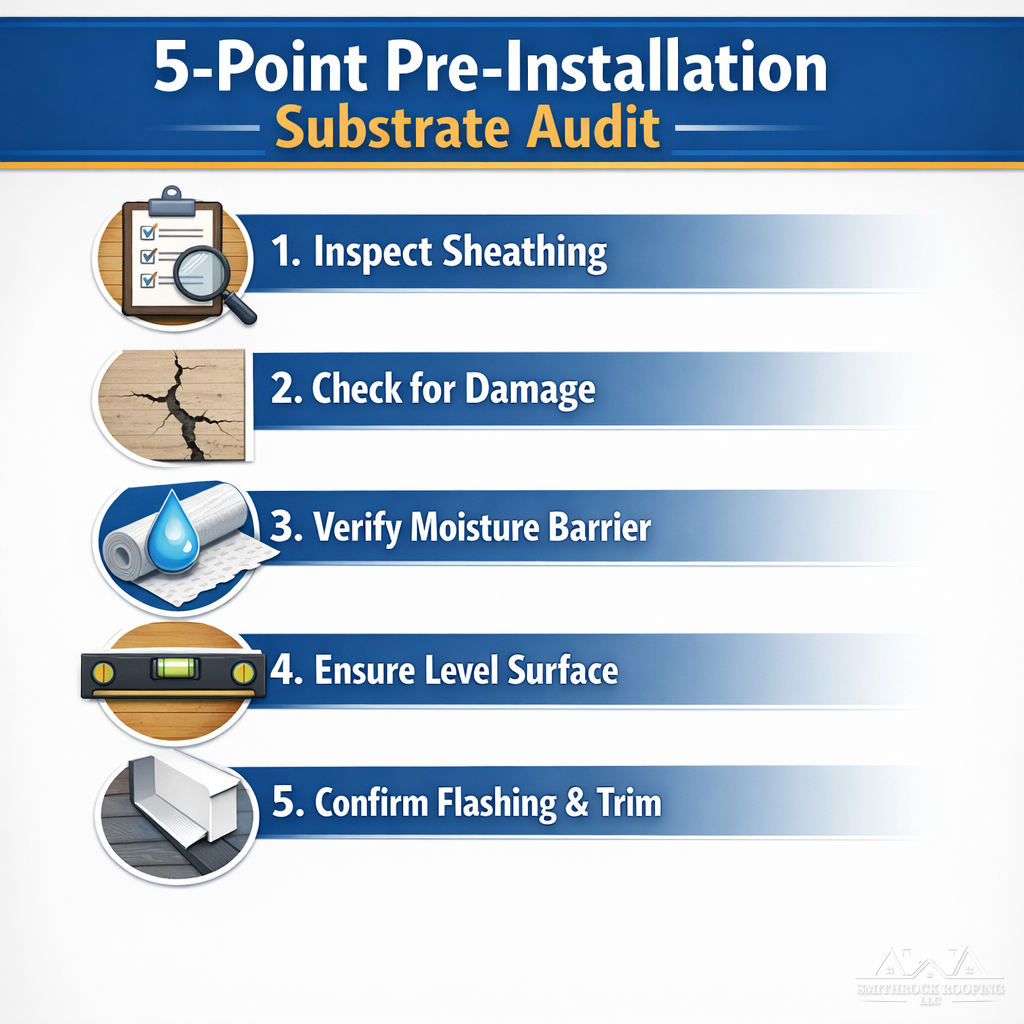
At Smithrock Roofing, a pre-installation substrate assessment is a standard part of every siding project — not an upsell. Here’s what that process looks like and why each step matters.
Sheathing that has absorbed moisture becomes soft, loses its structural integrity, and will not properly hold nails for new siding. Visual inspection alone won’t catch it — compressed or water-damaged OSB or plywood can look nearly normal on the surface while being significantly compromised underneath.
Moisture meter testing in high-risk zones — around every window, at grade-level walls, and anywhere the wall meets a roof plane — gives an accurate picture of what’s actually behind the existing cladding. If elevated moisture readings appear, the source needs to be identified and corrected before new siding goes on. Covering a moisture problem with fresh panels doesn’t solve it; it just hides it until the damage is worse.
Older homes in the Triad frequently have house wrap that has deteriorated, torn at staple lines, or was originally installed incorrectly. Every wall penetration — electrical outlets, hose bibs, dryer vents, cable entry points — needs a flashing detail that directs water away from the opening. When those details are missing or failing, water has a direct path to the sheathing every time it rains.
A thorough pre-installation inspection identifies every one of these points and addresses them before the new moisture barrier goes down. This is the kind of work that doesn’t show up as a visible line item but determines whether the siding job actually protects your home long term.
Flashing at window and door openings is the leading source of wall water intrusion in the Triad homes we inspect. When pan flashing at the sill is missing, incorrectly sloped, or has failed at its end dams, water sits against the rough opening framing and eventually finds its way into the wall cavity.
New siding installed over a failed window flashing doesn’t correct the problem — it seals it in. Within a few years, the framing around that opening begins to rot, and by the time the damage is visible inside the home, it has often spread to adjacent stud bays. Identifying and correcting this condition before installation is the right approach, and it’s one of the reasons we don’t skip the inspection step regardless of how straightforward a project looks on the surface.
If your home was built before 1978, there is a meaningful probability that existing exterior paint contains lead. Federal EPA RRP (Renovation, Repair, and Painting) regulations require that contractors working on pre-1978 homes hold current RRP certification and follow specific protocols for dust containment, testing, and disposal of disturbed materials.
What does that actually mean for you as a homeowner? It means the contractor must test affected surfaces before work begins, use containment practices during siding removal to prevent lead-contaminated dust from spreading across your yard, and dispose of old materials according to EPA guidelines. You should receive documentation confirming your contractor’s certification before any work starts — not a verbal assurance, but a certificate number you can verify.
Every siding contractor in the Triad mentions brand names. Almost none of them explain what those names mean in terms of actual product performance, and the omission matters.
Vinyl siding is not a commodity where one panel is interchangeable with another. Panel thickness alone — a specification rarely discussed in contractor proposals — has a direct relationship to impact resistance, wind performance, and long-term dimensional stability.
Vinyl siding panel thickness is measured in thousandths of an inch, and the difference between product lines is significant:
| Panel Grade | Nominal Thickness | Performance Characteristics | Typical Application |
|---|---|---|---|
| Builder/Entry Grade | .040″–.042″ | Minimum code compliance, higher flex and oil-canning risk, reduced impact resistance | New construction volume builds |
| Standard Residential | .044″–.046″ | Better dimensional stability, reduced thermal movement, improved wind resistance | Most residential replacement projects |
| Premium Residential | .046″–.048″ | Maximum rigidity, highest impact resistance, best long-term appearance retention | Exposed locations, high-wind zones, homeowner priority on longevity |
| Insulated Siding | .044″+ face panel with foam backing | All panel benefits plus R-value contribution, significantly reduced oil-canning, better sound attenuation | Energy-focused projects, homes with foam-backed exterior walls |
When a proposal simply says “CertainTeed vinyl siding” without specifying the product line and panel thickness, you don’t actually know what you’re getting. A contractor who understands their product will tell you the specific line name, the nominal thickness, and why that product is appropriate for your home’s exposure and your long-term goals. The article How to Compare Vinyl Siding Options breaks down how to evaluate these differences side by side when you’re reviewing contractor proposals.
Insulated vinyl siding adds a layer of contoured foam backing to a standard panel. The practical benefits go beyond R-value: the foam backing significantly reduces the characteristic waviness (called “oil-canning”) that can appear in thin panels on flat walls, provides minor sound attenuation, and gives the panel a more solid feel when struck.
The trade-off is cost and installation complexity. Insulated panels require adjusted corner and trim details to accommodate their additional depth, and they don’t perform identically to standard panels in every application. For Triad homes with west-facing walls that absorb significant afternoon sun, insulated panels can be a sound long-term investment. For homes where the wall cavity already contains continuous exterior insulation — more common in post-2010 construction — the incremental benefit may be lower.
The right answer depends on your specific home. A contractor who recommends one approach for every project without discussing your particular situation isn’t giving you expert guidance — they’re running a catalog.
Every competitor in the Triad market mentions a lifetime manufacturer’s warranty as a selling point. What they don’t explain is that vinyl siding warranties — including lifetime warranties — have two significant limitations homeowners rarely encounter until they need to use them.
Prorated vs. non-prorated coverage: Many manufacturer warranties reduce the replacement value of a defective product as the panel ages. A panel that fails at year 15 may only be covered for 30–40% of its original material value under a prorated warranty. Non-prorated warranties maintain full material replacement value throughout the warranty period.
Material only, not labor: The overwhelming majority of vinyl siding manufacturer warranties cover the cost of replacement material for a confirmed defective product. They do not cover the labor cost of removing existing siding, installing replacement panels, and color-matching weathered panels that have faded over time. Labor costs for a warranty repair on siding can easily exceed the material cost.
Understanding these distinctions before you sign a contract puts you in a much stronger position. Ask your contractor specifically whether the warranty they’re recommending is prorated or non-prorated, and ask directly whether labor for defect-related repairs is covered under any workmanship warranty they offer separately. You can also review Smithrock Roofing’s warranty coverage to understand what a clearly structured workmanship guarantee looks like in practice.
The standard advice — check licensing, verify insurance, look at reviews — is correct as far as it goes. It just doesn’t go far enough. Here’s what separates a contractor worth hiring from one who will get the job done adequately at best.
VSI (Vinyl Siding Institute) certification confirms that an individual has demonstrated knowledge of vinyl siding installation standards through a written examination. It is a meaningful credential — it indicates familiarity with manufacturer guidelines, installation protocols, and industry standards.
What VSI certification does not do is audit the quality of any specific contractor’s actual installed work. It’s a knowledge credential, not a performance guarantee. A VSI-certified contractor who routinely subcontracts installation to day-labor crews hasn’t transferred that certification to the people actually installing your siding.
This leads to the most important question most homeowners never think to ask.
The difference between a contractor who employs trained, full-time installation crews and one who subcontracts work to whoever is available on a given week is enormous. Consistent crews develop consistent habits — they know the correct nailing pattern, they make expansion gaps automatically, they flag substrate problems before covering them up. Rotating subcontractors bring inconsistent quality regardless of what any certification hanging on the office wall says.
Ask directly: “Will the crew installing my siding be your employees, or do you subcontract your installation work?” The answer is one of the most revealing things a contractor will tell you.
A proposal that protects you should specify the following in writing before you sign anything:
A proposal that lacks these specifics isn’t protecting your interests — it’s leaving room for disagreement after work has already started.
The Triad market has a healthy number of qualified siding contractors, but also sees its share of storm-chasing crews and volume operations that prioritize speed over quality. Watch for these warning signs:
None of this means the lowest bid is wrong or the highest bid is right. It means a proposal that answers these questions clearly, in writing, is worth more than one that doesn’t — regardless of the number attached to it.
As you move forward with a vinyl siding project in the Triad, three specific steps will help you make a better decision and protect your investment long after the crew leaves your property.
1. Use the North Carolina Licensing Board for General Contractors Lookup Tool
Before signing anything, verify that your contractor holds a current, active license through the NC Licensing Board for General Contractors. The board maintains a searchable online database where you can confirm license status, classification, and whether any disciplinary actions are on file. This takes less than five minutes and eliminates any contractor who is operating without proper credentials in the state.
2. Request a Pre-Installation Moisture Inspection
In 2026, moisture intrusion behind siding remains one of the most underdiagnosed problems in Triad homes, particularly in structures built before the widespread adoption of house wrap standards. Ask your top candidate to include — or independently arrange — a moisture reading of the substrate before installation begins. Several home inspection firms in Greensboro, Winston-Salem, and High Point offer targeted moisture assessments separate from full home inspections. Identifying rot, mold, or compromised sheathing before siding goes up prevents far larger costs later.
3. Document the Project with Time-Stamped Photos
Arrange with your contractor to receive progress photos at three stages: after existing siding removal, after house wrap installation, and after the first course of panels is set. These images create a verifiable record of what was done beneath the surface — documentation that supports any future warranty claim and provides meaningful disclosure if you sell the home.
In most cases, yes. Replacing the exterior cladding on a home typically requires a building permit in Triad municipalities, including Greensboro, Winston-Salem, and High Point. The permit triggers an inspection that verifies proper installation, which protects both the homeowner and the structure’s long-term integrity. A contractor who tells you permits are unnecessary for a full siding replacement is either misinformed or attempting to avoid the oversight process — neither is a position you want your project in.
For an average single-story or two-story home in the Triad, a professional crew typically completes installation in two to four days under normal conditions. That timeline can extend if significant substrate repair is required, if the home has complex architectural features such as multiple gables or dormers, or if weather interruptions occur. Be cautious of any contractor who promises unusually fast completion without first assessing the condition of what’s behind the existing siding.
Homes built before 1978 may have exterior surfaces with lead-based paint. If your property falls into that category, the removal and disposal of existing materials must follow EPA Renovation, Repair, and Painting (RRP) Rule requirements. Contractors performing this work must be RRP-certified, and the handling, containment, and disposal of lead-paint materials must meet specific federal standards. Before hiring, confirm that your contractor holds current RRP certification and spell out the handling procedures explicitly in your written contract.
Start by confirming that each proposal covers the same scope — not just gross square footage, but also trim linear footage, corner posts, J-channel, starter strips, and house wrap specification. Verify that labor, material removal, permit fees, and workmanship warranty terms are all addressed in writing. Once the scope is genuinely equivalent, compare the specificity and clarity of each document. A thorough, detailed proposal reflects how a contractor manages a project; a vague one reflects the same thing.
Vinyl siding installation is one of the more consequential exterior decisions a Triad homeowner can make — not because it’s the most complex project, but because it affects moisture management, energy performance, and curb appeal for decades. The Triad’s climate, its housing stock, and its contractor market all have specific characteristics that reward homeowners who ask precise questions and insist on written answers before work begins.
If you’re ready to discuss your project, get accurate information about what your home specifically requires, or schedule an on-site assessment, we’re here to help. Contact Us
Smithrock Roofing © Copyright 2026 • All Rights Reserved • Privacy Policy • Maintained by Mongoose Digital Marketing