
You notice a hazy film between the two panes of your living room window. You wipe the inside glass. You wipe the outside. The fog stays put, sitting right where you cannot reach it. That is the moment most homeowners start researching double-pane window installation, and it is also the moment that a key piece of information almost never surfaces: by the time you see that fog, the window’s insulating gas is already gone, and has been for a while.
This guide covers what actually happens inside a double-pane window, why the fog-as-warning-sign framework leads homeowners to act too late, and what a proper installation actually involves from start to finish. If you are weighing a DIY attempt against calling a professional, the most useful thing we can give you is a clear picture of where the real difficulty points are, so the decision is based on something more useful than “how hard can it be?”
A double-pane window, also called an insulated glass unit or IGU, consists of two panes of glass separated by a spacer and sealed at the perimeter. The cavity between the panes is filled with an inert gas, typically argon, which conducts heat far less readily than air. That gas layer is what gives the window its thermal performance. The spacer contains a desiccant material that absorbs any residual moisture inside the cavity during manufacturing.
Heat moves through a window in three ways: conduction through the glass itself, convection through the gas cavity, and radiation from one glass surface to another. The IGU design addresses all three. The gas slows convection. Low-emissivity (low-e) coatings on the glass surface reduce radiant transfer. The thickness of the glass controls conduction to a degree.
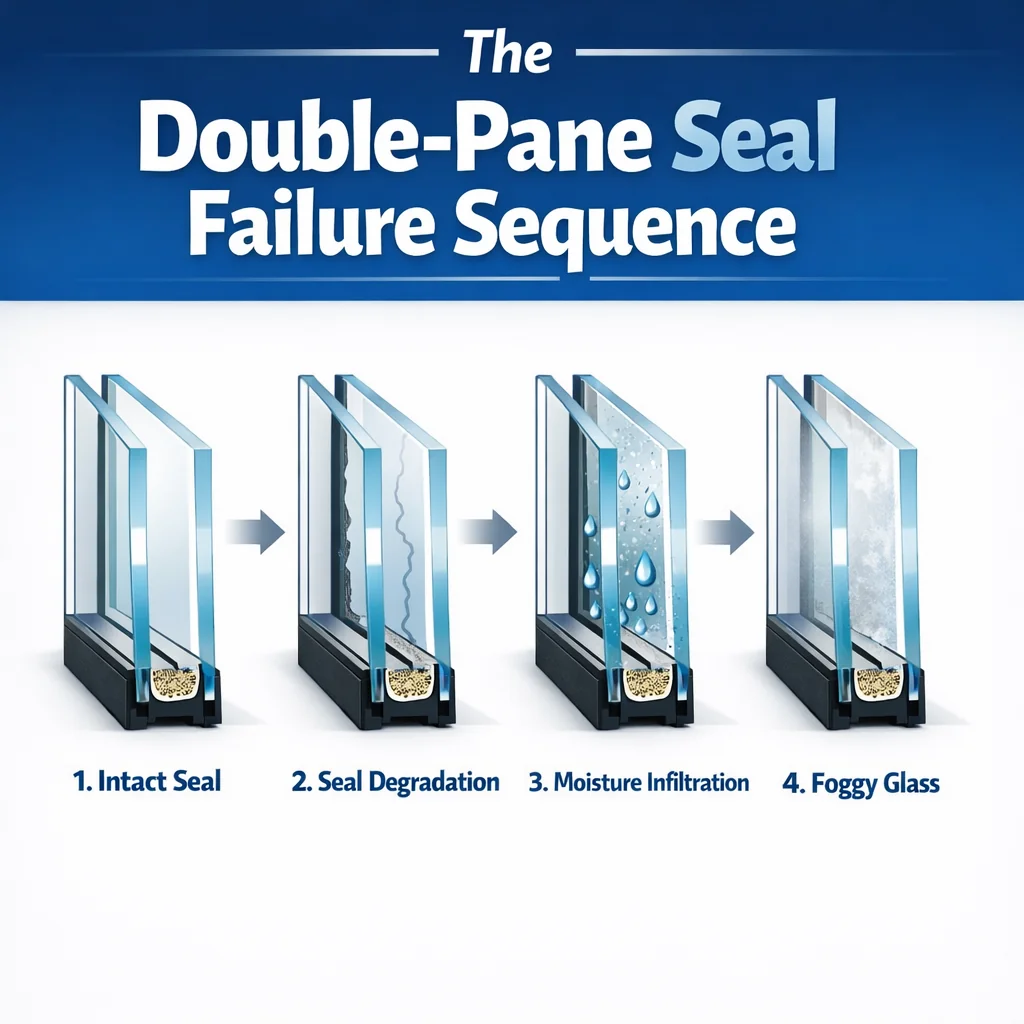
Here is what the standard fog-as-symptom framing misses entirely.
Seal failure does not begin with fog. It follows a specific sequence:
The practical implication: if you are waiting for fog to trigger a replacement call, you have already been paying to heat and cool through an underperforming window for an extended period. Slightly elevated heating bills, a cold draft near a window with no visible damage, or a window that is simply older than 15 to 20 years are all legitimate reasons to assess the seal condition before fog sets in. Understanding what those window seal repair costs look like can help you decide whether repair or full replacement makes more financial sense.
One of the most consistent gaps in competitor content is the treatment of all window work as a single category. In practice, there are three distinct scopes, and confusing them leads to buying the wrong product, ordering the wrong measurements, and attempting a repair that requires a skill level above what you have budgeted for.
This is the most targeted repair. The outer frame and sash remain in place. Only the glass unit itself is replaced. The installer removes the vinyl or wood stops around the interior perimeter of the sash, lifts the old glass unit out, seats a new IGU, and resets the stops.
This scope is appropriate when the frame and sash are structurally sound and the problem is isolated to the glass seal. It requires precise measurement of the glass unit itself, not the rough opening. A common mistake here is measuring the sash opening (the daylight area) and assuming the IGU dimensions match. The glass unit is always slightly larger than the daylight opening; it sits behind the stops, not flush with them.
The glass unit and the sash it sits in are both replaced, but the outer frame stays. This is common when the sash hardware has failed, the sash itself has warped or rotted, or the existing glass unit is bonded to the sash and cannot be removed cleanly.
Sash replacement kits are manufactured to match specific window brands and frame dimensions, so accurate frame measurement is essential before ordering.
The entire window assembly, including frame, sash, and glass, is removed and replaced. This is the appropriate scope when the frame itself has rotted, the rough opening has shifted, or you are changing the window size. This is also the scope that involves the most complexity around shimming, flashing, and exterior sealing.
Most homeowners who research “double-pane window installation” on their own are actually dealing with an IGU swap or sash replacement. Full-frame replacements involve structural and weatherproofing considerations that significantly raise the skill requirement. Our windows service covers all three scopes, from targeted glass unit swaps to complete frame replacements.
Need a hand with this in Winston-Salem, Greensboro and the Triad? Call (336) 971-0464 or request a free estimate. Honest answers, no pressure.
Every guide says “measure before you buy.” Very few specify which measurement to take or explain what happens when the numbers differ.
For a full-frame replacement, there are four numbers that matter, and they are not the same number.
| Measurement | What It Is | Why It Matters |
|---|---|---|
| Rough Opening Width and Height | The framed opening in the wall, from stud to stud and header to sill | Determines maximum window size; almost always larger than the window |
| Actual Window Frame Size | The exterior dimensions of the window unit you are installing | Must be smaller than the rough opening to allow for shimming and insulation |
| Daylight Opening | The visible glass area from inside, inside edge of frame to inside edge | Used for glass unit sizing, not frame sizing |
| Sill Condition and Level | Whether the rough opening sill is plumb, level, and free of rot | Determines whether a sill expander or filler is needed before installation |
The fourth measurement, sill condition, is the one almost nobody mentions before they start. A rough opening sill that is not level creates an uneven gap at the base of the window after insertion. If you apply caulk or begin fastening before you check this, you either lock in a gap or you have to remove the window and start over. The right practice is to dry-fit the window first, with no sealant applied, and check the sill gap from the exterior before anything is staged.
If a gap exists at the sill, a sill expander or custom filler piece needs to be added before the window goes in for the final time. Skipping this step and trying to fill the gap with caulk alone is not a durable solution; caulk is not a structural filler and will crack under the load and movement of the frame.
Understanding the real failure points makes the DIY-versus-professional decision easier to reason through. The issue is rarely whether someone can physically complete the work. It is whether they recognize a problem condition before it is too late to correct without starting over.
Shimming establishes whether the window sits plumb and level in the rough opening. A window that is not plumb will have a sash that binds or does not latch cleanly because the frame is racked. The correct sequence is: insert the window, shim until plumb and level is confirmed, then fasten. Fastening first and shimming afterward permanently locks in any misalignment.
In an IGU swap, the vinyl stops are the trim pieces that hold the glass unit against the sash. They are removed to take the old glass out and reset after the new unit is in. On windows with significant sun exposure, these stops become brittle over time. Prying a brittle stop causes it to crack or snap. A cracked stop cannot create a consistent seal against the glass edge, which means air infiltration bypasses the caulk bead regardless of how well that bead was applied.
The right approach is to assess stop condition before removal. If the stops are noticeably stiff, discolored, or chalky, order replacements before you start. Trying to source vinyl stops after you have already removed the old ones and have an open glass unit sitting in the frame is not a position you want to be in.
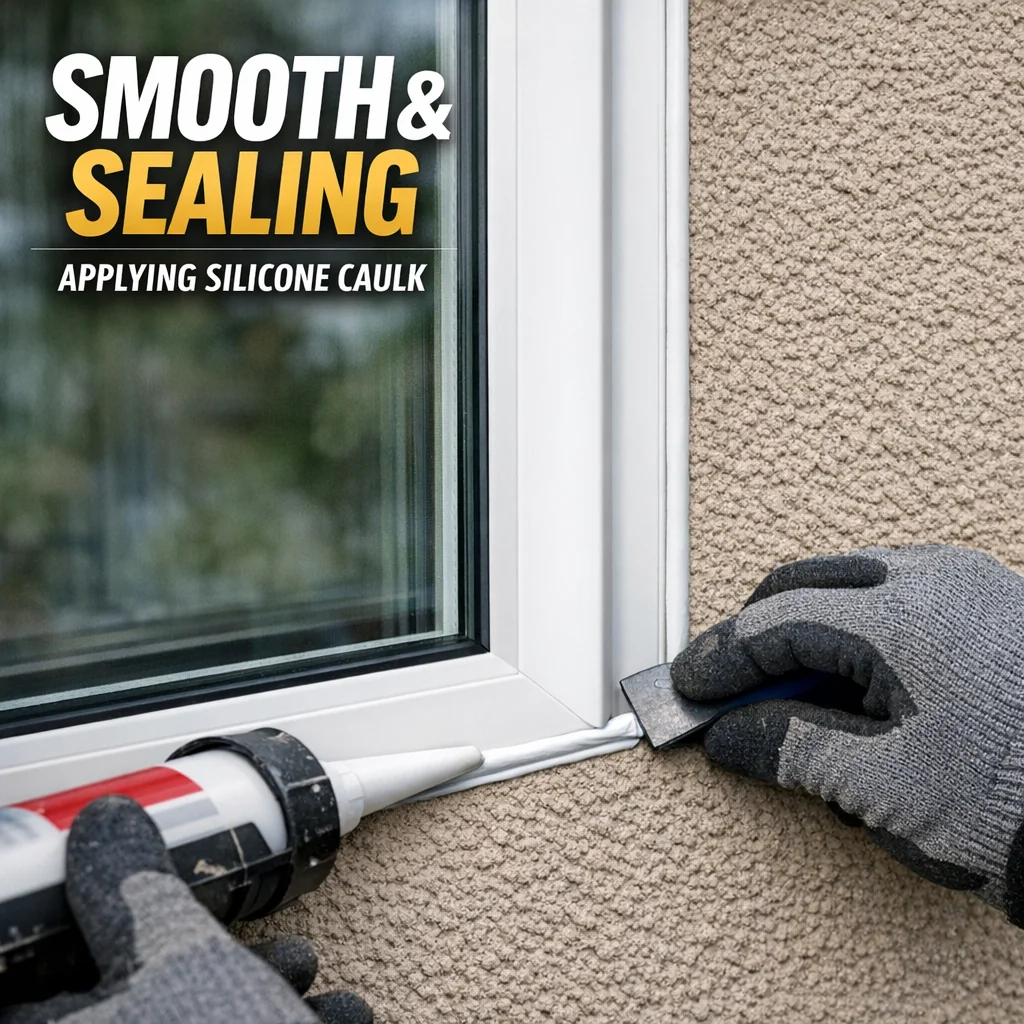
The perimeter caulk bead is the primary barrier keeping insulating gas in and moisture out of a new IGU installation. Two caulk types are commonly used: 100% silicone and paintable latex. They are not interchangeable.
Silicone cures to a flexible, UV-resistant seal and holds up well under the thermal expansion and contraction that happens at a window joint. It cannot be painted, and it must be tooled while still workable, which is a short window of time. Latex caulk is paintable and easier to work with but degrades faster under prolonged UV exposure and thermal cycling at exterior joints.
Using latex caulk on the exterior perimeter of a window frame is one of the more common sources of premature re-installation within a few years. The right application: silicone on exterior joints, latex only on interior trim where it will be painted and is not exposed to weather.
The bead itself must be continuous. A single gap, even a small one, allows gas exchange between the cavity and outside air. There is no effective way to patch a gap in a perimeter seal after installation without removing and reseating the window.
Some window situations are genuinely DIY-friendly. An IGU swap on a newer window with stops in good condition, a clear measurement, and good access is a manageable project for a handy homeowner. The work is careful and detail-oriented rather than physically demanding.
Full-frame replacements are a different matter. They involve removing exterior casing, managing flashing continuity, shimming a frame in a rough opening, and re-establishing the weatherproofing at the wall-to-window joint. A gap in that flashing sequence does not show up as a problem immediately. It shows up as water damage inside the wall cavity months or years later.
If the window you are replacing is on an upper floor, if the frame itself shows signs of rot or damage, if the rough opening sill is not level, or if you have any uncertainty about the flashing or exterior sealing, those are the conditions that warrant a professional installation.
At Smithrock Roofing, we handle window work for homeowners across the NC Triad, including roofing in Winston-Salem, Greensboro, High Point, Kernersville, Clemmons, Rural Hall, and King. With more than 60 combined years of exterior experience and more than 350 five-star reviews from local homeowners, we approach window installation the same way we approach every job: honestly, carefully, and with a focus on protecting your home for the long term. If you are not sure which scope of work your situation calls for, we are glad to take a look and give you a straight answer.
An IGU replacement on a single window with straightforward access can usually be completed in under an hour once you have the correct unit in hand. A full-frame replacement takes longer, plan on several hours per window when you account for removing the old frame, preparing the rough opening, setting and shimming the new frame, and completing the exterior sealing. A whole-house project is typically spread across one or more full days depending on the number of windows and the complexity of each opening.
If the glass itself is fogged, cracked, or showing failed seals but the surrounding frame and sill are structurally sound, an IGU swap is often the right scope of work. If the frame is warped, rotted, or no longer sits square in the opening, or if the window is an older single-pane unit being upgraded entirely, a full-frame replacement is the more appropriate solution. When in doubt, having someone inspect the frame condition before ordering glass is the step that prevents the wrong decision.
The fog you see between the panes is moisture that has entered the insulated glass unit after the perimeter seal has failed. The desiccant material inside the spacer bar is designed to absorb residual moisture during manufacturing, but once the seal breaks down, that desiccant becomes saturated and can no longer keep the interior air space dry. The result is condensation that forms on the interior glass surfaces and cannot be wiped away from outside. Once this occurs, the IGU itself needs to be replaced, there is no repair that restores a failed seal.
An IGU swap is a manageable DIY project for a careful, detail-oriented homeowner, provided the frame is in good condition and the replacement unit is measured correctly. Full-frame replacements involve flashing, shimming, and exterior sealing work where mistakes may not surface as visible problems until water has already caused damage inside the wall. Upper-floor windows, damaged rough openings, or any uncertainty about the flashing sequence are all good reasons to bring in a professional rather than work through the uncertainty on your own.
Window installation done right is one of the more durable investments a homeowner can make, and getting the flashing and sealing details correct the first time is what separates a window that performs for decades from one that causes problems well before its time. Whether you are dealing with a fogged IGU in a Kernersville home or a full-frame replacement on an older house in Greensboro, Smithrock Roofing brings the same careful, honest approach to every job. Call us at (336) 971-0464 or Contact Smithrock Roofing to get a free estimate and a straight answer about what your windows actually need.

Smithrock Roofing © Copyright 2026 • All Rights Reserved • Privacy Policy • Maintained by Mongoose Digital Marketing
