
Every time it rains, your gutters are moving hundreds of gallons of water off your roof and directing it straight down toward the ground — right next to your foundation. If that water has nowhere to go, it saturates the soil, works its way into your basement, erodes your landscaping, and quietly sets the stage for some of the most expensive repairs a homeowner can face. Water damage incidents average $11,000. Foundation repairs run $5,000 to $20,000. Basement flooding remediation lands around $10,000. These aren’t edge cases — they’re what happens when drainage is left to chance.
Burying your gutter downspouts solves the problem at the source. Instead of releasing water at ground level next to your home, an underground system carries that runoff through buried pipe to a discharge point safely away from your foundation. It works invisibly, handles heavy flow volumes, and requires no repositioning before you mow. The result is a protected foundation, a cleaner yard, and genuine peace of mind every time storm clouds roll in over the NC Triad.
This guide covers everything — how the system works, what separates a well-built installation from one that backs up at the first major storm, step-by-step installation, depth and slope guidance, maintenance, and answers to the questions we hear most from homeowners across Winston-Salem, Greensboro, High Point, Kernersville, and the surrounding communities.

Before you pick up a shovel — or before you call a contractor — it helps to understand the full picture. A buried downspout drainage system is a connected series of simple components, each playing a specific role in moving water safely away from your home. When every part is correctly sized, properly sloped, and securely connected, the whole thing runs without any intervention from you.
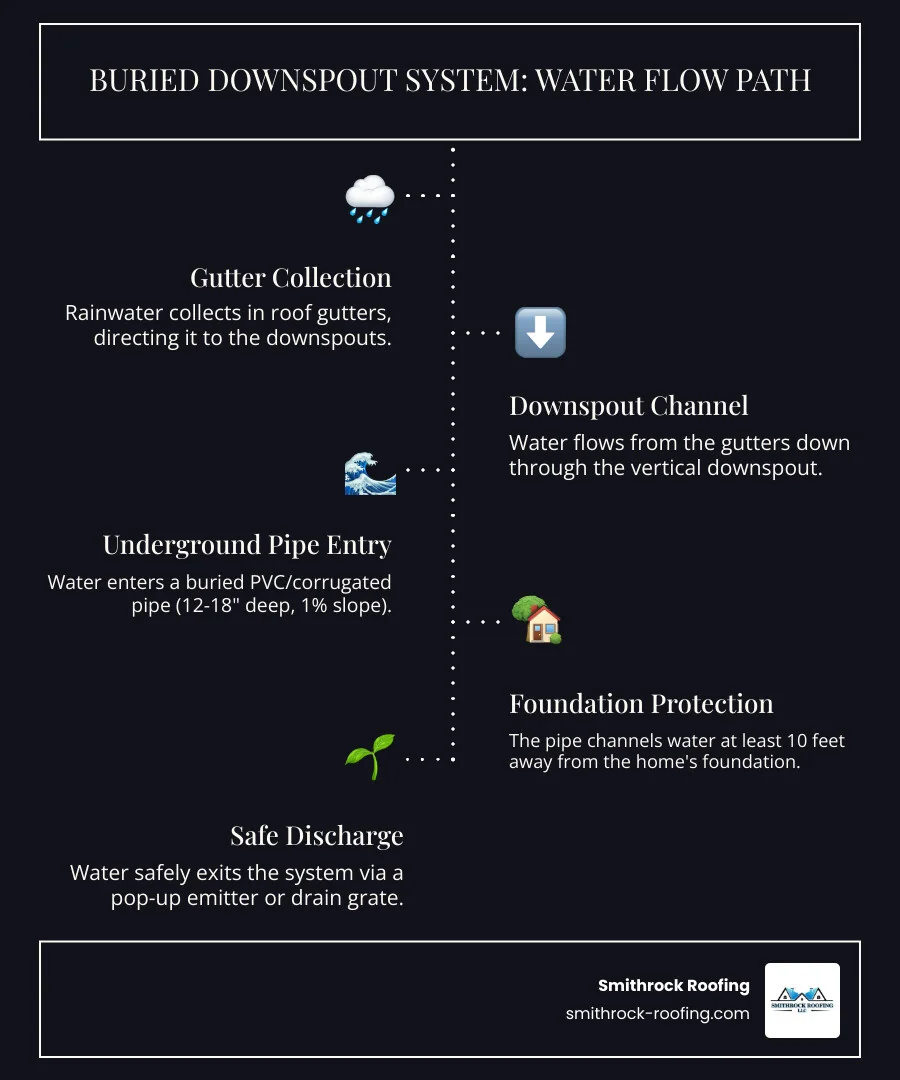
We’ve all seen unsightly corrugated hoses snaking across a lawn or a splash block sitting uselessly next to a foundation. Those are temporary fixes at best. A buried downspout system is a permanent solution — but it’s worth understanding both what you gain and what you’re taking on before you commit.
Here’s a quick side-by-side look at your main options:
| Feature | Buried Downspouts | Above-Ground Extensions | Splash Blocks | Rain Barrels |
|---|---|---|---|---|
| Aesthetics | Excellent (invisible) | Poor (unsightly) | Fair (visible but low-profile) | Varies (can be decorative) |
| Foundation Protection | Excellent (moves water far away) | Fair (often too short or poorly sloped) | Poor (disperses water too close) | Good (overflow needs managing) |
| Safety | Excellent (no trip hazards) | Poor (tripping hazard) | Good (low profile) | Good (if secure) |
| Maintenance | Moderate (inspection and flushing required) | High (frequent repositioning, easily damaged) | Low (occasional cleaning) | High (cleaning and winterization) |
| Installation Effort | High (digging, grading, connecting) | Low (attach to downspout) | Very low (place under downspout) | Simple (connect to downspout) |
| Durability | High (with quality materials and correct installation) | Low (prone to lawn equipment damage) | Moderate (easily displaced) | Moderate |
| Clogging Risk | Moderate (requires guards and periodic flushing) | Low (visible and easy to clear) | Low | High (if not filtered) |
| Freezing Risk | Moderate (if not sloped or buried correctly) | Low | Low | High (requires winterization) |
Not all buried downspout installations are created equal. The difference between a system that quietly handles every rainstorm for decades and one that backs up after the first major downpour usually comes down to three things: the right materials, a properly maintained slope, and a well-chosen discharge point. Before walking through each installation step, it’s worth being clear about what “done right” actually looks like.
Keep these principles in mind throughout the installation. They’re what separates a system that protects your home reliably for years from one that becomes a maintenance headache.
Proper planning is the most important phase of a buried downspout installation. Time spent here prevents costly mistakes during the dig — and expensive corrections after the fact.
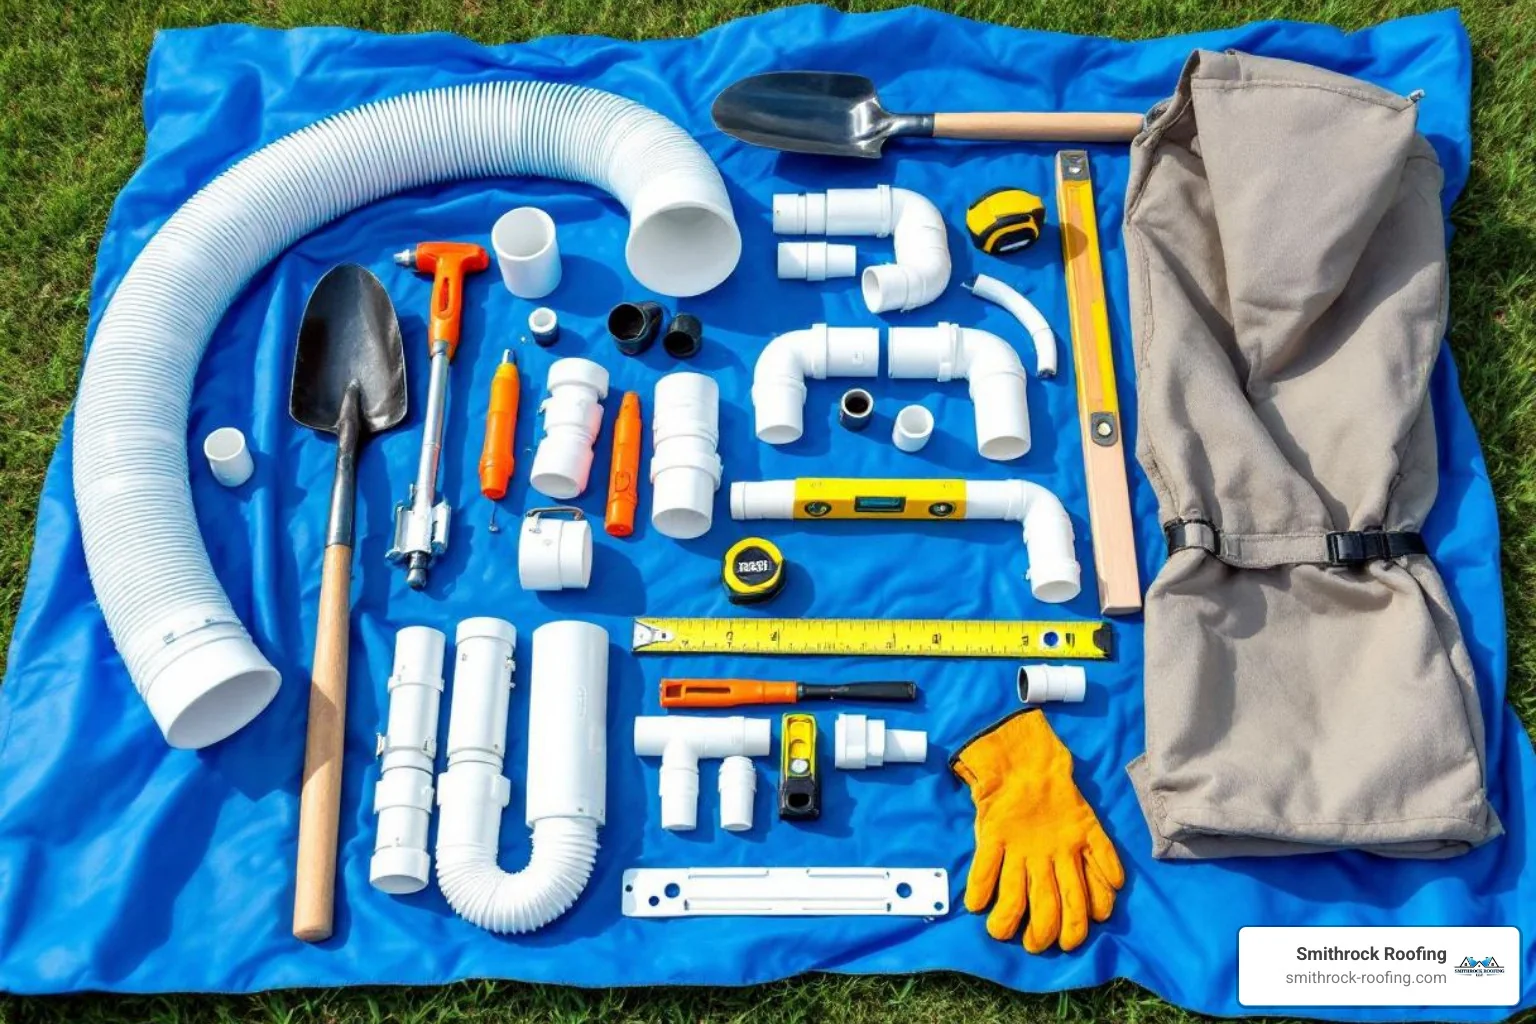
Gathering everything before you start makes the installation process far smoother. Here’s what you’ll need:
Tools:
Materials:
For expert guidance on your full gutter system — from the roofline down — our team offers professional gutter and downspout installation throughout the NC Triad.
Walk your property during or after a rain event and observe where water flows, pools, and concentrates. This tells you where the drainage problem is worst and helps you map the most effective trench path. Sketch your property, mark each downspout, and identify a discharge location at least 10 feet from your foundation — farther if your yard allows it.
The entire path must maintain a continuous downhill slope. If your yard is relatively flat, take extra time to confirm that a gravity-fed slope is achievable from the downspout to your chosen discharge point before you commit to that route.
One step is non-negotiable: call 811 before you dig. This free service marks underground utility lines across your property. It’s required by law, it’s quick to arrange (call a few days ahead), and it prevents dangerous and expensive accidents. Visit call811.com to get started.
Before breaking ground, take a few minutes to check the rules that apply to your property. Municipal stormwater regulations in Winston-Salem, Greensboro, High Point, and surrounding communities often dictate how and where you can discharge rainwater from your roof. If you’re in a Homeowners’ Association, review its covenants — some have specific requirements or restrictions on drainage work.
Also consider your property lines. Your system should discharge water onto your own property or into an approved outlet, not onto a neighbor’s yard. For larger or more complex projects, a building permit may be required — a quick call to your local building department will confirm whether yours does. Our gutter installation services team is familiar with the local landscape and can help you navigate these questions.
Depth is one of the most common questions homeowners ask when planning underground downspout drainage — and for good reason. Bury the pipe too shallow and you risk freezing, crushing from foot traffic, and damage from lawn equipment. But depth alone isn’t the determining factor. Slope is. Here’s how to think about it practically.
The standard recommendation is 12 to 18 inches deep. For most homes in the NC Triad — Winston-Salem, Greensboro, High Point, Kernersville — this range gives the pipe enough cover to stay protected without requiring excessive excavation. Eighteen inches also puts the pipe below most lawn tool depth and reduces the risk of accidental damage from edging or aeration equipment.
In colder winters, depth matters even more — but slope is still the real answer. If water sits in a pipe that freezes, the ice can crack or deform the pipe, especially corrugated plastic. The solution isn’t necessarily to dig much deeper; it’s primarily to ensure your pipe has enough slope that it drains completely after every rain event. A pipe that empties itself has nothing left to freeze. For areas like Pilot Mountain or Danbury where hard freezes are more frequent, burying below the local frost line adds an extra margin of protection.
Slope always takes priority over depth. If maintaining an 18-inch depth means you can’t achieve a consistent downward grade, it’s better to sacrifice some depth and keep the slope intact. A pipe at 12 inches that drains completely will outlast and outperform a pipe at 18 inches with a belly in the middle where water stalls and sediment collects.
As a practical rule: dig to a minimum of 12 inches, target 18 inches where your soil conditions allow, and confirm your slope at every stage of the trench before the pipe goes in. If you’re uncertain about your yard’s grade, a professional assessment can save you from having to re-dig later.
With your plan in hand and your materials gathered, it’s time to work through the installation. Follow these steps carefully — the sequence matters, and a few details at each stage make the difference between a system that performs reliably for decades and one that causes problems within a season or two.
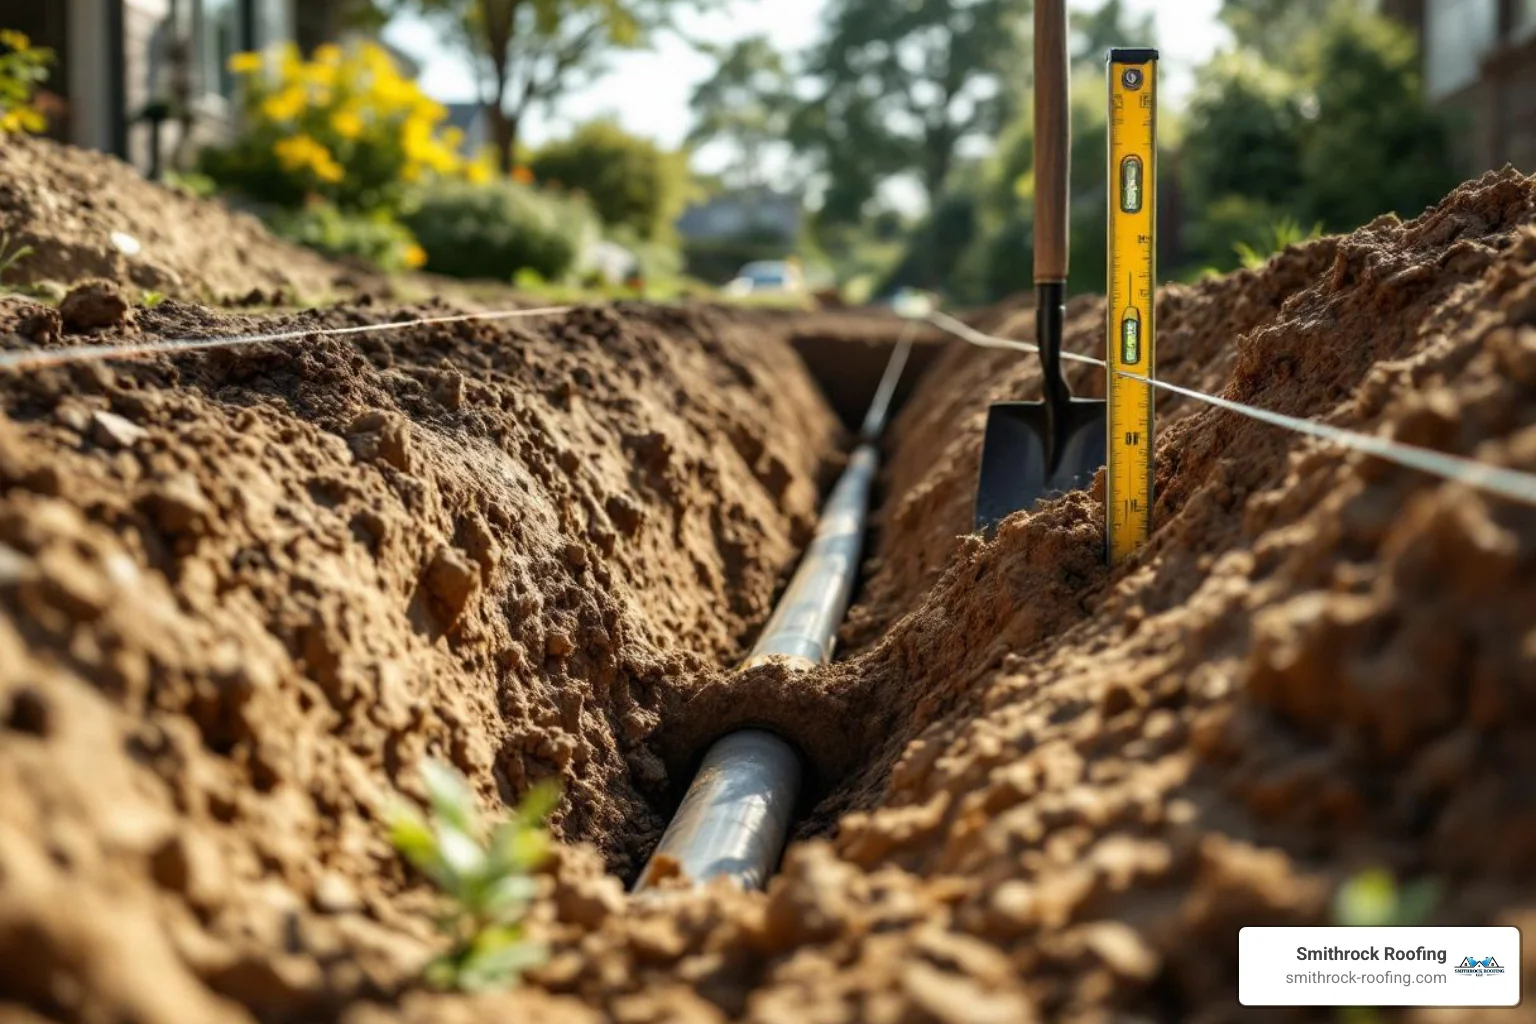
Use stakes and string to mark your planned path before you lift a shovel. Once the line is marked, dig your trench to a depth of at least 12 to 18 inches. Make the trench about 6 inches wider than your pipe’s diameter — this gives you room to add gravel on both sides for proper bedding and drainage.
The most critical part of this step is establishing and maintaining the correct slope. Aim for a minimum drop of 1/8 inch per foot (1 inch per 10 feet of run) away from the house. To check this consistently as you dig, drive stakes at both ends of the trench and stretch a level string line between them. Measure down from the string at regular intervals to confirm the trench bottom is dropping at the right rate. Don’t skip this check — a slope error here will compromise the entire system, and correcting it after backfill means re-digging.
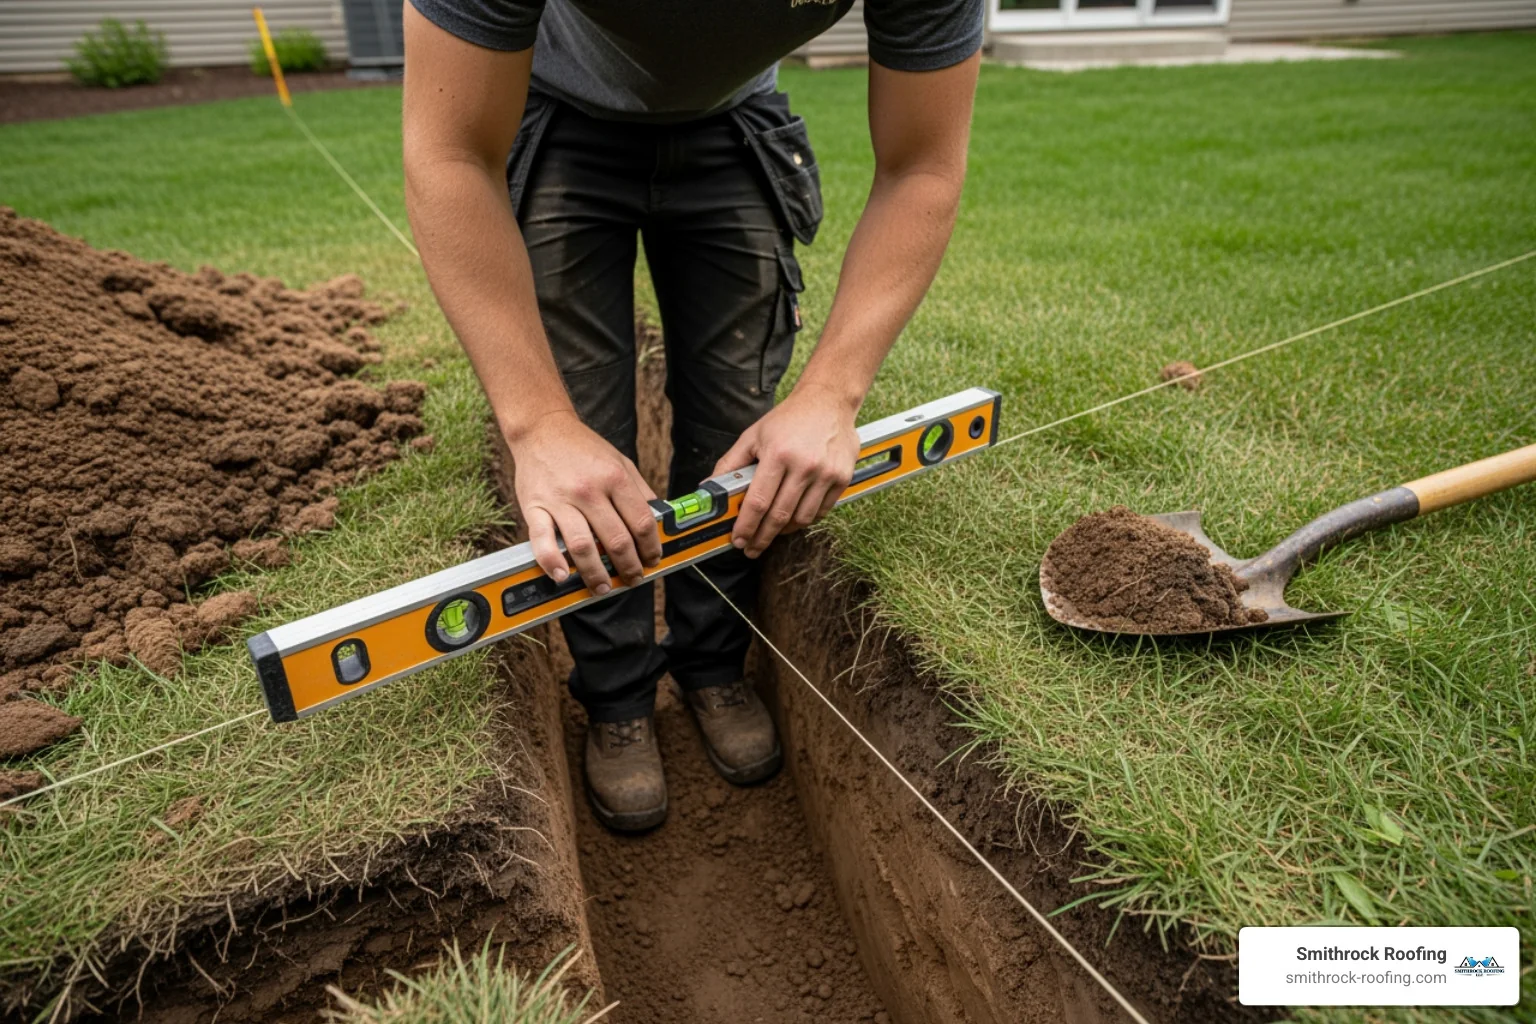
As you dig, navigate carefully around any marked utility lines. If you encounter tree roots, dig under them where possible. If you must cut a root, assess its size first — cutting large roots can destabilize the tree.

Remove the existing elbow at the bottom of your downspout. Attach a downspout-to-pipe adapter, which transitions from the rectangular downspout to your round drainage pipe. Secure this connection with sheet metal screws and seal it thoroughly — this is the first point where a leak can develop if the connection is loose or unsealed.
If you’re using PVC pipe (and you should be), use PVC primer and cement on every joint. Don’t skip the primer — it prepares the pipe surface for a true chemical bond. Work from the adapter at the downspout end toward the discharge point, laying the pipe in the trench and confirming the slope as you go. Avoid creating any low spots or sags where water could stall.
If you’re merging multiple downspouts into a single underground run, always use a Wye fitting at the junction — not a T-fitting. A Wye allows water from two pipes to merge smoothly in the direction of flow, while a T-fitting creates turbulence and is more prone to backing up. When merging multiple lines, step up to a 4-inch pipe on the main run even if your branch lines are 3-inch, to handle the combined volume during heavy rain.
At the connection point where the downspout meets the underground pipe, consider installing an inline catch basin. These small boxes intercept larger debris before it enters the buried run, making future maintenance far simpler. For a professional-quality installation that handles high volumes without backing up, explore our seamless gutter installation services.
Proper backfilling is what keeps your system stable and your yard looking like nothing was ever disturbed. Work through it in layers rather than all at once.
Start by adding a 2 to 4 inch layer of gravel to the bottom of the trench to create a stable, well-draining bed for the pipe. Then wrap the pipe and gravel with landscape fabric. This barrier prevents soil, silt, and fine roots from working their way into and around the pipe over time — a small step that makes a significant difference in long-term system performance.
Fill the rest of the trench with the excavated soil, adding it in layers and compacting each layer as you go. Compacting in stages prevents the ground from settling later and creating a visible depression or low spot in your lawn. Mound the soil slightly at the surface to account for the settling that will happen over the first few weeks.
At the end of your pipe run, install your chosen discharge outlet. A pop-up emitter sits flush with the lawn, stays closed when dry to block critters and debris, and opens automatically under water pressure when flow arrives. A fixed drain grate works in locations where pest intrusion is less of a concern and the area stays clear of debris. Whichever you choose, make sure the outlet is positioned where it can discharge water freely without creating a new pooling problem.
Before you finish backfilling around the outlet and restore any landscaping, test the entire system. Run a garden hose into the top of the connected downspout for several minutes and walk the trench line looking for any signs of seeping or dripping at the joints. Watch the discharge point — water should flow freely and move away from the home. If it backs up or takes a long time to appear at the outlet, there may be a slope problem or a connection issue that needs to be addressed before you cover everything up. Catching it now saves significant effort later.
Once the system passes the test, restore the surface. Replace sod, spread grass seed, or apply a thin layer of topsoil as needed. Consider shallow-rooted ground cover over the trench area and decorative river rock around the discharge point to protect the emitter from mower contact.
A buried downspout line is the most effective single solution for managing roof runoff — but it can also be part of a larger water management strategy. Here’s how the most common alternatives stack up, and how they can work together with an underground downspout system.
Splash blocks are concrete or plastic blocks placed under a downspout outlet to disperse water and prevent erosion directly below the exit point. They move water only a foot or two from the foundation — far short of what’s needed to protect against soil saturation or basement infiltration. They’re easily displaced by heavy rain or lawn care and offer minimal long-term protection.
Roll-out extensions are corrugated tubes or vinyl sleeves that attach to the downspout and extend across the lawn. They can move water further than a splash block, but they’re unsightly, create trip hazards, collect standing water in their ridges, and are easily crushed by foot traffic or lawnmowers. They’re a temporary fix, not a solution.
French drains are designed to solve widespread ground saturation — a perpetually soggy lawn or yard, for example. They use a perforated pipe in a gravel-filled trench that collects groundwater along its entire length. This is different from a buried downspout line, which uses solid pipe to transport a concentrated volume of water from a specific source. The two can be integrated, but a downspout line should connect to the French drain through a catch basin or parallel solid pipe run — not feed directly into the perforated section, which could overwhelm the system during heavy rain.
Dry wells are an excellent solution for flat yards with no practical surface discharge point. A buried pit — often a prefabricated plastic chamber surrounded by gravel — receives runoff from the downspout line and holds it temporarily while it percolates into the surrounding subsoil. Their effectiveness depends heavily on soil type; in areas with heavy clay, they may drain too slowly and overflow during significant storms.
Rain gardens are shallow, planted depressions filled with deep-rooted, water-tolerant native plants. Runoff from a buried downspout is directed into the garden, where it pools briefly before being absorbed and filtered. They’re functional, beautiful, and beneficial for pollinators — a worthwhile addition to any property where the yard layout supports one.
Rain barrels collect and store roof runoff for outdoor use, which conserves water and reduces runoff volume. Their limitation is capacity — during a heavy storm, a barrel fills quickly. Any rain barrel must have an overflow system, often a buried downspout line that begins where the barrel’s overflow exits, to handle the excess safely.
For complex drainage situations involving multiple downspouts, challenging grades, or persistent moisture problems, Smithrock Roofing can assess your property and recommend a custom approach that integrates these systems effectively.
A properly installed buried downspout system is a long-term asset — but like any home system, it performs best with routine attention. The good news is that most maintenance is simple and takes very little time.
The standard recommendation is 12 to 18 inches. This depth protects the pipe from surface damage and, combined with proper slope, reduces freezing risk. Most importantly, regardless of depth, your trench must maintain a consistent downward slope of at least 1/8 inch per foot. A pipe at 12 inches that drains completely after every storm will always outperform a deeper pipe with a low spot that holds water.
Solid, smooth-wall PVC pipe — Schedule 40 is the common standard — is the right choice for most residential installations. It’s durable, crush-resistant, and its smooth interior sheds debris rather than trapping it. Corrugated pipe is more flexible and easier to route around obstacles, but its ribbed interior catches sediment and debris, it’s less durable under pressure, and it’s harder to clean. The upfront investment in PVC pays off in lower maintenance and a longer-lasting system.
Prevention starts at the roofline. Keep your gutters clean so that leaves, twigs, and shingle grit don’t wash into the downspout in the first place. Installing quality gutter guards is the most effective long-term step — they block the debris that would otherwise work its way into the underground pipe. For extra protection at the connection point, an inline catch basin intercepts larger particles before they enter the buried run. Flush the underground pipe with a hose once or twice a year to clear any accumulated sediment.
For most homeowners, yes — decisively. The upfront cost of materials and installation is a fraction of what you’d pay to repair foundation damage, remediate basement moisture, or rebuild eroded landscaping. Beyond the financial math, there’s real peace of mind in knowing that every rainstorm is being managed proactively. Homes with chronic drainage problems, low-lying foundation grades, or heavy tree coverage tend to see the most dramatic improvement — but even homes without obvious issues benefit from the long-term protection a correctly installed system provides.
That depends on the number of downspouts, trench length, and soil conditions. A DIY project for a few downspouts might take a weekend — roughly 4 to 8 hours per downspout for someone working methodically. A professional crew with specialized equipment can typically complete a standard installation in a single day. More complex projects involving multiple merged lines, difficult grades, or rocky or clay-heavy soil will take longer regardless of who’s doing the work.
Yes, and it’s a common approach for keeping trench work to a minimum. The key is to use Wye fittings — not T-fittings — at any junction where lines merge. A Wye allows water from two pipes to combine smoothly in the direction of flow. A T-fitting creates turbulence and is far more prone to backing up. When merging multiple downspouts, also confirm that your main run pipe is large enough to handle the combined volume — stepping up to a 4-inch pipe on the main run, even if individual branches are 3-inch, is a sound safeguard against overwhelming the system during a heavy storm.
A pop-up emitter has a spring-loaded cap that stays closed when the pipe is dry, then opens under water pressure to release flow. When the rain stops, it closes again. This design keeps animals, insects, and debris from entering the pipe through the discharge end — a meaningful benefit for a pipe that runs under your lawn. A drain grate is an open-face outlet set flush with the ground. It works fine in locations away from foot traffic where pest intrusion isn’t a concern, but it requires more frequent clearing and doesn’t protect against critters. For most residential installations in the NC Triad, a pop-up emitter is the practical default.
It depends on your municipality and the scope of the project. Many local jurisdictions in the Winston-Salem, Greensboro, and High Point area have stormwater regulations that govern where and how you can discharge roof runoff. HOA covenants may add another layer of requirements. For most straightforward single-home installations, a permit isn’t required — but it’s always worth a quick call to your local building department to confirm before you dig. Connecting to a municipal storm drain, in particular, will almost always require approval.
Burying your gutter downspouts is one of the most effective investments you can make in your home’s long-term health. A correctly installed system quietly handles every rainstorm — routing water safely away from your foundation, protecting your landscaping, eliminating trip hazards, and improving your property’s appearance — without any ongoing effort from you. The upfront work pays dividends for decades.
Whether you’re weighing a DIY installation or looking for a professional who’ll get it right the first time, Smithrock Roofing is here to help. We bring 60-plus combined years of exterior expertise to homes across Winston-Salem, Greensboro, High Point, Kernersville, King, Clemmons, and the surrounding NC Triad communities — and we treat every project with the same attention to detail we’d bring to our own homes. From assessing your yard’s grade and drainage challenges to installing a complete underground system with quality materials and watertight connections, our team handles it all. Explore our complete gutter services to learn more, or reach out for a professional assessment and let us show you what a well-built drainage system looks like from the ground up.

Smithrock Roofing © Copyright 2026 • All Rights Reserved • Privacy Policy • Maintained by Mongoose Digital Marketing