
Gutters are easy to overlook. They sit at the edge of your roofline, they’re rarely the first thing you notice about a home, and they do most of their work during a rainstorm when nobody is watching. But when a gutter system fails, or was never installed correctly in the first place, the consequences reach well beyond a little overflow. Water running down your siding, saturating the soil against your foundation, seeping behind your fascia boards, these are the kinds of problems that turn a straightforward exterior project into a much larger repair conversation.
If you’re a homeowner in Winston-Salem, Greensboro, High Point, or anywhere else across the NC Triad, you’ve seen what a good summer storm can do. This region gets meaningful rainfall, the clay-based soils common in many areas don’t absorb water quicklyand properties with even modest grade challenges can funnel runoff directly toward a home’s foundation if the gutter system isn’t doing its job.
This guide is written for homeowners who want to understand gutter installation at a level most contractors won’t take the time to explain. We’ll cover how sizing decisions actually get made, what has to happen before a single bracket goes up, why “seamless” doesn’t mean “no seams,” and what the discharge end of your downspout has to do with your foundation’s long-term health.
Most homeowners assume gutter installation is a straightforward swap, pull off the old system, run new material along the fascia, connect the downspouts, done. In reality, a properly designed gutter installation involves hydraulic load calculationssubstrate assessment, slope verification, and discharge management. When any one of those steps is skipped or shortcut, the system underperforms from day one.
Understanding the reasoning behind each step doesn’t just make you a more informed homeowner, it helps you ask better questions when you’re evaluating contractors and make confident decisions about your home.
The NC Triad sits in a climate zone that sees an average of roughly 40 to 45 inches of annual rainfall, with a significant portion of that falling during intense summer convective storms. These aren’t slow, steady rains, they’re high-intensity events that can deliver large volumes of water in a short window. That intensity is precisely what gutter sizing calculations are designed to account for.
The relevant metric is design rainfall intensitytypically expressed as the volume of rain that falls in a five-minute period during a statistically significant storm event for your area. NOAA’s precipitation frequency data provides this by region. For most of the NC Triad, this figure is higher than many homeowners expect, and it directly influences whether a 5-inch gutter system is adequate or whether a 6-inch system is the appropriate choice for your specific roof configuration.
This matters because a system that handles average rainfall comfortably may still overflow during a summer downpour, and those overflow events are exactly when foundation saturation, fascia water intrusion, and erosion damage occur.
Need a hand with this in Winston-Salem, Greensboro and the NC Triad? Call (336) 971-0464 or request a free estimate. Honest answers, no pressure.
One of the most persistent oversimplifications in gutter content is the idea that sizing comes down to “bigger roof, bigger gutter.” While that directional thinking isn’t wrong, it skips the actual calculation process, and that’s where errors happen.
The first variable in any sizing calculation is the drainage area feeding each gutter run. This is not the slope surface area of your roof panels, it’s the horizontal projected areameaning the footprint of the roof section as viewed from directly above. This distinction matters because it’s the horizontal area that determines the volume of rain intercepted, not the angled surface.
For a complex roofline with multiple planes, valleys, and dormers, this calculation requires mapping each run individually. A single gutter run on a simple ranch home and a gutter run on a home with a steep hip roof and multiple contributing planes require different approaches even if the linear footage looks similar.
Once you have the horizontal projected area, roof pitch enters the equation as a multiplier. Steep pitches accelerate water velocity as it moves down the roof surface, which increases the hydraulic load delivered to the gutter in any given storm. The steeper the pitch, the higher the effective drainage load relative to the same roof area at a shallower pitch.
Standard hydraulic sizing references provide pitch multiplier tables. A 12/12 pitch carries a meaningfully higher multiplier than a 4/12 pitch, which is why two homes with identical square footage can legitimately require different gutter sizes based on roof geometry alone.
The final major input is the design rainfall intensity for your specific location. The five-minute, 100-year storm event intensity differs from one region to another across the state. Using a generalized national figure rather than the correct regional value introduces error into the calculation.
When these three factors, projected area, pitch multiplier, and local intensity, are combined, the result is a required gutter outlet area. That number, in turn, dictates not just gutter width but the number and placement of downspout outlets needed to handle the load.
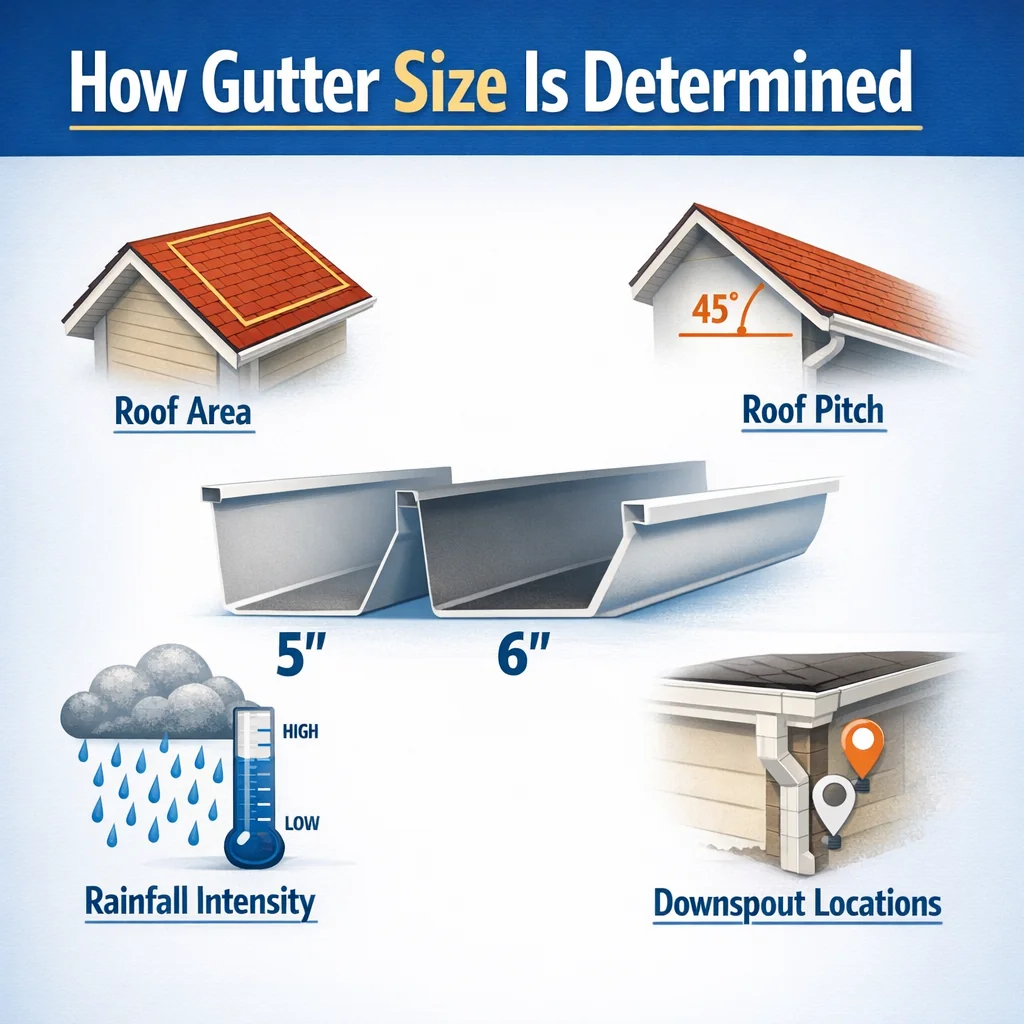
The table below outlines the practical differences between common residential gutter configurations. These are general performance characteristics, actual selection for your home depends on the hydraulic calculation described above.
| Configuration | Typical Use Case | Drainage Capacity | Best For |
|---|---|---|---|
| 5″ K-style, 2×3 downspout | Standard residential, lower-pitch roofs, smaller drainage areas | Moderate | Ranch homes, low-complexity rooflines |
| 5″ K-style, 3×4 downspout | Standard residential with higher intensity load or larger area | Moderate-High | Upgraded capacity without changing gutter width |
| 6″ K-style, 3×4 downspout | Larger roof sections, steeper pitches, high-intensity rainfall zones | High | Two-story homes, steep roofs, extended runs |
| 6″ half-round, 3×4 downspout | Architectural compatibility, smooth interior flow profile | High | Older or historically styled homes |
| Oversized 7″ commercial-style | Large commercial or high-volume residential applications | Very High | Steep multi-plane roofs, high-intensity sites |
Downspout outlet spacing is as important as the gutter size itself. A common rule of thumb is one downspout outlet per 30 to 40 linear feet of gutter run, but this must be validated against the hydraulic load. Longer runs in high-intensity rainfall zones may require closer spacing to prevent midpoint overflow.
Before a single bracket is set, the condition of the fascia board demands a thorough inspection. This step is where many gutter installations quietly fail, not because the gutter material is poor, but because it was attached to a substrate that couldn’t support it.
The fascia board is the mounting surface for your entire gutter system. Every hanger, bracket, and fastener transfers the weight of the gutter, plus the weight of water during a storm, directly through the fascia and into the rafter tails behind it. When the fascia has deteriorating wood, elevated moisture content, or compromised rafter tail connections, that load transfer fails over time.
Here’s the part that catches homeowners off guard: fascia doesn’t have to look visibly rotted to be problematic. Wood with elevated internal moisture content, common in North Carolina’s humid climate, can appear structurally sound on the surface while the interior fibers are already breaking down. Gutters installed over this material can hold for a season or two before hangers begin pulling away, creating a failure that looks like a gutter problem but is actually a substrate problem.
The correct installation sequence is: inspect fascia → identify and replace any sections with damage or elevated moisture → verify rafter tail connections → confirm consistent fascia pitch across the run → fabricate and install the gutter.
Skipping or abbreviating the inspection step to save time is a shortcut with compounding consequences. Catching a compromised fascia section before installation takes far less time and investment than pulling a gutter system off the house a year later to replace the board underneath it. If you’d like a deeper look at what this process involves, the Fascia & Soffit Repair guide covers the full scope of substrate assessment and remediation.
Gutters require a slight downward slope toward each outlet, typically around one-quarter inch of drop per 10 feet of run, to ensure water flows to the downspout rather than pooling in the middle of the run. This slope is set relative to the fascia surface.
If the fascia itself isn’t running consistently level, or if it has sags and high points from years of thermal cycling and moisture exposure, the gutter slope will be inconsistent. On-site seamless fabrication can produce a gutter that follows the fascia exactly, but if the fascia plane is irregular, the finished gutter will have low points that collect water and debris regardless of how well the material itself was formed.
Seamless aluminum gutters are the right choice for most NC Triad homes. Fabricated on-site from continuous coil stock, they eliminate the sectional joints that were a chronic leak source in older gutter systems. But the word “seamless” requires an honest qualification that most gutter content leaves out.
Seamless gutters still have seams. They just have far fewer of them, and those that remain are located at specific, predictable points:
These junction points are precisely where water pressure concentrates and where thermal expansion and contraction create stress over time. They are also where installation craftsmanship matters most. A properly sealed corner or end cap, using a polyurethane-based sealant rated for thermal cycling, can hold for the life of the system. An improperly sealed or under-sealed joint will begin showing stress within a few seasons.
This is not a knock on seamless gutters, it’s a realistic picture of where quality installation separates reliable systems from ones that look fine at first but develop drips and leaks at the joints. When you’re evaluating a gutter contractor, it’s worth asking specifically how they seal interior corners and end caps and what sealant product they use. For a full breakdown of what seamless gutter installation involves from material selection to joint sealing, that resource covers the process in depth.
Gutter hangers don’t get much attention in most content, but they are a primary factor in whether a system maintains its slope, stays flush to the fascia, and holds up under weather loads over time.
The older spike-and-ferrule method, a long spike driven through the front gutter lip, through a cylindrical ferrule inside the gutter, and into the fascia, was standard for decades but has well-documented failure modes. The spikes loosen over time as wood expands and contracts with seasonal moisture changes, allowing gutters to sag, tilt forward, or pull away from the fascia entirely.
Hidden hanger systems, which clip inside the gutter and fasten to the fascia with a screw rather than a spike, distribute load more effectively and are far more resistant to pull-out over time. For homes in the NC Triad, which sees temperature swings from well below freezing in winter to high summer heat, thermal cycling is a real stress on any hanger system, and the mechanical advantage of a properly installed hidden hanger screw system is meaningful.
Standard hanger spacing for residential aluminum gutters is typically every 24 to 36 inches. In regions with meaningful snow and ice load, spacing closer to 24 inches is the more conservative and reliable choice. Even in the Triad, where we don’t see the sustained snow loads of the NC mountains, ice events and the occasional significant winter storm create short-duration static loads that can stress a gutter system with wide hanger spacing.
Gutter guard systems have improved significantly over the past decade, and for many homeowners they represent a genuine quality-of-life upgrade. But the “maintenance-free” framing that dominates most guard marketing deserves more honest treatment.
Different guard technologies perform very differently depending on the debris profile around your home:
| Guard Type | How It Works | Handles Well | Struggles With |
|---|---|---|---|
| Micro-mesh | Fine stainless steel mesh over gutter opening | Leaves, large debris, most seeds | Pine needles, shingle grit, fine organic material |
| Reverse curve (surface tension) | Water follows curve into gutter, debris falls off | Large leaves in dry climates | NC humidity and heavy debris loads; can channel water over edge in high-intensity rain |
| Screen/mesh insert | Flat screen over gutter opening | Moderate leaf debris | Seeds, pine needles, fine debris; compresses under weight |
| Foam insert | Porous foam fills gutter channel | Basic leaf debris | Seeds and debris lodge in foam; significant maintenance over time |
| Solid cover with trough | Water enters through front trough | Heavy leaf loads | Surface tension failure in heavy rain; high-flow events can bypass |
For NC Triad homeowners, pine needles are a significant variable. The loblolly and shortleaf pines common throughout this region shed year-round and produce needle debris that bypasses most guard types except high-quality micro-mesh systems. If your property has mature pine trees, the guard selection conversation is different than for a home surrounded primarily by deciduous hardwoods. The Gutter Guards Winston-Salem NC article goes deeper on which guard technologies hold up against the specific debris profiles common to this region.
No guard system eliminates maintenance entirely. High-quality micro-mesh systems meaningfully reduce cleaning frequency and prevent the clogging events that cause overflow, but periodic inspection remains necessary, particularly after a heavy storm event.
A gutter installation can be sized correctly, attached to solid fascia, and fabricated with precision, and still allow water to damage your foundation if the discharge end isn’t managed properly. This is the part of the system that gets the least attention and causes some of the most expensive downstream problems.
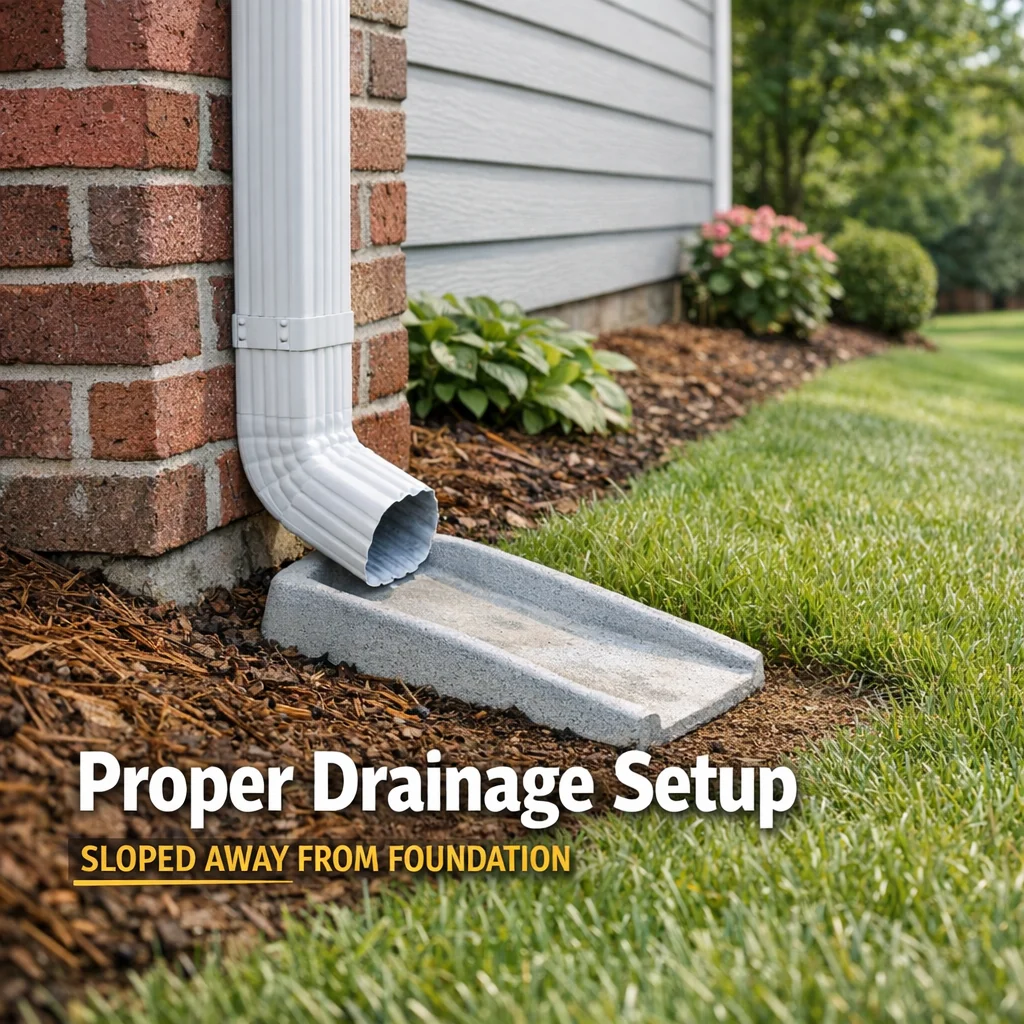
The basic downspout extension, the angled piece that directs water away from the foundation at grade level, works adequately when the property has positive drainage slope away from the home and the extension is long enough to clear the foundation planting zone. In practice, extensions are frequently too short, get displaced by lawn maintenance, or deposit water onto a surface that slopes back toward the house.
Buried corrugated drain lines are a more reliable solution for properties where topography makes positive surface drainage difficult. These run underground from the downspout outlet to a discharge point further from the foundation, typically daylighting at a lower point in the yard. They’re a more involved installation, but they eliminate the risk of displaced extensions and move water consistently regardless of what’s happening at grade.
Buried lines have their own maintenance considerations: root intrusion over time, joint separation, and outlet blockage are the primary failure modes. These aren’t arguments against using them, they’re arguments for inspecting them periodically as part of routine property maintenance.
The International Residential Code requires the ground to slope away from the foundation at a minimum of 6 inches over the first 10 feet from the structure. This grading standard exists precisely because water collecting against the foundation, even in small volumes, creates hydrostatic pressure that works against foundation walls over time.
Understanding this grading requirement is relevant to gutter design because it defines where downspout discharge can be effective. If the existing grade doesn’t meet this standard, even a perfectly functioning gutter system can contribute to foundation saturation if water is deposited at a point that doesn’t drain positively away from the building.
Splash blocks seem almost too simple to matter, but their placement and sizing have real consequences. An undersized splash block, or one positioned directly against a dense foundation planting, can redirect discharge water back toward the soil immediately adjacent to the foundation, the opposite of the intended effect. The discharge zone needs a clear path away from the structure, and the splash block size should be proportional to the volume of flow expected from that outlet.
Understanding the technical depth behind proper gutter installation changes what you should expect from the process, and what a thorough, professional installation actually looks like on your property.
A quality installation engagement should include:
At Smithrock Roofing, we’ve been serving homeowners across Winston-Salem, Greensboro, High Point, Kernersville, Clemmons, Rural Hall, King, and the surrounding communities long enough to know what this region’s weather demands of a gutter system, and what shortcuts eventually cost homeowners far more than they saved upfront.
Our team brings 60 or more combined years of exterior contracting experience to every project, and that experience shows up in the details: the fascia inspection before the first bracket goes up, the sizing conversation before material is ordered, the sealant selection for our climate’s thermal cycling range. We’re fully licensed and insured, hold an A+ BBB rating, and have earned the trust of more than 312 homeowners who’ve left us five-star reviews, not because we promise the lowest number, but because we show up, do the work correctly, and stand behind it.
If you’re ready to talk through what a properly designed gutter system looks like for your home, we’re here for that conversation.
The decision between repair and replacement typically comes down to the condition of the gutter material itself and the substrate it’s attached to. Surface issues like a single separated joint or a clogged downspout are usually repairable. Widespread sagging, multiple areas of rust or corrosion, gutters that have pulled away from the fascia in several locations, or fascia boards that have softened due to prolonged water exposure often indicate that replacement is the more practical path. A thorough inspection will give you a clear picture of which situation you’re facing.
Sectional gutters are assembled from pre-cut lengths joined together at intervals across your roofline. Every one of those joints is a potential leak point over time as sealant ages and materials expand and contract through seasonal temperature changes. Seamless gutters are formed on-site from a continuous coil of material cut to the exact length of each run, which eliminates interior seams along the straight sections. The only joints in a seamless system are at corners and downspout connections, far fewer failure points than a sectional installation.
Gutter width and downspout diameter are not one-size-fits-all decisions. Proper sizing takes into account your roof’s square footage, pitch, and drainage area, specifically how much water a given section of roof sheds toward a particular gutter run during a heavy rainfall event. Local rainfall intensity data for the NC Triad also factors into that calculation. A contractor who recommends a specific size without discussing these variables is likely defaulting to a standard rather than designing a system matched to your home’s actual hydraulic load.
A thorough installation begins before any material arrives. Your contractor should inspect the fascia and rafter tails for rot or damage, discuss sizing and downspout placement with you, and confirm measurements before gutters are fabricated on-site. During installation, hangers should be spaced to handle the weight of a water-filled gutter in your region’s rain conditions, slope should be verified across the full length of each run, and all end caps and interior corners should be sealed with a product rated for thermal cycling. Before the crew leaves, you should have a clear understanding of where water exits the system and whether the discharge points are positioned to protect your foundation.
Homeowners across Winston-Salem and Kernersville know that the right contractor isn’t always the one with the quickest bid, it’s the one who takes the time to understand the home, explain the work, and stand behind the result. Smithrock Roofing brings that standard to every gutter installation we complete across the NC Triad, combining decades of hands-on experience with the kind of attention to detail that holds up long after the crew has moved on. If you’re ready to protect your home with a system designed and installed the right way, Contact Smithrock Roofing and let’s start with a conversation.
See also: Gutter Installation Cost: What Quotes Don’t Tell You
See also: Siding Winston-Salem NC | Expert Installation & Repair

Smithrock Roofing © Copyright 2026 • All Rights Reserved • Privacy Policy • Maintained by Mongoose Digital Marketing
