
There’s a version of fascia and soffit damage that every homeowner notices eventually, peeling paint along the roofline, a soft spot where a board feels spongy underfoot during a gutter cleaning, or a gap where something small and uninvited has clearly decided to move in. What most people don’t realize is that by the time those signs appear, the story has already been unfolding quietly for quite a while.
Fascia and soffit work sits at one of the most underappreciated intersections in residential construction: the point where your roof system, attic ventilation, gutter drainage, and exterior cladding all meet at once. When something goes wrong in that zone, the visible damage you’re looking at is rarely the whole picture. And the repairs that stick long-term are the ones that account for what’s happening beneath the surface, not just what’s obvious from the driveway.
This guide is written for homeowners across the NC Triad, Winston-Salem, Greensboro, High Point, Kernersville, Clemmonsand surrounding communities, who want a real understanding of why fascia and soffit fail, what a proper repair actually involves, and how to make sure the fix lasts. We’ll cover the diagnostic process, the material decisions, the ventilation engineering, and the failure modes that nobody warns you about until you’re dealing with a second repair on the same section of roofline.
Before getting into repair specifics, it helps to understand why these components exist and what they’re protecting against.
Fascia is the vertical board that runs along the lower edge of the roof, capping the ends of the rafter tails and providing the mounting surface for your gutters. It’s the finished face of your eave, the board that gives your roofline a clean, defined edge. Structurally, it helps stabilize the lower course of the roof and distributes gutter weight across multiple rafter tails.
Soffit is the horizontal surface that closes off the underside of the eave overhang, the material you see when you stand at the edge of your home and look up. Soffit panels serve two functions simultaneously: they close the eave cavity against pest entry and weather exposure, and they allow attic ventilation air to enter the roof system through perforated or vented panels.
Together, they form a protective system for the most exposed structural members in your roof: the rafter tails. Those tails are the ends of the same rafters that support the entire weight of your roof deck and covering. When fascia and soffit deteriorate without correction, the decay works inward, and rafter tail damage is a significantly more complex repair than anything at the surface.
In the NC Triad’s climate, with its humid summers, periodic freeze-thaw cycles in winter, and significant seasonal rainfall, that inward progression happens faster than it would in drier regions. Moisture doesn’t need a catastrophic event to damage wood here. It just needs time and a path in.
Need a hand with this in Winston-Salem, Greensboro and the NC Triad? Call (336) 971-0464 or request a free estimate. Honest answers, no pressure.
Most repair guides lead with symptoms: rot, sagging, mold, pest holes. Those are accurate observations. But symptoms don’t tell you whether your repair will last five years or twenty-five. That answer lives in the root cause.
This is the most common origin story for fascia decay in the NC Triad. When gutters overflow, from clogging, improper pitch, or undersizing, water doesn’t just fall away from the house. It spills back against the fascia board, saturating the wood face. Over seasonal cycles, the fascia’s surface coating degrades, the raw wood begins absorbing water, and the decay process starts.
What makes this particularly damaging is that the gutter hanger locations are where the fascia is most consistently wet. Hangers hold water against the board face and create micro-channels that direct moisture directly to the wood grain. If you look at a fascia board that has been in service for 15 or 20 years, you’ll frequently see rot that corresponds almost exactly with hanger spacing, not because the hangers caused the damage, but because they concentrated the moisture.
This is a failure mode that almost no repair guide addresses, but it’s one of the most consistent determinants of long-term fascia longevity after installation.
The drip edge is the metal flashing installed at the roof’s lower edge, positioned to direct water runoff off the roof deck and away from the fascia. The critical variable is the overlap anglespecifically, how far the drip edge extends over the fascia face, and at what pitch it directs water.
When the drip edge overlap is insufficient or incorrectly angled, water running off the roof deck doesn’t shed cleanly into the gutter. Instead, it follows surface tension back underneath the drip edge and contacts the fascia face directly. This is a slow process, maybe a few tablespoons per rain event, but compounded over years, it’s one of the most reliable mechanisms for fascia decay that exists.
A competent fascia repair should always include an evaluation of the drip edge geometry. If the drip edge is inadequate, replacing the fascia board without correcting it is solving the same problem twice.
Here’s the insight that separates a repair that lasts from one that doesn’t: fascia rot is frequently a lagging indicator of rafter tail decay that has been progressing for years.
Rafter tail end grain is the most moisture-absorbent surface in the eave assembly. End grain absorbs water at a rate many times higher than face grain, and in an exposed roofline position, it’s the first place moisture accumulates. The decay that eventually becomes visible on the fascia face often originated at the rafter tail end, then progressed outward through the fascia-to-rafter interface.
This matters practically because a contractor who replaces the fascia board without assessing the rafter tail condition is leaving the source of the problem unaddressed. The new fascia board will begin to absorb moisture from the same already-compromised rafter tail, and the repair timeline resets, typically to 2–4 years before visible deterioration returns.
Soffit panels fail for two primary reasons: physical damage from impact or weather, and moisture intrusion from above or below. In both cases, the downstream consequences matter as much as the panel itself.
A compromised soffit panel, cracked, detached, or pest-damaged, creates an open pathway into the eave cavity. In the NC Triad, that opening is an invitation for wasps, carpenter bees, squirrels, and starlings, all of which are common in the area and all of which cause structural damage once inside the cavity.
More significantly, damaged soffit disrupts the attic ventilation balance. A soffit that is partially blocked or missing doesn’t deliver the intake air volume the attic system was designed to receive, which affects everything from summer attic temperatures to winter moisture management.
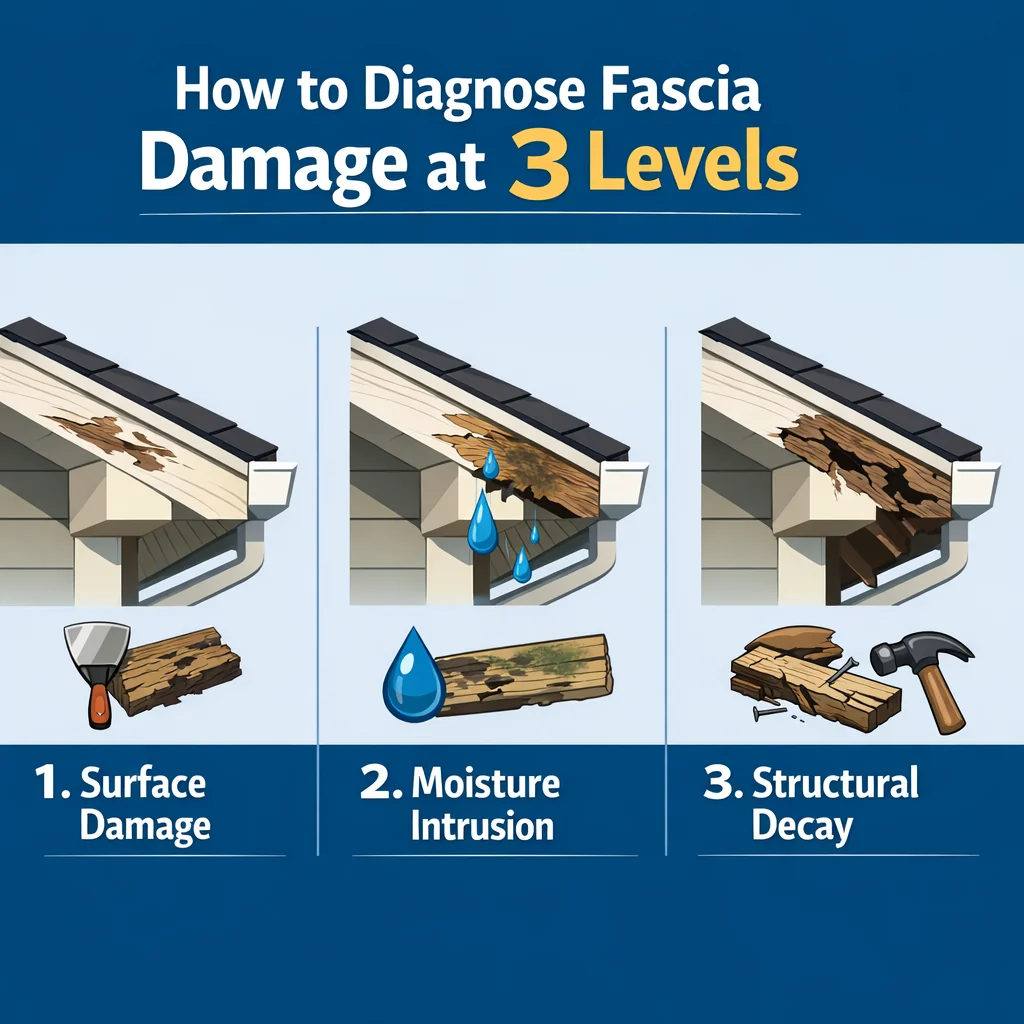
Visual inspection is the starting point, not the finishing point. Experienced contractors evaluate fascia and soffit damage across three distinct zones, and the findings in each zone determine the scope of the repair.
A pin-type moisture meter is standard equipment for any professional fascia assessment. It removes guesswork and establishes a factual baseline for repair decisions.
The meter measures the moisture content of wood as a percentage. Here’s how those numbers translate to real repair decisions:
| Moisture Content Reading | Condition | Recommended Action |
|---|---|---|
| Below 15% | Dry, stable | Safe to enclose or clad without further treatment |
| 15–19% | Elevated, monitor | Address water source before repair; allow drying time |
| 19–25% | Active risk | Do not enclose; treat, dry, and reassess before proceeding |
| Above 25% | Structural concern | Rafter tail assessment required; replacement likely needed |
These readings should be taken at the fascia face, at the subfascia (if accessible), and at the rafter tail end grain. The pattern of readings across those three zones tells the diagnostic story. A fascia face reading of 22% with a rafter tail reading of 28% is a fundamentally different situation than a face reading of 22% with a tail reading of 14%, even though the visible damage may look identical.
A professional repair scope should address the following in sequence before any new cladding or boards are installed:
Skipping any of these steps doesn’t save time, it just moves the failure forward by a few years.
Material choice for fascia and soffit repair isn’t just a preference decision. In a climate with high humidity levels, the wrong material combination, or the wrong fastener specification, creates its own failure timeline.
Engineered Wood (PVC and Composite)
PVC fascia boards have become the dominant choice for new installations and replacements over the past decade, and for good reason, they don’t rot, they don’t absorb moisture, and they’re dimensionally stable in most conditions. However, there is one specific failure mode with PVC that has become widespread on post-2015 installations: thermal expansion buckling at butt joints.
PVC has a thermal expansion coefficient roughly five times higher than wood. In a North Carolina summer, a board that was installed snugly in November will expand significantly by July. PVC fascia boards installed without the manufacturer-specified gap at joints, typically 1/8 to 3/16 inch per joint, will buckle visibly. The fix is removing and reinstalling with correct gaps; there is no patch.
Wood (Pressure-Treated and Cedar)
Traditional wood fascia remains a viable option when properly specified and maintained. Pressure-treated lumber is appropriate for subfascia applications and anywhere the board will be in contact with moisture-prone areas. Cedar offers natural decay resistance for exposed face applications. Either choice requires attention to paint and coating maintenance on a cycle, typically every 5–7 years in the NC Triad’s climate.
Fiber Cement
Fiber cement fascia boards offer good dimensional stability and moisture resistance without the thermal expansion concerns of PVC. They require painting, which adds maintenance, but they perform well in humid conditions and accept paint finishes consistently. For a deeper look at how fiber cement performs as an exterior cladding material, the article Siding Savvy: Repairing Fiber Cement Like a Pro covers material behavior and repair considerations that apply beyond just siding panels.
Aluminum Soffit
Aluminum panels are durable, moisture-resistant, and available in vented configurations. The critical fastener specification here is non-negotiable: aluminum or stainless steel fasteners only. Using steel fasteners with aluminum soffit panels creates a galvanic corrosion pair. In humid climates, you can expect visible rust streaking and fastener pullout within 5–8 years when mismatched metals are used. This is not a theoretical concern, it’s a documented failure mode that shows up regularly on homes where budget-grade steel nails were used during installation.
Vinyl Soffit
Vinyl is the most common soffit material in residential construction across North Carolina, and it performs well when installed correctly. The failure mode to know about is this: vinyl installed over a damp wood substrate traps residual moisture in the substrate. Vinyl is effectively impermeable, so any moisture present in the wood when the panels go on has nowhere to go. It sits against the substrate, continuing the decay process beneath a surface that looks fine from outside.
Before any vinyl soffit is installed, substrate moisture content should read below 15% on a moisture meter. This is not a suggestion, it’s the difference between a repair that lasts and one that creates a hidden problem.
Vented vs. Solid Soffit Panels
The choice between vented and solid panels is an engineering decision, not an aesthetic one. This is covered in depth in the next section.
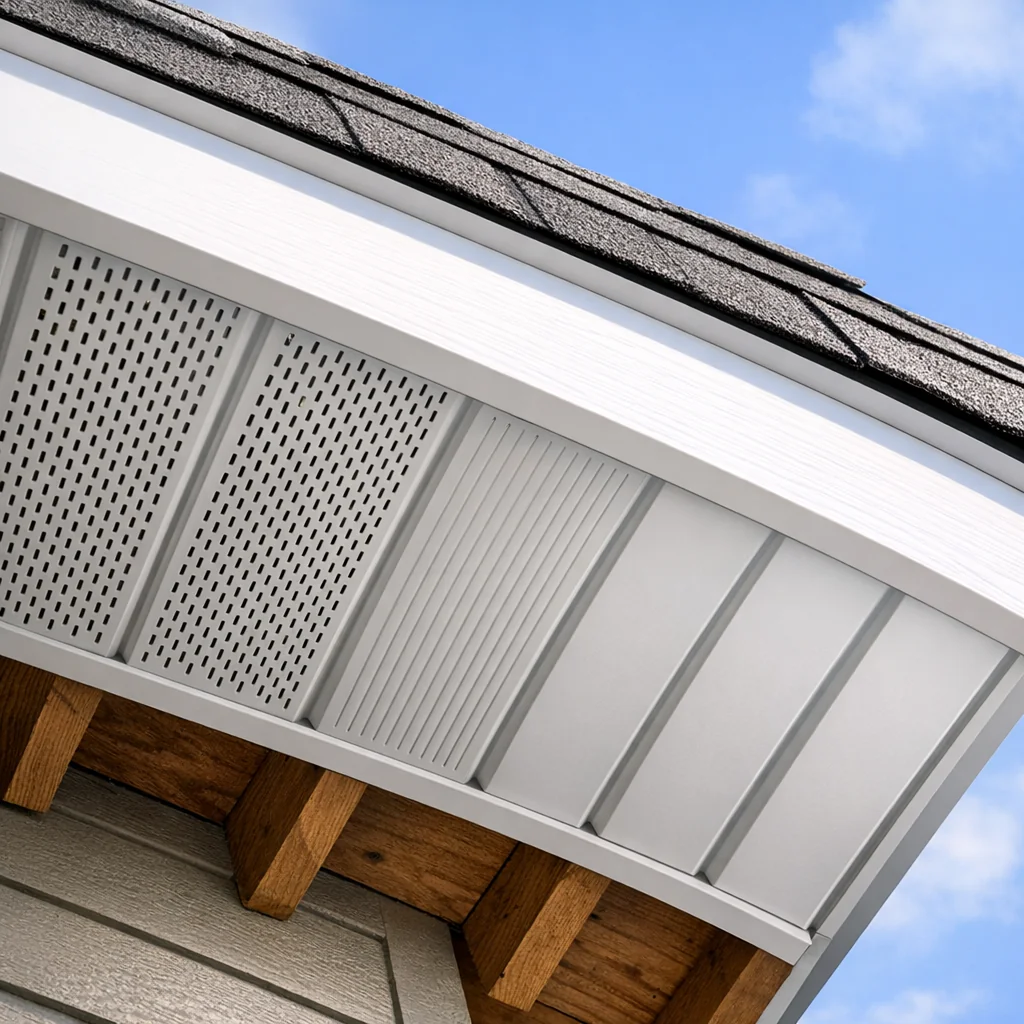
Replacing damaged soffit panels creates a decision point that carries real consequences for your attic environment, your energy bills, and the long-term moisture management of your roof system. That decision is the ratio of vented to solid soffit panel coverage.
Building codes and roofing industry standards establish minimum attic ventilation requirements based on the ratio of net free ventilation area (NFA) to attic floor square footage:
NFA is the actual open area through which air can flow, measured in square inches. Every soffit panel has a published NFA rating, full-vent panels provide significantly more NFA per square foot than partial-vent panels, and solid panels provide zero.
To calculate your home’s minimum NFA requirement at the 1:300 ratio, divide your attic floor square footage by 300, then convert to square inches (multiply by 144). That’s the total NFA needed, split evenly between intake (soffit) and exhaust (ridge or other top venting).
Here’s where many soffit repairs inadvertently create a new problem: installing high-NFA vented soffit on a home with inadequate ridge vent exhaust capacity creates a negative pressure scenario.
When the intake capacity significantly exceeds the exhaust capacity, the attic cannot maintain proper airflow direction. Pressure differentials can draw conditioned air from the living space up through ceiling penetrations and into the attic, increasing both energy costs and moisture load. Attic humidity rises, condensation risks increase, and the very decay processes you’re trying to prevent get more favorable conditions.
Before selecting soffit panel types for a repair or replacement, the exhaust side of the ventilation equation needs to be confirmed. If you’re replacing a section of solid soffit with full-vent panels, the additional NFA you’re introducing should be accounted for in the overall system balance. The article Roof Vent Installation Cost: What Drives the Price provides useful context on exhaust vent options and what correcting an imbalanced system involves.
This is not a calculation that most homeowners are expected to run themselves. But it is a question worth asking any contractor proposing soffit work: “How does this panel selection affect my attic’s intake-to-exhaust balance?” A contractor who can answer it clearly is one worth trusting with the work.
The repair-or-replace question gets more nuanced the more you understand the diagnostic process. Here’s a practical framework:
This is the category most guides don’t address directly: when the rafter tails themselves need work before any surface repair can be meaningful.
Rafter tail repair typically involves one of two approaches. Sisteringattaching a new structural member alongside the damaged tail, is the standard method, but it carries an important caveat. Sistering addresses the structural deficit but does not address the cause of the original decay. If the moisture pathway that rotted the original tail isn’t corrected (usually a drip edge or gutter problem), the sister begins its own decay cycle within a few years.
A complete structural repair pairs the sistering work with correction of the water source and, in many cases, requires a building permit. Replacing structural subfascia or performing structural rafter work in most NC jurisdictions triggers permit requirements. A reputable contractor will identify this upfront, homeowners who complete this work without permits can face complications during home sales or insurance claims.
There’s nothing wrong with a competent homeowner patching an isolated section of soffit or replacing a short run of fascia on a single-story home. But there’s a consistent gap between what DIY repairs address and what a professional assessment covers.
A professional fascia and soffit repair by an experienced exterior contractor should include:
The repairs that fail early almost always skipped one or more of these steps, not because the people doing them were careless, but because they didn’t know what they didn’t know.
The NC Triad’s climate creates specific demands that a contractor needs to understand from experience, not just from reading a spec sheet. The combination of hot, humid summers, where attic temperatures can push well above ambient air temperature, and cool winters with periodic freeze-thaw cycles means that moisture management at the eave is a year-round concern, not a seasonal one.
Smithrock Roofing brings 60+ combined years of experience serving homeowners across Winston-Salem, Greensboro, High Point, Kernersville, Clemmons, Rural Hall, King, and the broader Triad area. Our team understands how local weather patterns interact with roofline assemblies, which material choices hold up in this specific climate, and what proper fascia and soffit work looks like when it’s done to last.
We’re CertainTeed PREMIER ShingleMaster certified, fully licensed and insured, and have earned an A+ rating with the BBB along with more than 312 five-star reviews from homeowners who’ve trusted us with exactly these kinds of decisions. Our approach is consultative, we’ll tell you what we find and why it matters, and we’ll give you honest guidance on the scope of work your home actually needs.
If you’re seeing signs of fascia or soffit deterioration and want a professional assessment that goes beyond a visual glance from the driveway, we’re ready to help.
Cosmetic fascia damage typically involves surface paint peeling, minor discoloration, or small localized areas of weathering. Structural damage goes deeper, soft spots when pressed, visible rot that has penetrated through the board thickness, areas where the wood has pulled away from the rafter tail, or sections where gutter fasteners no longer hold firmly. The safest way to distinguish between the two is a hands-on inspection at close range. A contractor should physically press along the fascia board length, check the rafter tails behind it, and look at what the gutters are doing to the wood over time. A visual inspection from the ground is not sufficient to make that call accurately.
Straightforward cosmetic replacements, swapping out a single undamaged vinyl soffit panel, for example, are within the range of a capable DIYer with the right tools. But most fascia and soffit repairs that reach the point where a homeowner notices them have already involved some degree of moisture intrusion, and that changes the scope significantly. Once rot is present, the underlying structure needs to be evaluated, drainage and flashing geometry often needs to be corrected, and material compatibility becomes a real concern. Errors in fascia installation can redirect water into wall cavities or behind cladding in ways that don’t show up for months. For anything beyond truly surface-level replacement, professional assessment is worth the investment.
In most cases, gradual deterioration from moisture and age is considered a maintenance issue and is not covered under standard homeowner’s insurance policies. However, if fascia or soffit damage results from a specific covered event, a storm, falling debris, or wind damage, then repair costs may be eligible for a claim depending on your policy terms. It’s worth reviewing your policy and documenting damage thoroughly with photographs before any repairs begin if you believe a covered event contributed to the problem. For guidance on navigating the claims process, the article Roof Insurance Claim: Get What You Deserve walks through the documentation and filing steps that apply to storm-related exterior damage.
Longevity depends heavily on material choice, installation quality, and whether any underlying issues, like improper drainage or inadequate ventilation, were corrected at the time of repair. Properly installed and primed wood fascia in a well-maintained condition can last 20 years or more. Aluminum-wrapped or capped fascia, when installed correctly over sound substrate, reduces ongoing maintenance significantly. Vinyl and engineered composite soffit panels installed with appropriate expansion gaps and fastener spacing typically perform well for several decades in the NC Triad climate. The repairs that fail prematurely almost always share one of two causes: the underlying moisture source wasn’t addressed, or the materials weren’t installed to the manufacturer’s specifications for this climate.
Fascia and soffit work done right is one of the best investments a homeowner can make in the long-term integrity of their roof system, and doing it right requires a contractor who understands both the materials and the climate they’re working in. For homeowners in Winston-Salem, Greensboro, and the surrounding Triad communities, Smithrock Roofing brings the local experience, certifications, and honest approach that these repairs deserve. If you’re ready for a professional assessment of your roofline, Contact Smithrock Roofing to schedule your free estimate.
Need a local pro? Learn more about our roofing services in Kernersville.
See also: Roof Repair Company | Fix Leaks Right the First Time

Smithrock Roofing © Copyright 2026 • All Rights Reserved • Privacy Policy • Maintained by Mongoose Digital Marketing
