
Choosing synthetic slate comes down to three things before a single nail goes in: whether your roof structure and deck can support the product correctly, what your specific roof pitch requires in terms of underlayment and exposure, and whether the installation team understands how polymer tile behaves differently from asphalt or natural slate. Get those three right and synthetic slate is a genuinely excellent roofing material. Miss any one of them and you have a warranty problem waiting to happen.
This guide covers the installation fundamentals in enough depth that you can ask the right questions, understand what your contractor is doing and why, and make a confident decision about whether synthetic slate is the right fit for your home.
Synthetic slate is manufactured from engineered polymers, typically a blend of recycled rubber and plastic, molded to replicate the dimensional profile and surface texture of natural slate. The result is a tile that looks substantially like the real thing but behaves mechanically in ways that natural slate, and asphalt shingles, do not.
Three material properties drive most of the installation-specific rules:
Thermal expansion. Polymer tiles expand and contract meaningfully with temperature change. This is why manufacturers specify minimum keyway spacing, typically around 3/16 inch between adjacent tiles in a course. That gap is not decorative clearance; it is engineered breathing room. In a region that sees genuine temperature swings across seasons, as the NC Triad does, ignoring keyway requirements leads to tiles buckling or working loose over time.
Surface hardness and nail bearing. Unlike asphalt shingles, where a nail driven slightly proud or slightly countersunk still holds the shingle effectively, synthetic polymer tiles require nails driven flush with the tile surface. The tile face is rigid. A nail driven too deep creates a stress point that lifts adjacent tiles. A nail driven at an angle prevents the tile from lying flat. Neither failure is immediately visible, but both compromise the installation and, in most cases, void the warranty.
Thickness and substrate telegraphing. Synthetic slate tiles are typically around one inch thick, which is substantially thicker than asphalt. That thickness amplifies any irregularities in the roof deck. A soft spot, a raised nail from a previous roofing layer, or an uneven seam in the decking shows through a synthetic tile in a way it would not through a heavier, more conformable material. This matters especially on re-roofs, where the existing deck must be evaluated carefully before work begins.
Manufacturers consistently specify a minimum deck of 15/32-inch CDX plywood or equivalent OSB. The deck must be flat, sound, and free of soft spots. Any decking that flexes underfoot or shows signs of moisture damage needs to be replaced before installation begins.
For re-roof applications, the existing deck deserves close attention. Synthetic slate is frequently marketed as a re-roof product, and it works well in that context when the deck is in good condition. The evaluation should include checking for raised fasteners from previous roofing layers, assessing whether multiple existing roof layers have created an uneven surface, and confirming that any areas of localized deck damage are repaired and patched flush before tile goes down.
Structural adequacy is rarely a concern because synthetic slate is so much lighter than natural slate. Most standard residential roof framing handles the load easily. However, if there is any reason to question the framing, a structural review is the right first step, not an assumption. For a broader look at what goes into a full installation from start to finish, the Roof Installation Guide: What Contractors Won’t Tell You is a useful resource before making any final decisions.
Need a hand with this in Winston-Salem, Greensboro and the Triad? Call (336) 971-0464 or request a free estimate. Honest answers, no pressure.
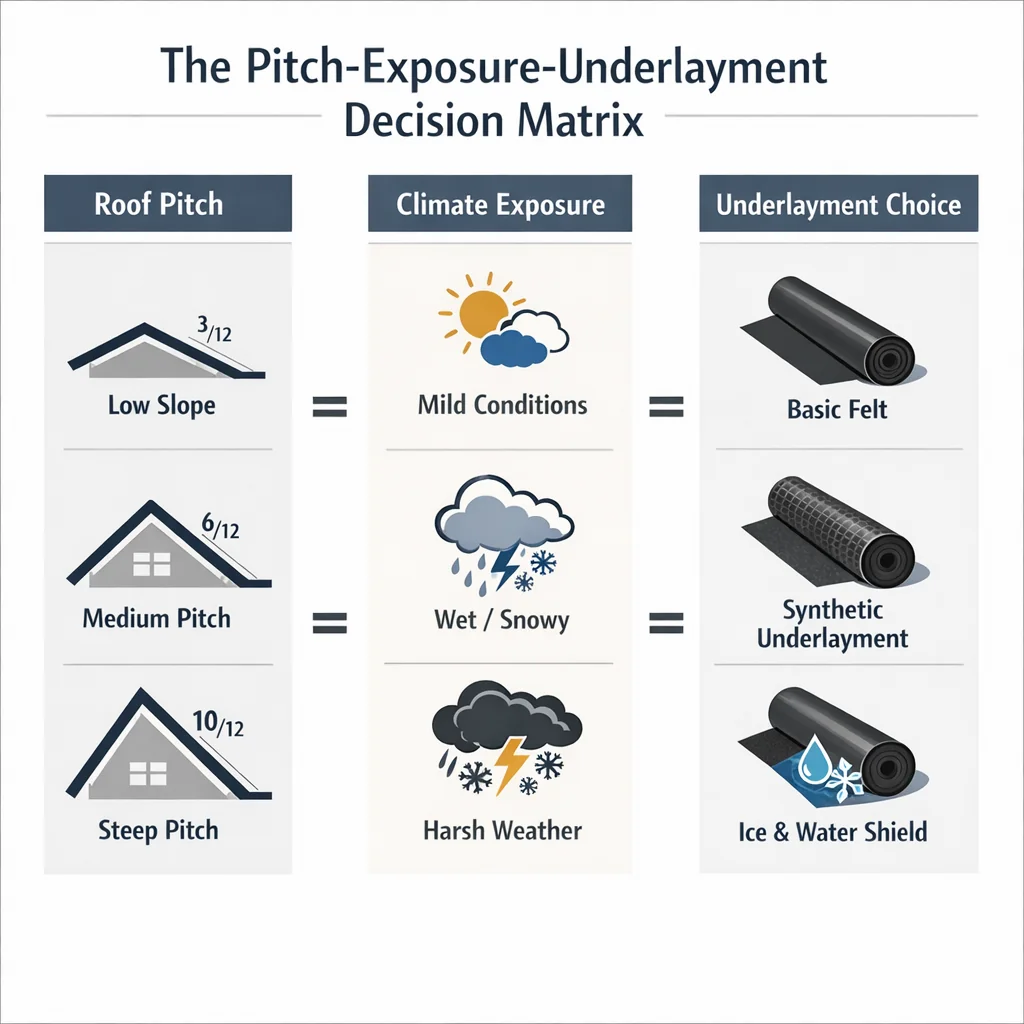
This is where most installation guides fall short. Pitch, exposure, and underlayment requirements are typically explained in separate sections as if they are independent choices. They are not. Each one directly constrains the others.
Here is how the decision framework actually works:
Pitch determines how quickly water moves off the roof. On steeper pitches, water sheds before it has time to work under a tile. On low pitches, it lingers longer and creates a higher infiltration risk.
For pitches between 3:12 and just under 6:12, most synthetic slate manufacturers require a self-adhered membrane across the entire roof surface, not just at the eaves. This is not the same as an ice-and-water shield applied only at eave overhangs. It means the entire deck is protected with a peel-and-stick membrane before any tile goes down.
For pitches at 6:12 and above, synthetic underlayment or 30-lb felt is typically acceptable, though local conditions and the specific product’s installation manual govern the final call.
Weather exposure is the amount of each tile left visible between courses. It determines how many layers of tile cover any given point on the roof. More exposure means fewer tile layers at any point on the deck. On a low-pitch roof, that is a problem because water moves slowly and needs maximum coverage to stay out.
| Roof Pitch | Profile Type | Typical Exposure | Underlayment Requirement |
|---|---|---|---|
| 3:12 to under 6:12 | Slate profile | 6 inches | Self-adhered membrane, full roof |
| 6:12 and above | Slate profile | 7 inches (straight coursing) | Synthetic felt or 30-lb felt |
| 6:12 and above | Slate profile | 7.5 inches (staggered coursing) | Synthetic felt or 30-lb felt |
| 4:12 and above | Shake profile | Up to 10 inches | Per manufacturer spec |
| All pitches | Any profile | Minimum keyway: 3/16 inch | Not pitch-dependent |
These figures reflect common manufacturer guidance. Always confirm against the specific product’s installation manual, as individual products vary.
On low-pitch installations using felt underlayment, manufacturers often specify an interlay method where felt courses are positioned so the bottom edge of each felt course sits above the butt line of the tile below it by a distance equal to twice the weather exposure. This is a water-shedding geometry requirement. It ensures that any water reaching the underlayment cannot travel horizontally across the felt and find a path under an exposed tile edge. Understanding the principle, not just the measurement, helps an installer apply it correctly when conditions do not match a simple diagram.
Synthetic polymer does not grip a smooth-shank nail the way wood fiber does. In wood substrates, a smooth nail driven in clean eventually locks in as the wood fibers compress and partially recover around the shank. Polymer does not behave that way. The nail hole stays clean, and the nail retains only its initial driven resistance against pullout. In wind events or through repeated thermal cycling, that resistance is not enough.
Ring-shank and screw-shank nails have mechanical interlock with the substrate. The rings or threads grip the decking material through the tile’s fastening zone and resist pullout at a level that smooth-shank nails cannot match on a polymer substrate. This is not a preference; it is a warranty requirement across virtually every synthetic slate manufacturer.
The nail must be driven flush with the surface of the tile. Not proud, not countersunk. The synthetic tile’s rigid face means that even modest nail head protrusion creates a point on which the tile above will pivot or rock rather than lie flat. Drive it too deep and you create a stress fracture zone at the nail hole that can propagate under thermal loading.
This tolerance is tighter than most asphalt shingle work. Installers who have spent years on asphalt have to recalibrate their feel for nail depth when switching to polymer tile. A pneumatic nailer requires careful pressure adjustment. Hand nailing requires attention that experienced asphalt crews can do more automatically.
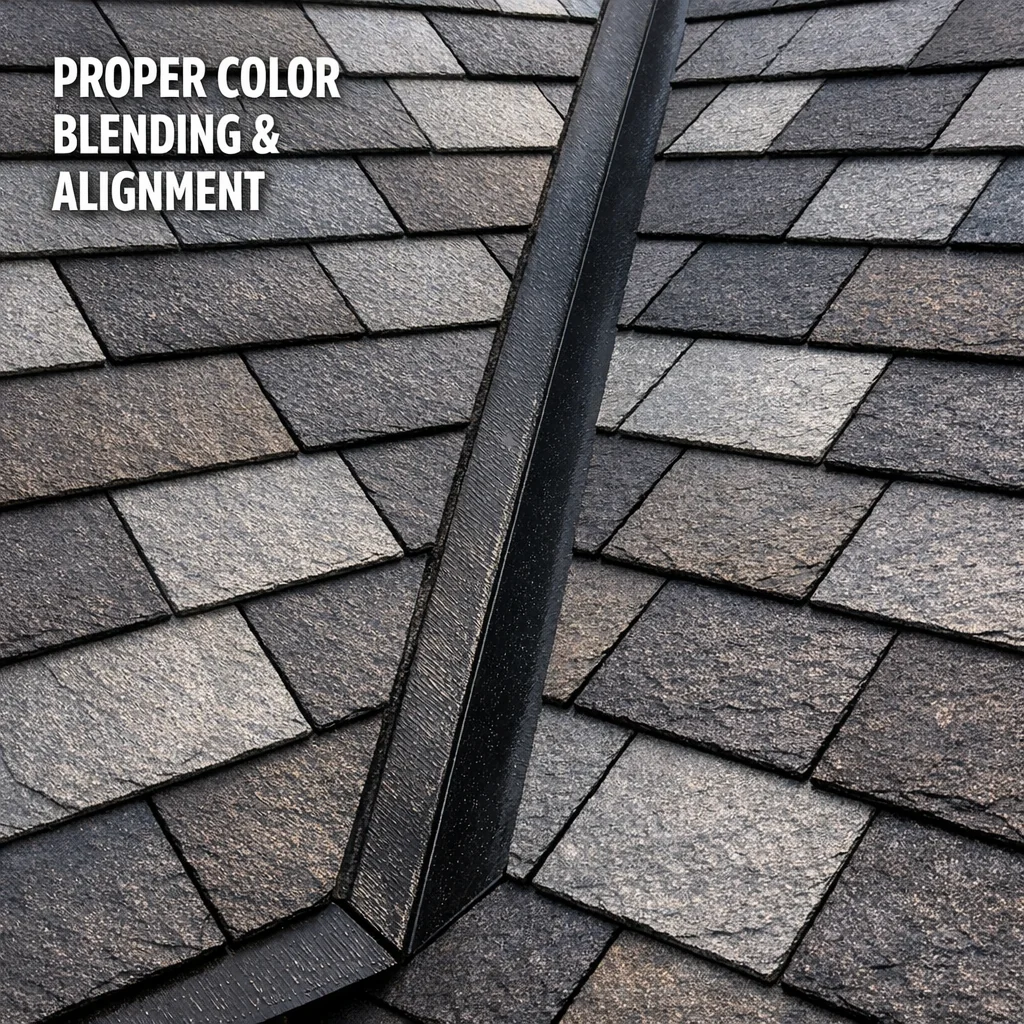
Synthetic slate tiles are manufactured in batches. Within a single color option, there is natural variation from batch to batch in shade depth and surface tone. That variation is intentional to a degree, because it mimics the natural variation in real slate quarried from different veins.
The problem is that tiles from the same batch tend to cluster together in shipment. If an installer works through one bundle completely before opening the next, adjacent tiles on the roof come from the same batch and share the same subtle tone. Multiply that across a section and you get visible banding: stripes of slightly different shade running across the roof in the pattern of how bundles were consumed.
Blending from multiple open bundles during loading means pulling tiles from three or four bundles alternately as the roof is staged. This distributes batch variation randomly across the field, which is exactly how natural slate looks. The blending instruction belongs at the loading stage because once tiles are nailed down, correcting a banding problem means removing and replacing finished courses.
Valley treatment is one of the more consequential decisions in a synthetic slate installation, and it is also one where homeowners rarely know what to ask.
Open valleys use metal flashing laid into the valley, with tiles cut back to leave the metal exposed. Water runs directly on the metal and exits cleanly. Open valleys work well on steep pitches where debris can exit freely and the metal width accommodates high water volume.
Closed valleys weave or cut tiles across the valley without exposing metal. They are more common with asphalt products and can be used with some synthetic slate products, but the specific product’s manual needs to confirm compatibility.
The decision criteria come down to three factors:
A contractor who cannot explain this decision with specific reasoning tied to your roof’s conditions is not yet at the level of expertise synthetic slate installation requires.
Synthetic slate manufacturers typically require or strongly recommend installation by certified contractors for warranty coverage to apply. This is worth confirming before work begins, not after.
At Smithrock Roofing, we carry more than 60 combined years of field experience and hold CertainTeed PREMIER ShingleMaster certification, which reflects the kind of verified, ongoing training that manufacturer certification programs are designed to confirm. Our roofing service covers every phase of a synthetic slate project, correct materials, correct fasteners, correct sequencing, and job-site practices that protect your home throughout the process.
See also: Roof Installation Kernersville NC | Expert Guide
Homeowners seeking roofing in Winston-Salem, Greensboro, High Point, Kernersville, Clemmons, Rural Hall, King, and the surrounding NC Triad trust Smithrock with more than 350 five-star reviews and an A+ BBB rating built through straightforward, quality work. If you are evaluating synthetic slate for your home, we are happy to walk through what your specific roof requires before you make any decisions.
Most synthetic slate products are engineered to last between 40 and 50 years, with some manufacturers offering lifetime limited warranties. Natural slate can outlast that range under ideal conditions, but synthetic slate delivers comparable longevity without the structural load requirements, the fragility during installation, or the difficulty of sourcing matching replacement pieces decades later.
Synthetic slate is relatively low-maintenance compared to many other roofing materials. Periodic inspections to check flashing integrity, clear debris from valleys and gutters, and confirm fastener seating at hip and ridge caps are the primary ongoing tasks. Because the material does not absorb moisture the way natural slate or wood shake does, it is not subject to the same freeze-thaw cracking or moss retention issues, though shaded roofs in humid climates should still be inspected for organic growth over time.
Installation of synthetic slate on its own does not void coverage, but two things matter: whether the product carries a recognized Class 4 impact resistance rating and whether the contractor is manufacturer-certified. Many insurance carriers offer premium reductions for Class 4 rated roofing materials, and some policies require licensed, certified installation for claims to be honored. Confirming both details with your insurer before work begins is always worth the call. The Roof Insurance Claim: Get the Settlement You Deserve article is a helpful resource for understanding how to navigate that conversation.
Some jurisdictions permit installation over an existing layer depending on current roof condition and local building code, but most manufacturers do not recommend it and will not extend full warranty coverage when it is done. A full tear-off allows the installation team to inspect the decking, address any soft spots or moisture damage, and ensure the underlayment system is installed correctly from the substrate up. Skipping that step to save time typically creates more problems than it solves.
Synthetic slate is a material that rewards careful installation, and getting that installation right means working with a team that understands both the product and the specific conditions of your roof. Smithrock Roofing has built its reputation across Winston-Salem and Greensboro on exactly that kind of thorough, honest work, more than 60 combined years of field experience, manufacturer certification, and a straightforward approach that puts your home first. If you are ready to explore whether synthetic slate is the right fit for your roof, call us at (336) 971-0464 or Contact Smithrock Roofing to get started.

Smithrock Roofing © Copyright 2026 • All Rights Reserved • Privacy Policy • Maintained by Mongoose Digital Marketing
